9 memory menu – Behringer high-precision digital 24-bit/96 kHz EQ/RTA mastering processor DEQ2496 User Manual
Page 13
13
ULTRACURVE PRO DEQ2496 User Manual
◊
When you activate the AEQ menu, the current GEQ settings will be
taken over and used as the desired frequency response curve.
Press the large data wheel to exclude individual frequency bands from the AEQ
mode. These bands will not be processed by the automatic frequency response
correction. It makes sense to exclude the low-frequency range (up to approx.
100 Hz) from AUTO EQing, because it is this range that may produce inaccuracies
during the calculation of the frequency response, which might impair the results
achieved with the AUTO EQ.
Fig. 3.29: AEQ menu (page 2)
On this page the signal to be processed is displayed as in the RTA menu. The MAX.
parameter lets you select an “excerpt” of the entire level spectrum, depending
on the actual magnitude of the signal level (upper data wheel). The RANGE
value is firmly set to 30 dB. Press the upper data wheel to activate AUTO mode,
which automatically adjusts the displayed “excerpt”, depending on the signal
level. With the NOISE GAIN parameter (-60 to -10) you can adjust the magnitude
of the noise level. AUTO EQ (lower data wheel) determines the speed at which
the EQs are analyzed and their settings are calculated. You can select between
the settings FAST, MID and SLOW.
The B key activates the room correction function (ROOM CORR.), which cuts the
high frequencies and boosts the low-frequency range by “tilting” the desired
response curve by 1 dB/oct.
When you press the A key (START AUTO EQ), the analyzer starts measuring
and calculating the AEQ settings. The subsequent messages inform you that
the unit analyzes the level of the ambient noise at first, before it measures the
noise signal applied. Subsequently, the ULTRACURVE PRO corrects the EQ values.
Press STOP AUTO EQ to cancel this process.
Fig. 3.30: AEQ menu (page 3)
Page 3 of this menu shows the graphic EQ with the settings adjusted on page
1. Here, too, you can START AUTO EQing and change the NOISE GAIN parameter
(large data wheel). However, this page includes two additional parameters:
∆ MAX adjusts the maximum difference between two adjacent filters from 0 to
+15 dB (large data wheel), while MAX. SPAN (lower data wheel) controls the
maximum distance allowed between the desired and real frequency response
curve (0 to 30 dB). When this value is exceeded, the corresponding range will
not be processed. Press the B key (DONE) to complete this process and keep the
adjusted curve. Press the RTA key to cancel. Please note the AUTO EQ does not
automatically terminate the analyzing process.
◊
After leaving the first page of the AEQ menu, there is no way
of returning to this page, but by leaving the entire menu and
recalling it again.
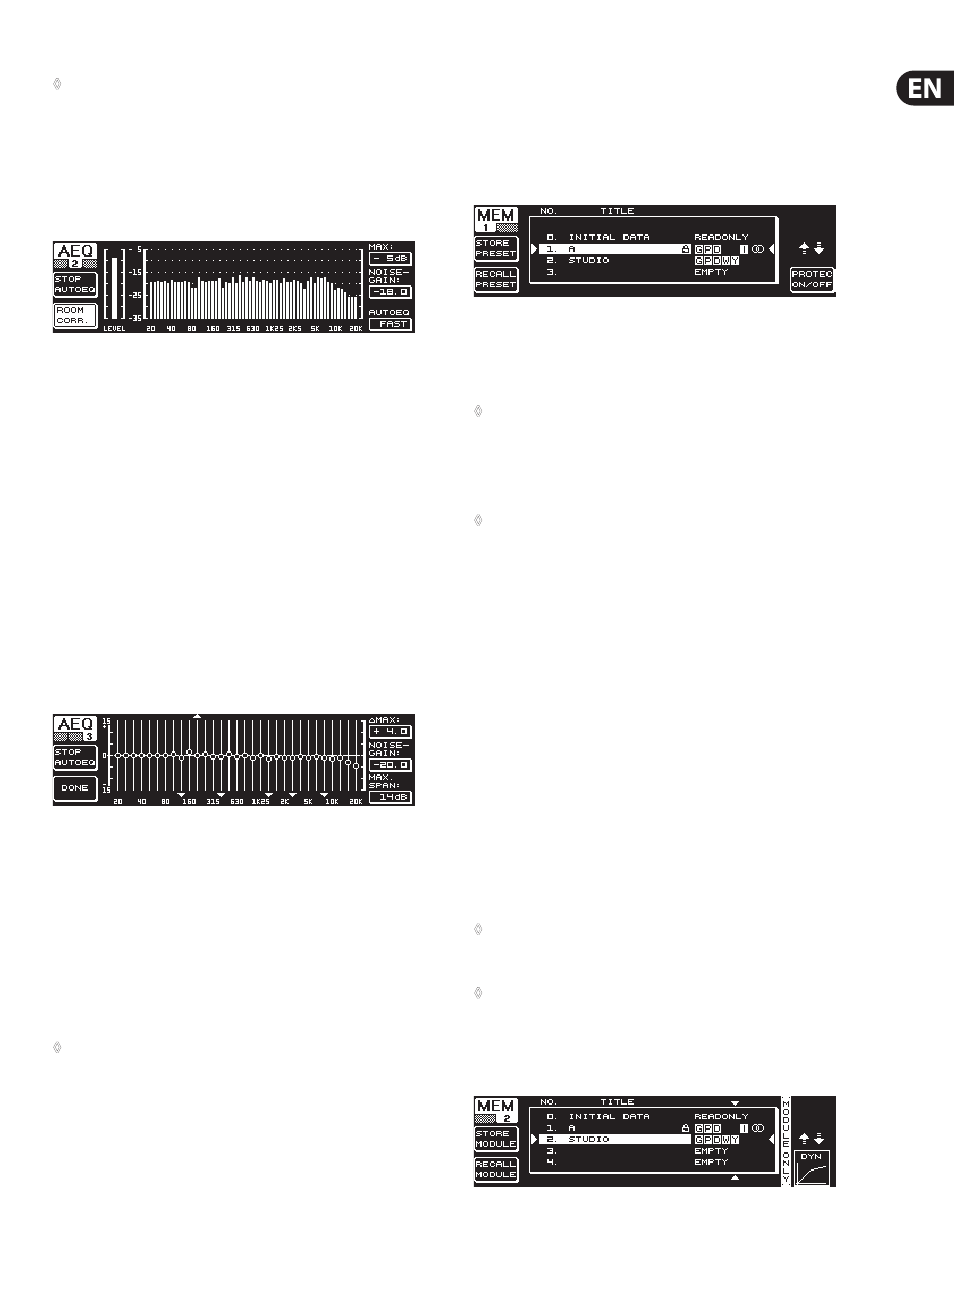
3.9 MEMORY menu
In the MEMORY menu you can save and recall complete presets (page 1) or load
and save individual modules (page 2). Modules that are active within a preset
are marked by a letter (G = GEQ, P = PEQ, D = DEQ, W = WIDTH, Y = DYN). If the
stored I/O settings differ from the current ones, an I (=I/O) will appear next to the
letter indicating the module.
Fig. 3.31: MEMORY menu (page 1)
On the first page of this menu, you can save and recall complete presets. To save
a previously edited preset please use the large data wheel to select a memory
location from the table shown (max. 64 user locations).
◊
Preset #0 (INITIAL DATA) is a neutral default setting which cannot be
overwritten (READONLY).
You can either select an EMPTY memory location or overwrite an existing preset,
as long as it is not write-protected (PROTEC ON). After selecting a memory
location, press the A key to store the preset (STORE PRESET).
◊
When you try to overwrite an existing preset and press the A key,
the DEQ2496 will prompt you to confirm your overwrite command
(OVERWRITE DATA?). Press the A key to CANCEL, or the B key (or press
the large data wheel) to confirm (OK).
After pressing STORE PRESET another menu will appear in which you can name
the preset (max. 16 characters). With the data wheel (turn) and the upper
data wheel (turn and press), you can select the characters both horizontally
and vertically. Press the center data wheel to enter a character, subsequently
the cursor in the lower entry field will be moved to the next position. Turn the
lower data wheel to select individual positions and press it to erase individual
characters. When you keep the wheel pressed for about 1 s, all characters will be
erased. The PAGE key determines whether selected characters will be overwritten
(OVR) or new ones be inserted (INS). Confirm (OK) or CANCEL with the A or B
key respectively.
To recall an existing preset, just select it as usual with the large data wheel, and
confirm by pressing the wheel or the B key (RECALL PRESET). You will then be
prompted to confirm the command, because this will erase the settings of the
currently selected preset—as long as it has not been saved before (RECALL ALL
DATA?). Confirm (OK) or CANCEL with the A or B key respectively. You can also
continue the process by pressing the large data wheel. Subsequently, the preset
of your choice will be loaded.
◊
The MEMORY LED lights up as soon as the settings of the preset
selected in the MEMORY menu have been edited and thus differ
from the current settings.
◊
Presets set to stereo LINK mode are marked by a stereo symbol (oo)
in the preset chart.
Press the lower data wheel for a while to lock or unlock the selected preset
(PROTEC ON/OFF), which prevents accidental overwriting. Locked presets are
marked with a lock symbol.
Fig. 3.32: MEMORY menu (page 2)