How to use, Polarized plug, Electrical cord – Black & Decker CTO9000 User Manual
Page 3: Oven features, Convection cooking, Toasting/top browning, Cover
POLARIZED PLUG
This appliance has a polarized plug — one blade is wider than the other. To reduce the
risk of electric shock, this plug will fit into a polarized outlet only one way. If the plug does
not fit fully into the outlet, reverse it. If it still does not fit, contact a qualified electrician.
Do not attempt to defeat this safety feature by modifying the plug in any way.
ELECTRICAL CORD
The cord of this appliance was selected to reduce the possibility of tangling in or tripping
over a longer cord. If more length is needed, use an Underwriters Laboratories (UL) -
Listed or Canadian Standards Association (CSA) or NOM-approved extension cord rated
no less than 15-amperes and 120 volts. When using an extension cord, do not let it
drape over the working area or dangle where someone could accidentally trip over it.
3
How To Use
90
80
70
60
50
40
30
20
10
OFF
N
O
s
y
a
wl
A
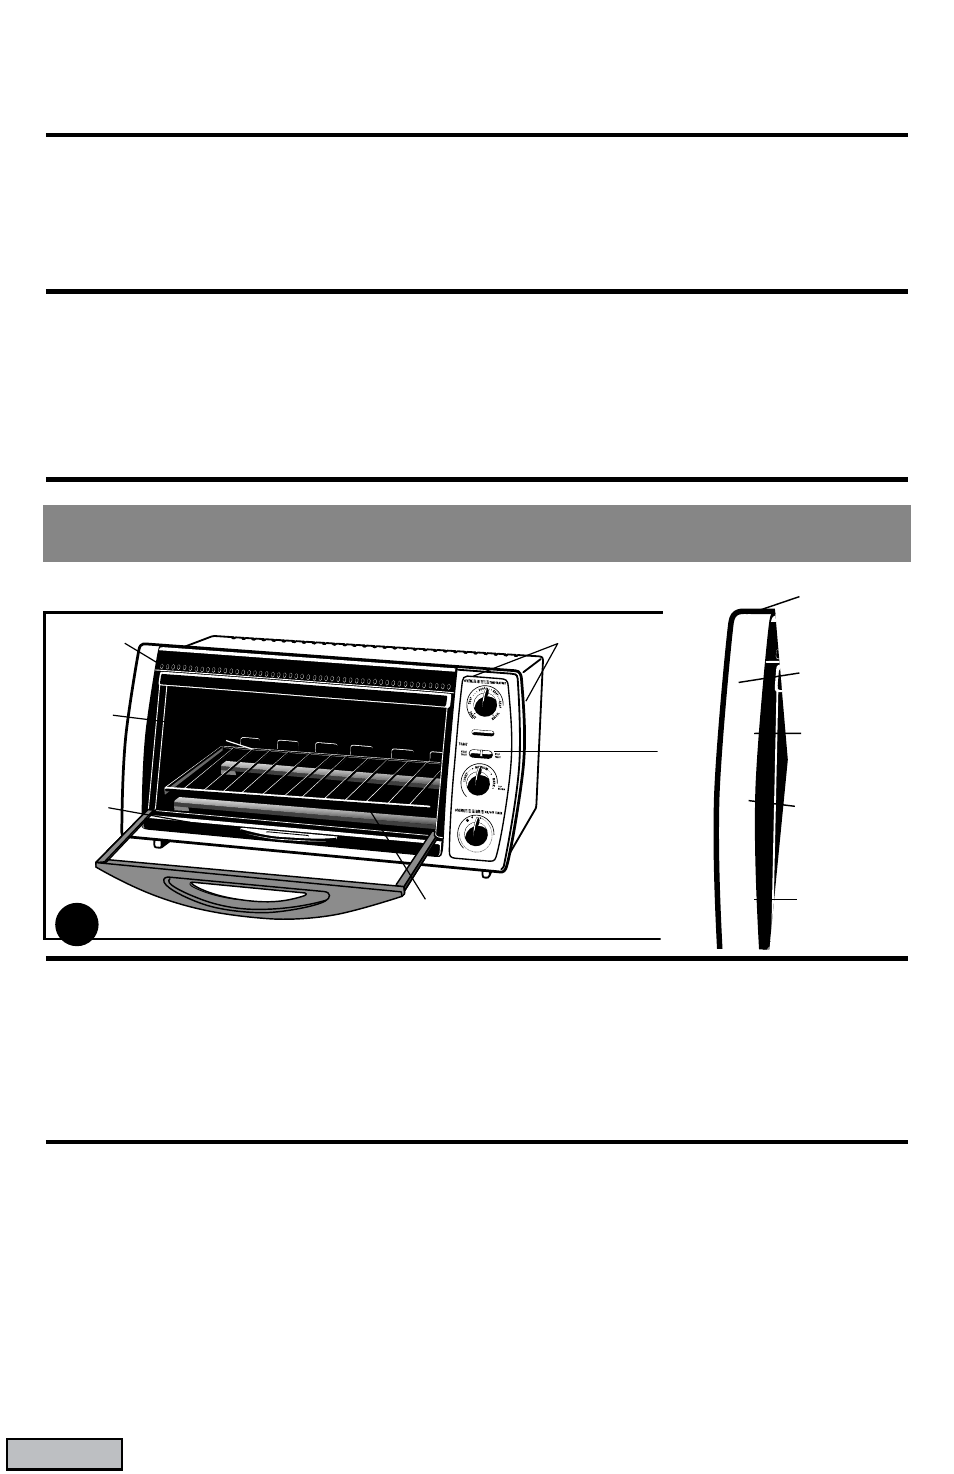
OVEN FEATURES
Control
Panel
Slide Rack
Crumb
Tray
Vent
ThermaGuard™ Top & Sides
Easy
Clean
Interior
CONVECTION COOKING
This convection oven circulates the air for faster, more even cooking, baking, and broiling
than traditional ovens. The convectioning is automatic in the bake and broil modes and
does not affect toasting. Use the cooking and broiling guides in this manual to help you
approximate times for meal, casserole, side dish, dessert, and snack preparation in this
counter top convection oven.
TOASTING/TOP BROWNING
NOTE: Always use the Oven Pan when melting, crisping, and top browning.
1. Select the toast color setting or Top Brown and be sure the Temperature Control
Dial is set on “Toast.” Press the Start Toast Button (A). The Signal Light will come
on. A bell will ring, the oven will automatically shut off, and the Signal Light will go
out when the desired toast cycle is done.
2. To stop toasting or top browning, in the middle of a cycle, press Stop Toast. To continue
toasting, be sure the door is shut and press the Start Toast Button.
A
Temperature
Control Dial
Signal Light
Start/Stop
Toast
Toast Color
Selector
Worry-Free
Timer™ Dial
Cover