Bryant 619FNQ User Manual
Page 23
—23—
4. Ensure that the filters and return air grilles have
been installed and that the discharge louvers are
correctly positioned.
SERVICE AND MAINTENANCE
Remove unit grille, filter, and condensate pan for cleaning,
lubricating, or replacing parts.
I. MINIMUM MAINTENANCE
1. Check, clean, or replace air filter each month or as
required.
2. Check cooling coil, drain pan, condensate trap, and
condensate drain pan each cooling season for cleanli-
ness. Clean as necessary.
3. Check fan motor and wheel for cleanliness each heat-
ing and cooling season.
4. Check electrical connections for tightness and con-
trols for proper operation each heating and cooling
season. Service as necessary.
II. SERVICE
A. To Clean or Replace Air Filters
1. Place a plastic sheet on the floor to catch any water
that may spill from drain pan.
2. Slide filter out.
3. Vacuum clean or wash filter with soapy water. Rinse
and let air dry. If filter needs replacing, filters are
available from the local dealer.
B. To Clean or Replace Drain Pan
1. Place a plastic sheet on the floor to catch any water
that may spill from drain pan.
2. Remove the air intake and distribution assembly.
Remove the condensate water in the drain pan by
pulling out the rubber drain plug and letting water
drain into a 3-gallon bucket.
3. Remove screws holding the drain pan. Carefully hold
the drain pan to remove it from the assembly.
4. Reinstall the drain pan using the appropriate num-
ber of screws. Center and align the metal fan inlet
orifice with the fan. Ensure the fan spins freely.
TROUBLESHOOTING
See Table 9 and Fig. 35 for troubleshooting information.
I. FAULT CODE
Once a failure occurs with the indoor unit in operation, the
green LED on the indoor unit flashes at intervals of 0.5 sec-
onds. The fault code is deduced from the number of times the
green LED flashes, blocking unit operation. Between one
flash cycle and the next one, a pause of 5 seconds elapses.
See Fig. 35.
Table 9 — Fault Codes
*When code is enabled.
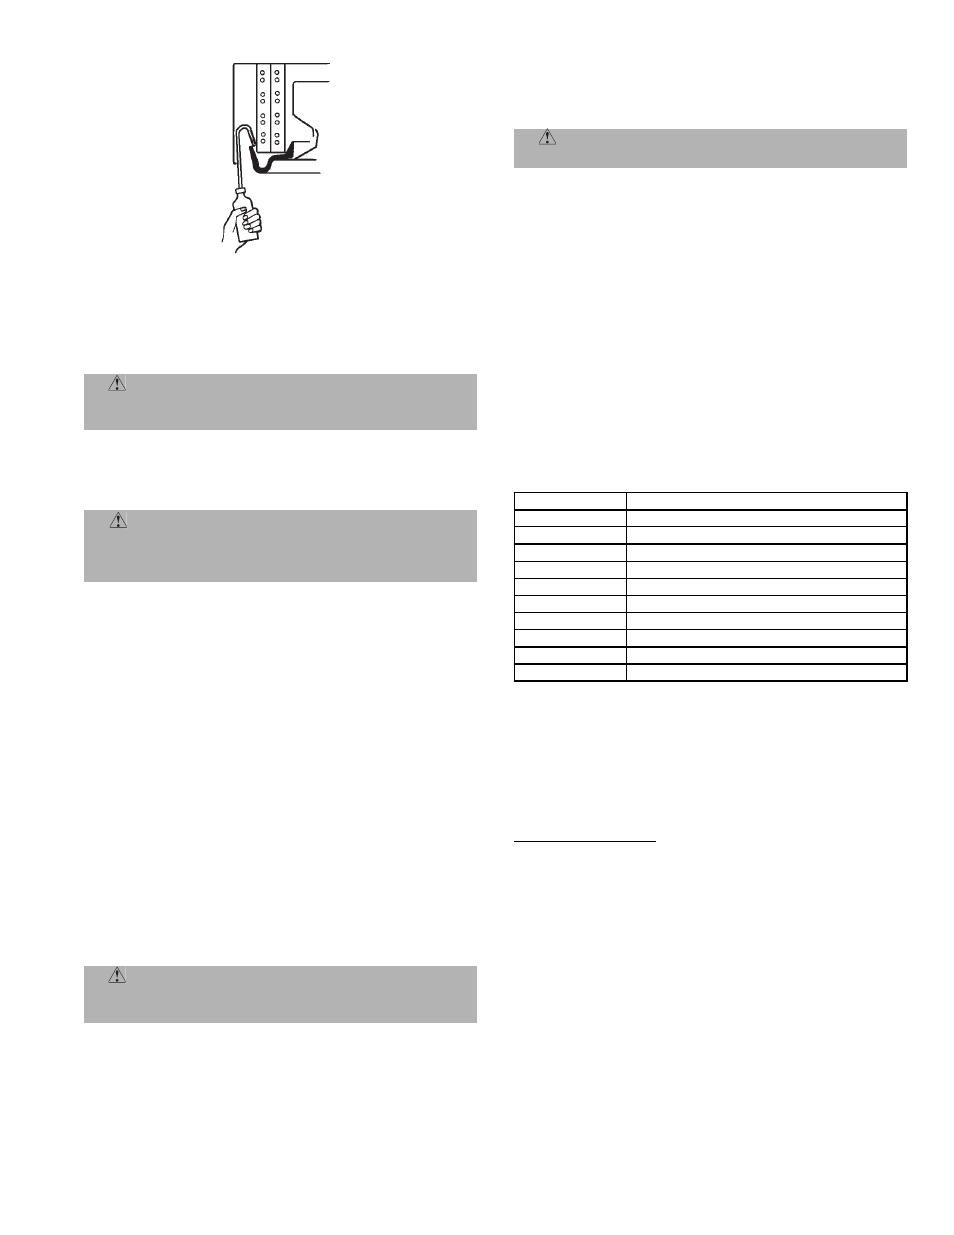
A. Using the Emergency Button
The Emergency button is for use by a qualified service tech-
nician only. The Emergency button is for use when the room
controller is inoperative. Use a screwdriver to press the
emergency button through the metal protection grille. See
Fig. 35.
Emergency Operation
When the unit is in the OFF mode and the Emergency but-
ton is pressed for 5 seconds, the unit will operate as follows:
• Automatic mode
• temperature preset to 72 F
• automatic fan speed
• louvers set automatically according to the operating mode
• Timer function is cancelled
• buzzer beeps
When the unit is ON and the Emergency button is pressed
for 5 seconds, the unit will operate as follows:
• the unit is turned off
• buzzer beeps
When a signal is received by the remote control, the unit
operates accordingly.
CAUTION:
Never operate unit without a filter or
with grille removed. Damage to the unit or personal
injury may result.
CAUTION:
To avoid personal injury or damage to
unit, do not service until all power sources are shut
down, locked out, and tagged out. Failure to do so could
result in personal injury or unit damage.
CAUTION:
If air filter is not replaced in the unit,
dust and dirt gather in air conditioner and operation
becomes impaired.
CAUTION:
Do not use a screw driver to pry drain
pan out of assembly. It could damage the pan.
CODE
DESCRIPTION
2
Condensate discharge pump
3
Room air sensor fault
4
Indoor unit coil sensor fault
6*
Filter dirty
7
Outdoor unit failure
10
EEPROM corrupt
11
Card serial number damaged
12
Address or zone incomplete
13
Gas flow distributor corrupt
14
Outdoor air thermistor fault
Fig. 34 — Inserting Water into Drain Pan