Din rear-mount, Installing the microphone, When installing the microphone on the sun visor – Pioneer DEH-P8100BT User Manual
Page 9: Installation, Din rear mount
9
English
Installation
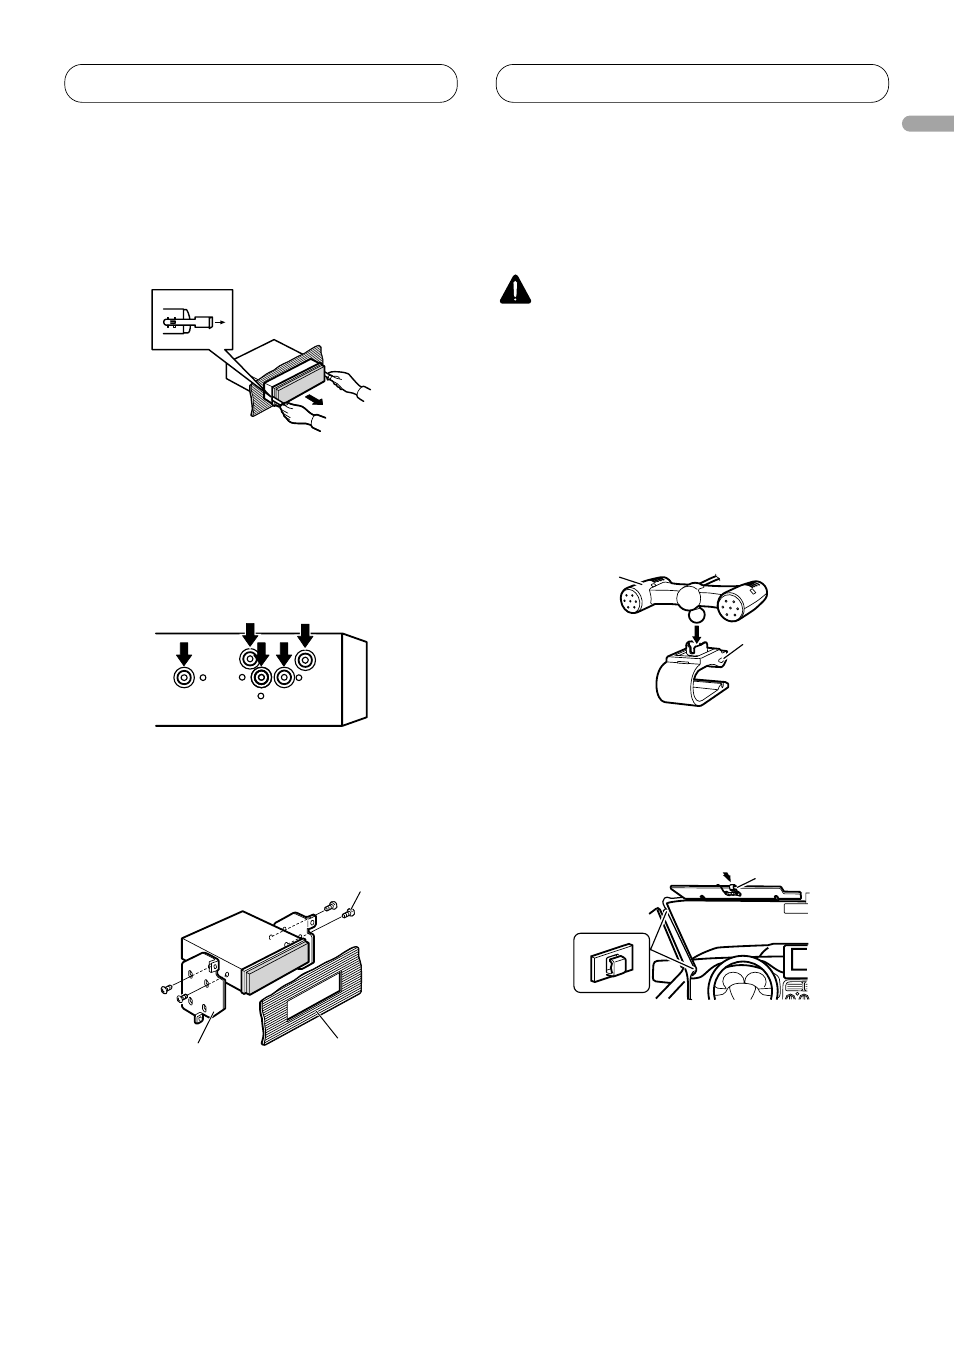
Removing the Unit
1. Insert the supplied extraction keys
into both sides of the unit until they
click into place.
2. Pull the unit out of the dashboard.
DIN Rear mount
1. Determine the appropriate position
where the holes on the bracket and
the side of the unit match.
2. Tighten two screws on each side.
• Use either truss screws (5 mm × 8 mm)
or flush surface screws (5 mm × 9 mm),
depending on the shape of screw holes in the
bracket.
Installing the microphone
Install the microphone in a position and
orientation that will enable it to pick up the
voice of the person operating the system.
CAUTION
• It is extremely dangerous to allow the microphone
lead to become wound around the steering
column or gearstick. Be sure to install the unit in
such a way that it will not obstruct driving.
When installing the microphone
on the sun visor
1. Install the microphone on the
microphone clip.
2. Install the microphone clip on the sun
visor.
• With the sun visor up, install the microphone
clip. (Lowering the sun visor reduces the voice
recognition rate.)
• Use separately sold clamps to secure the lead
where necessary inside the vehicle.
Screw
Factory radio mounting bracket
Dashboard or
Console
Microphone
Microphone clip
Microphone clip
Clamp