Air plenum finger assembly – Bakers Pride COUNTERTOP VH1828G User Manual
Page 13
Conveyor BeltAssembly
Plenum Fingers
1. CONVEYOR BELT STILL MOUNTED IN OVEN:
Using a plastic abrasive pad, wipe the conveyor belt in a back-and-forth motion to remove
baked-on product. Wipe clean with a hot, damp cloth.
2. CONVEYOR BELT REMOVED FROM OVEN:
Using a plastic abrasive pad, wipe the conveyor belt in a back-and-forth motion to remove
baked-on product. Wipe clean with a hot, damp cloth.
NOTE: IT IS NOT NECESSARY TO REMOVE THE BELT FROM THE FRAME ASSEMBLY FOR
CLEANING.
3. Check the belt links for any sign of damage. If any links are bent, use a needle-nose pliers to
repair prior to re-installation into the unit.
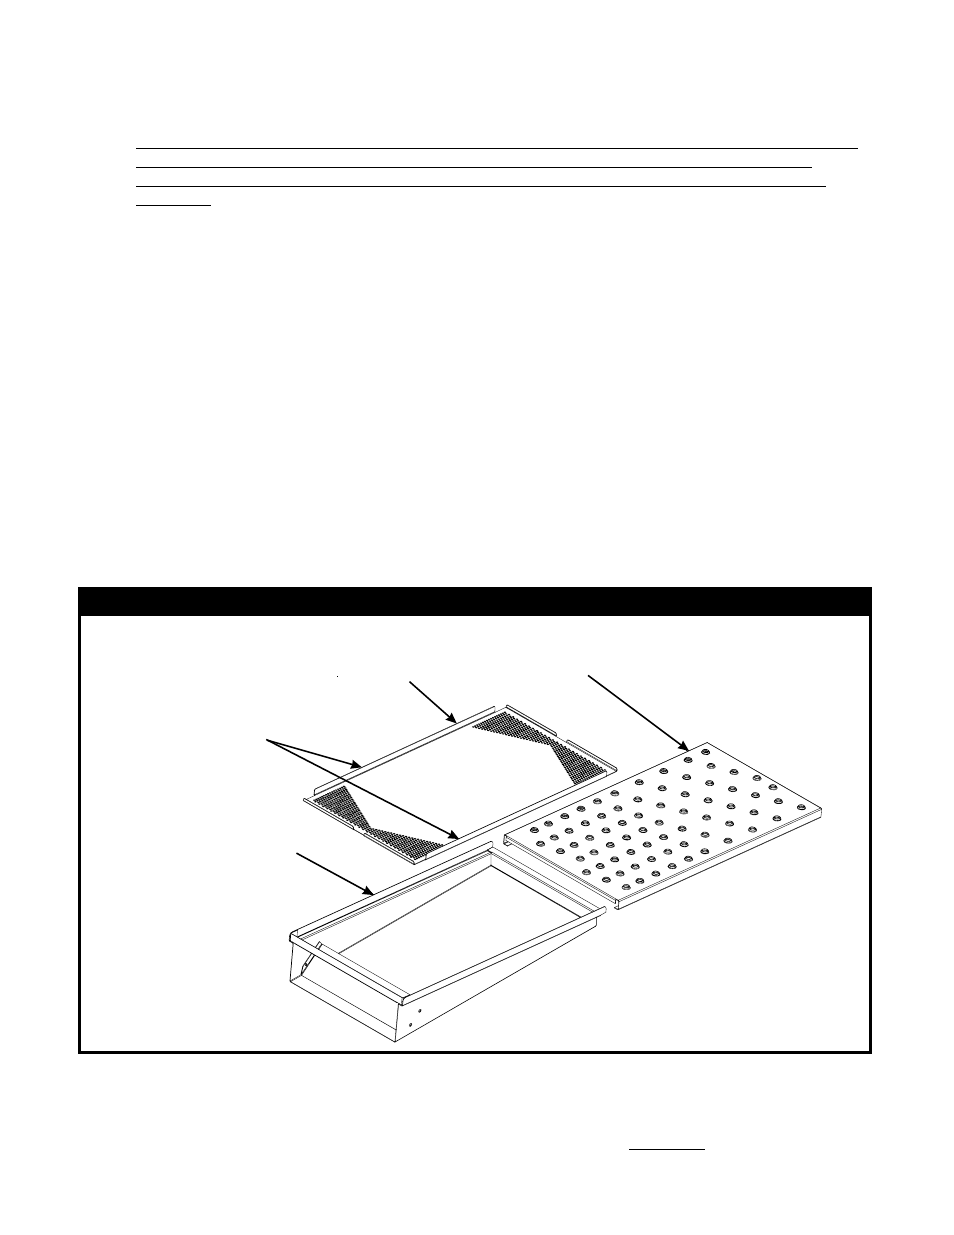
The conveyor oven contains (4) plenum fingers that direct air onto the product surface while
cooking. This 3-piece assembly comes apart for cleaning, as shown below:
NOTE: USE CARE IF CLEANING THE CONVEYOR BELT WHILE IT IS STILL MOUNTED IN
THE OVEN. EXCESSIVE FORCE MAY PRODUCE AN OVERLOAD CONDITION THAT
COULD DAMAGE THE GEARMOTOR AND CAUSE THE OVEN TO BE RENDERED UN-
USABLE.
13
Although symmetrical
in design, inner panel
must have flanges
facing up as shown
Inner Perforated
Screen
(Stainless Steel)
Outer Perforated
Panel
(Stainless Steel)
Main Panel
(Aluminized Steel)
AIR PLENUM FINGER ASSEMBLY
The Outer Perforated panel is locked into place through a friction fit to the Main panel. This method
of fastening also captures the Inner panel, holding it in place. The Outer panel slides off the Main
panel, exposing the perforated Inner panel. The Inner panel is symmetrical in design, and may be
placed in either direction, as long as the outer flanges are pointing
as shown in the figure
above.
UPWARD