Olympus FE-360 User Manual
Page 36
EN
Submenu
5
Submenu
6
Application
<
×
0 to 10
This selects the number
of prints.
DATE
WITH/
WITHOUT
Selecting [WITH] prints the
images with the date.
Selecting [WITHOUT]
prints the images without
the date.
FILE NAME WITH/
WITHOUT
Selecting [WITH] prints the
file name on the image.
Selecting [WITHOUT] does
not print any file name on
the image.
P
(Proceeds
to the
setting
screen.)
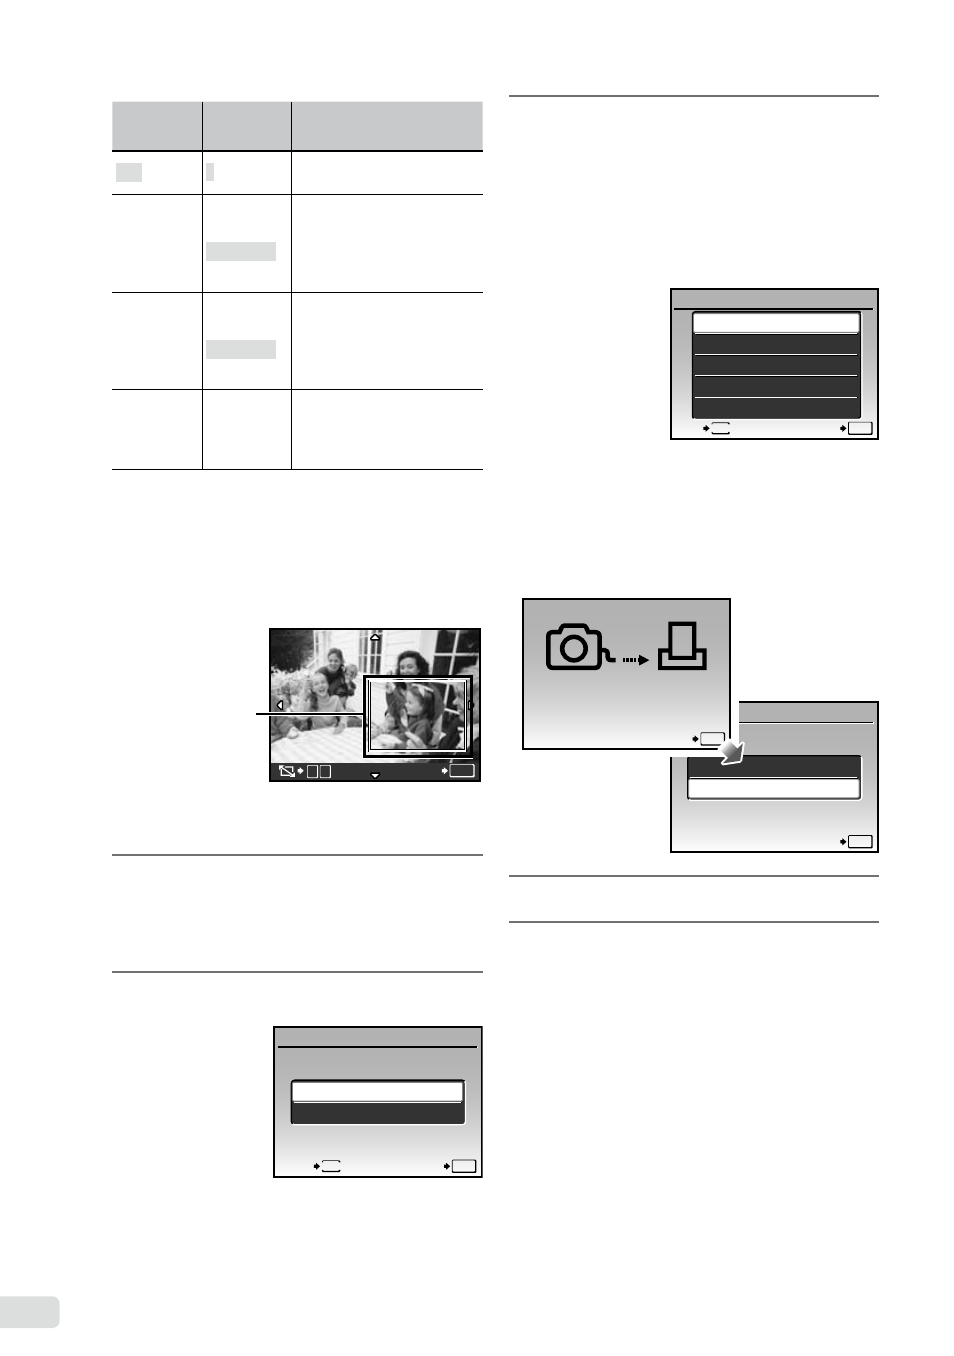
This selects a portion of
the image for printing.
To crop an image [
P]
1
Use the zoom buttons to select the size
of the cropping frame, use
klmn
to move the frame, and then press the
B button.
Cropping
frame
T
W
SET
OK
2
Use
kl to select [OK], and press
the
B button.
8
If necessary, repeat Steps 6 to 7
to select the image to be printed,
make the detailed settings, and set
[SINGLEPRINT].
9
Press the
B button.
SET
OK
MENU
BACK
CANCEL
10
Use
kl to select [PRINT], and
press the
B button.
Printing starts.
When [OPTION SET] is selected in [ALL PRINT]
mode, [PRINT INFO] screen is displayed.
When printing is finished, the [PRINT MODE
SELECT] screen is displayed.
ALL PRINT
PRINT MODE SELECT
SET
OK
ALL INDEX
PRINT ORDER
MULTI PRINT
EXIT
MENU
To cancel printing
1
When [TRANSFERRING] is displayed,
press the
B button, use kl to select
[CANCEL], and then press the
B button
again.
SET
OK
CONTINUE
CANCEL
CANCEL
OK
TRANSFERRING
11
Press the
button.
12
When the message [REMOVE USB
CABLE] is displayed, disconnect
the USB cable from the camera and
printer.
●
●
●