Olympus P-440 Photo Printer User Manual
Page 59
59
2
Press either the left or right arrow button.
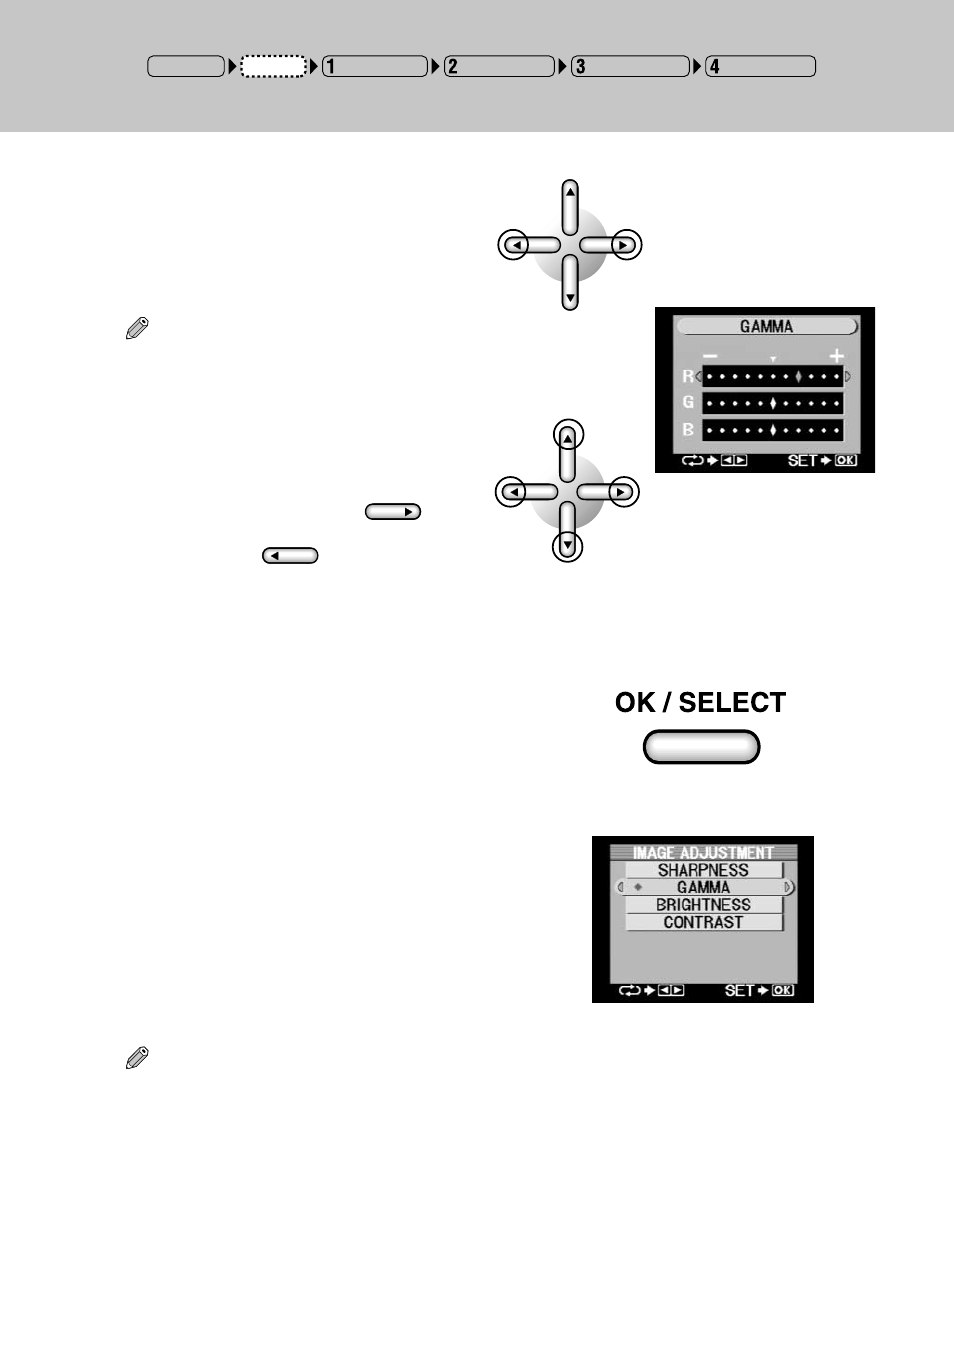
The gamma adjustment menu is displayed.
Tip
• The previously set value is displayed.
○ ○ ○ ○ ○ ○ ○ ○ ○ ○ ○ ○ ○ ○ ○ ○ ○ ○ ○ ○ ○ ○ ○ ○ ○ ○ ○ ○ ○ ○ ○ ○ ○ ○ ○ ○ ○ ○
3
Select R, G and B levels with the up or
down arrow button, and density with the
left or right arrow button.
Pressing the right arrow button (
)
results in brighter images, while pressing the
left arrow button (
) results in darker
images.
○ ○ ○ ○ ○ ○ ○ ○ ○ ○ ○ ○ ○ ○ ○ ○ ○ ○ ○ ○ ○ ○ ○ ○ ○ ○ ○ ○ ○ ○ ○ ○ ○ ○ ○ ○ ○ ○ ○ ○ ○ ○ ○ ○ ○ ○ ○ ○ ○ ○ ○ ○ ○ ○
4
Once adjustments have been completed,
press the OK/SELECT button.
The display returns to the Image Adjust menu.
Tip
• A red ◆ is displayed to the left of the selected setting when the gamma adjustment is set to a value
other than the middle setting.
➜
Input Selection
Paper Selection
Picture Selection
Printing Modes
Setup
POWER ON