Installing "tee" connector, Pressure regulator and hose assembly, Installing “tee” connector – Broilmaster DPSBSS User Manual
Page 10: Ropane, Onnection connecting to propane gas, Continued)
Page 10
DPSBSS
Installing "Tee" Connector
The pressure regulator has an outlet pressure of not
more than eleven (11") inches water column. It must
be connected to the propane gas cylinder’s female
valve outlet before the grill and side burner can be
operated.
C
AUTION
: O
PERATION
OF
A
PROPANE
GAS
GRILL
AND
SIDE
BURNER
WITHOUT
THE
PRESSURE
REGULATOR
AND
HOSE
ASSEMBLY
WILL
CAUSE
GAS
LEAKS
WHICH
COULD
LEAD
TO
FIRE
OR
EXPLOSION
,
RESULTING
IN
PROPERTY
DAMAGE
OR
PERSONAL
INJURY
.
The pressure regulator’s fitting must remain clean
and free of nicks and scratches. A dirty, nicked or
scratched fitting can cause a gas leak, resulting in
an explosion or fire. Use only genuine Broilmaster
®
replacement parts unless otherwise specified by the
manufacturer.
Pressure Regulator and
Hose Assembly
If your grill is equipped with a factory installed gas
"tee" behind the grill’s control panel, please skip to
the next section.
Turn OFF the gas valve at the propane cylinder.
Disconnect the regulator and hose assembly from
the cylinder. Disconnect hose from the gas valve
located under the grill’s control panel. F
IGURE
9.
Attach one end of the 10" S/S flex line (22) to the
end of the grill’s gas valve. Attach the other end of
the S/S flex line to the brass "tee" (20). F
IGURE
10.
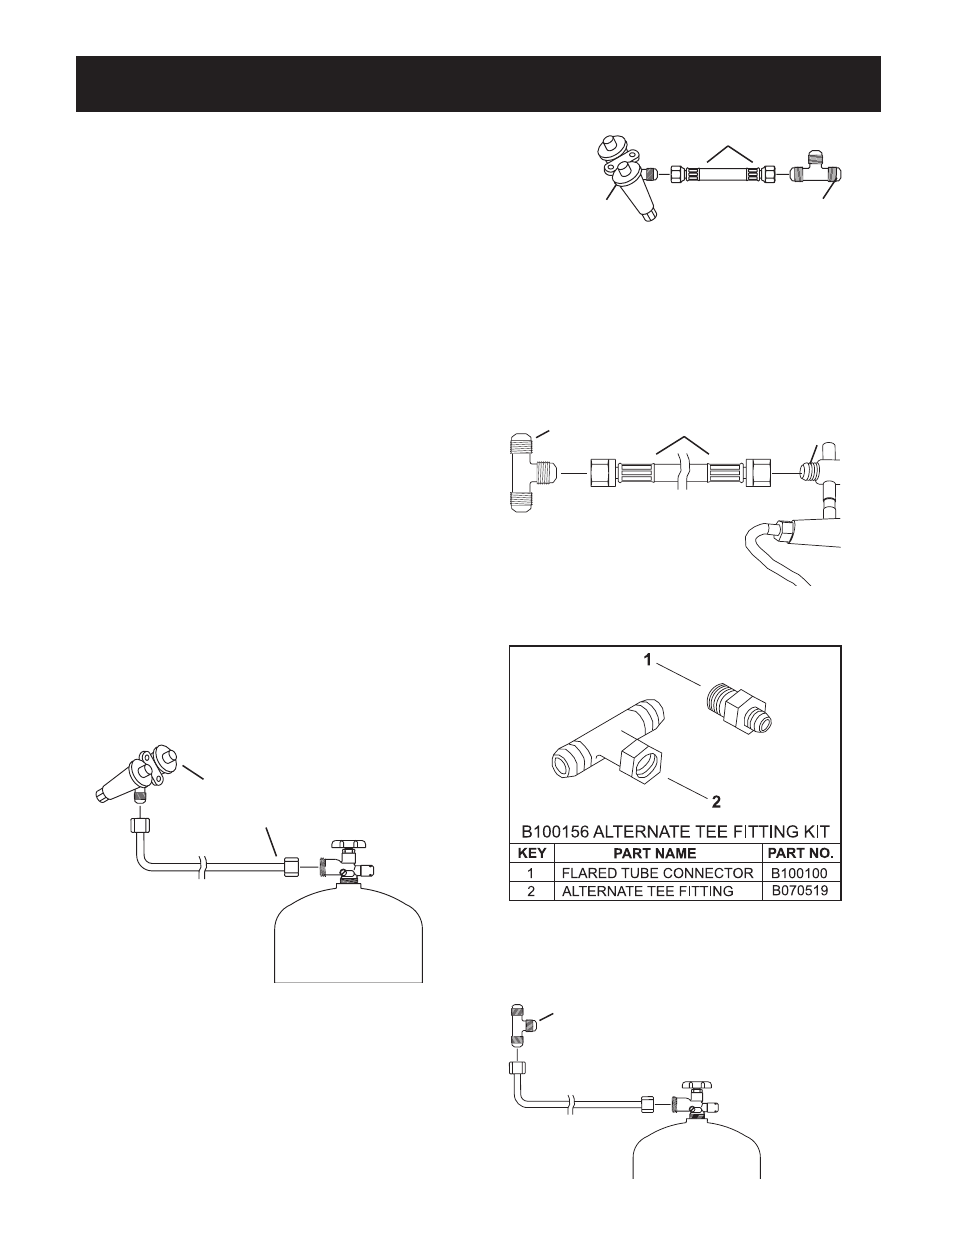
N
OTE
: G
RILLS
MANUFACTURED
PRIOR
TO
1999
MAY
REQUIRE
THE
ALTERNATE
"
TEE
"
CONNECTOR
.
Installing “Tee” Connector
(Continued)
Attach the regulator and hose assembly to the brass
tee" (20). Reconnect the assembly to the cylinder.
Use two adjustable wrenches to hold and tighten
the joint between the hose and "tee". F
IGURE
12.
P
ROPANE
G
AS
C
ONNECTION
Connecting to Propane Gas
Attach one end of the 34" S/S flex line (23) to the
end of the side burner valve (6). Attach the remaining
end of the hose to the "tee" (20) and use two
wrenches to tighten the S/S flex line connections.
One wrench should be used to turn the S/S flex line
connector while the "tee" or valve is held with the
second wrench. F
IGURE
11.
F
IGURE
12
20
F
IGURE
10
Grill Gas Valve
"Tee" (20)
10" S/S flex line (22)
F
IGURE
9
Grill Gas Valve
Hose Assembly
F
IGURE
11
34" S/S flex line (23)
"Tee" (20)
6
For old Broilmaster grill, this alternate tee fitting kit
must be ordered.