1 removing and installing the chassis cover, Removing the cover, Installing the cover – Asus Pentium 4 1U Rackmount Server AP160R-S User Manual
Page 18
18
Chapter 2: Hardware Setup
2.1
Removing and installing the chassis cover
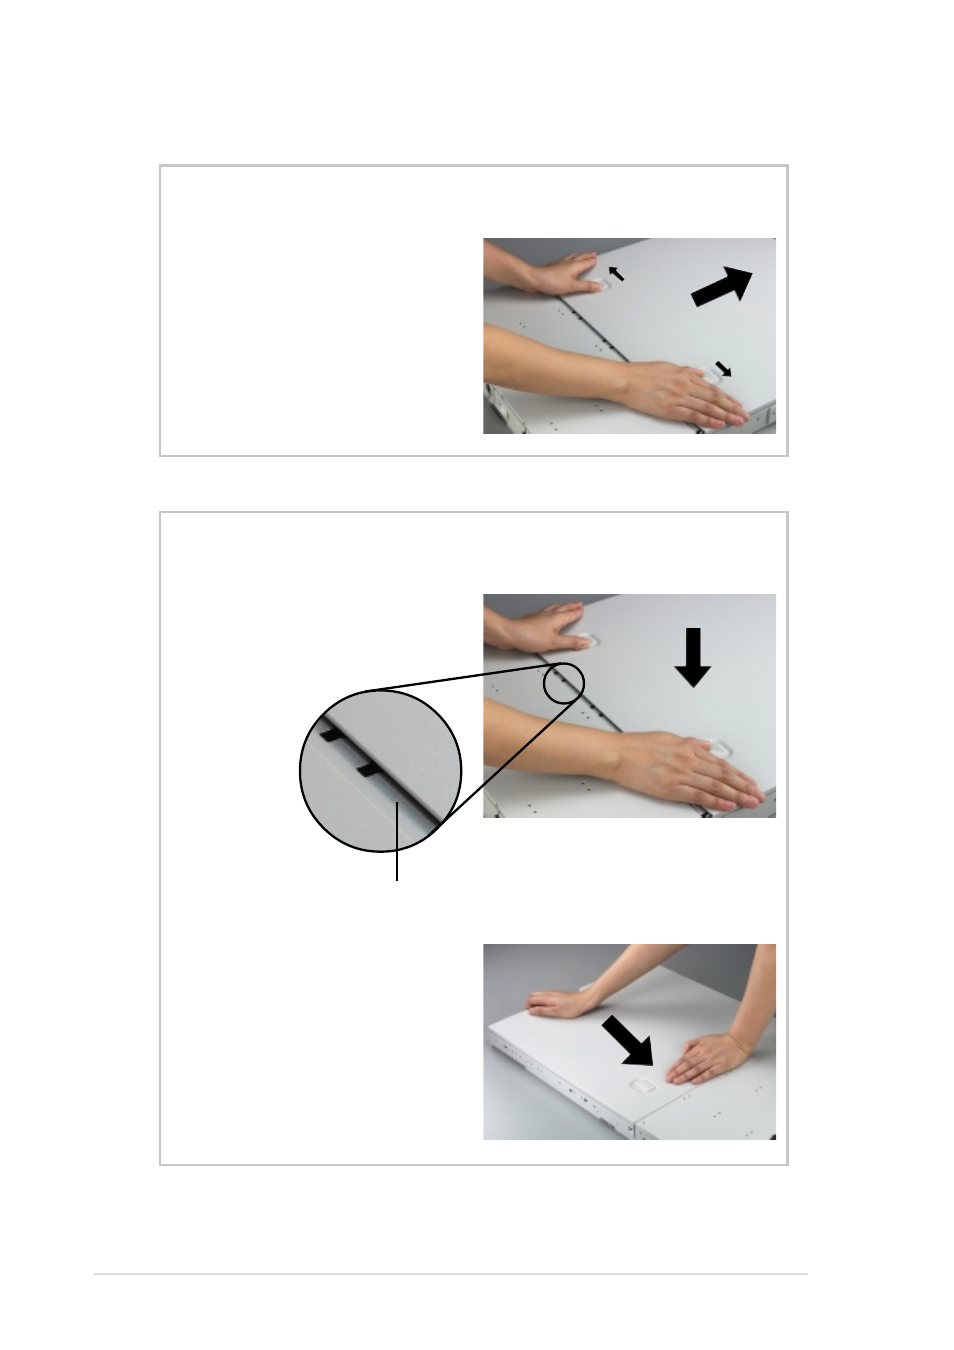
Removing the cover
1. To release the cover, push the
two latches outward, then
slide the cover towards the
rear for about half an inch.
2. Lift the cover from the chassis.
Installing the cover
1. Place the cover on top of the
chassis leaving about half an
inch gap from the front edge.
2. Firmly hold down the cover and
you slide it towards the front
until it fits in place.
Half-inch gap
See also other documents in the category Asus Hardware:
- Xonar DX (80 pages)
- Xonar DX (10 pages)
- PCI Express Audio Card Xonar DX (70 pages)
- Audio Card Xonar D2X (70 pages)
- Xonar D2X (88 pages)
- Xonar D2X (84 pages)
- D2X (88 pages)
- ROG Xonar Phoebus (72 pages)
- ROG Xonar Phoebus (122 pages)
- Xonar DSX (26 pages)
- Xonar DSX (29 pages)
- Xonar DGX (58 pages)
- Xonar DGX (38 pages)
- Xonar DGX (33 pages)
- Xonar DG (54 pages)
- Xonar DG (58 pages)
- Xonar DG (32 pages)
- Xonar DG (28 pages)
- Xonar Essence ST (52 pages)
- Xonar Essence ST (35 pages)
- Xonar Essence ST (40 pages)
- Xonar Essence ST (53 pages)
- Xonar DS (54 pages)
- Xonar DS (33 pages)
- Xonar Xense (47 pages)
- Xonar Xense (70 pages)
- Xonar Xense (45 pages)
- Xonar U3 (56 pages)
- Xonar U3 (38 pages)
- Xonar Essence STX (32 pages)
- Xonar Essence STX (49 pages)
- Xonar Essence STX (10 pages)
- XONAR D1 E4009 (72 pages)
- Xonar D1 (72 pages)
- Xonar D1 (80 pages)
- Xonar D1 (10 pages)
- Xonar Essence One (7 pages)
- Xonar Essence One (5 pages)
- Xonar HDAV 1.3 (100 pages)
- Motherboard M4A78-EM (64 pages)
- A7N8X-VM/400 (64 pages)
- K8V-XE (86 pages)
- K8V-XE (20 pages)
- M2R32-MVP (160 pages)
- M2R32-MVP (60 pages)