Creating a raid 10 set (raid 0+1) – Asus Motherboard P5LD2 User Manual
Page 129
ASUS P5LD2
5-23
Creating a RAID 10 set (RAID 0+1)
To create a RAID 10 set:
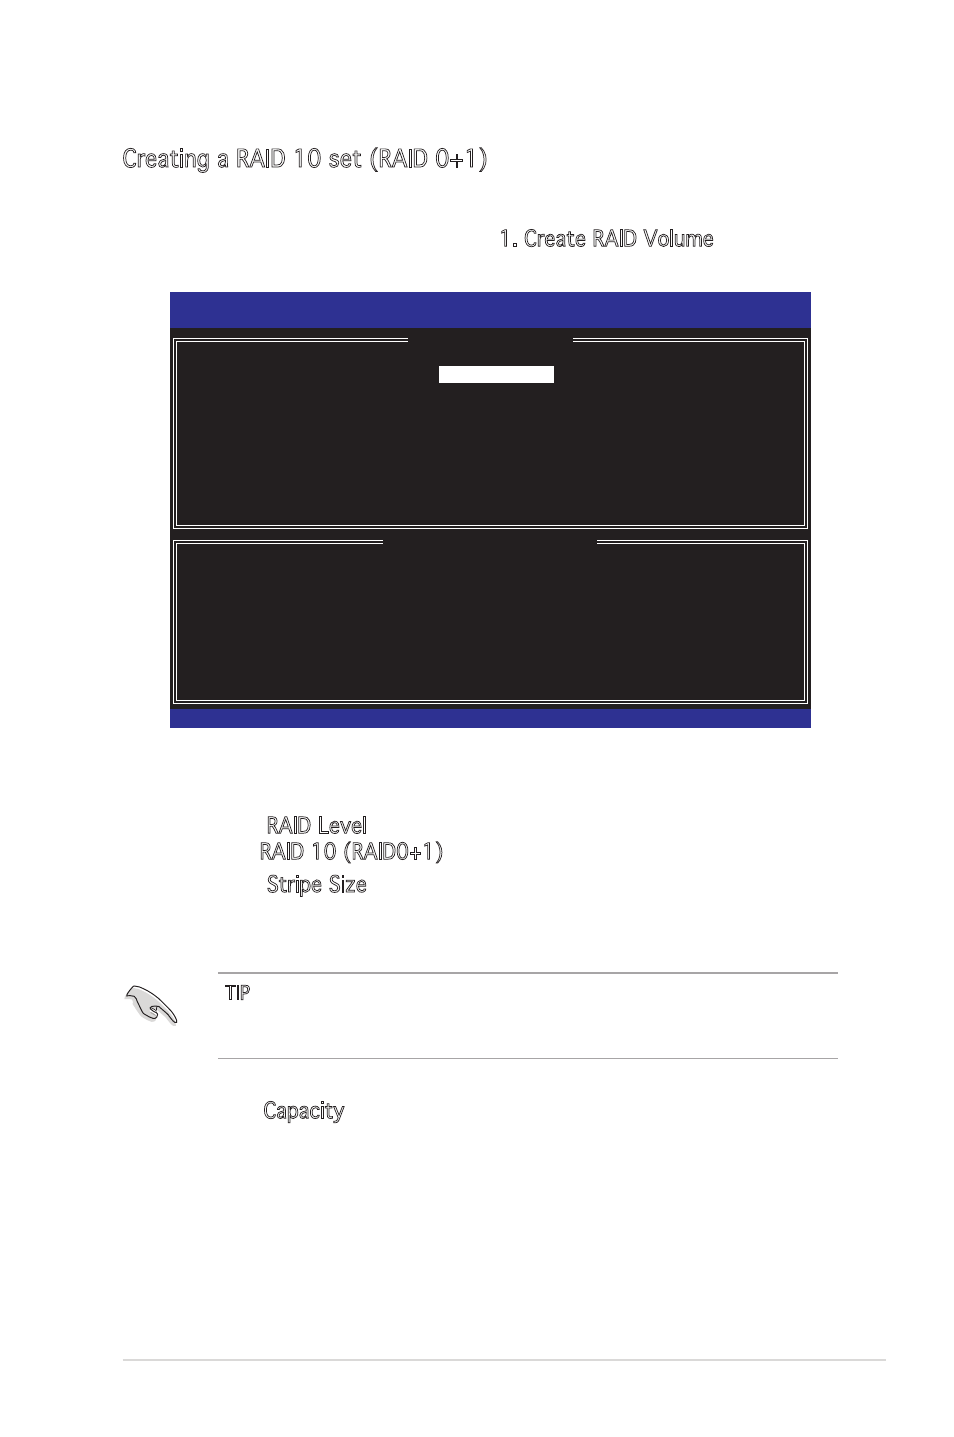
1. From the utility main menu, select 1. Create RAID Volume, then press
Intel(R) Matrix Storage Manager Option ROM v5.0.0.1032 ICH7R wRAID5
Copyright(C) 2003-05 Intel Corporation. All Rights Reserved.
[
CREATE ARRAY MENU
]
[
DISK/VOLUME INFORMATION
]
Enter a string between 1 and 16 characters in length that can be used
to uniquely identify the RAID volume. This name is case sensitive and
cannot contain special characters.
Name:
RAID Level:
Disks:
Strip Size:
Capacity:
Volume10
RAID10(RAID0+1)
Select Disks
128KB
XXX.X GB
Create Volume
2. Enter a name for the RAID 10 set, then press
3. When the RAID Level item is highlighted, press the up/down arrow key
to select RAID 10 (RAID0+1), then press
4. When the Stripe Size item is highlighted, press the up/down arrow key
to select the stripe size for the RAID 10 array, then press
The available stripe size values range from 4 KB to 128 KB. The
default stripe size is 64 KB.
TIP: We recommend a lower stripe size for server systems, and a higher
stripe size for multimedia computer systems used mainly for audio and
video editing.
5. Key in the RAID volume capacity that you want then press
when the Capacity item is highlighted. The default value indicates the
maximum allowed capacity.
[↑↓]-Change [TAB]-Next [ESC]-Previous Menu [Enter]-Select