Replacing the language eprom – American Power Conversion AP9215 User Manual
Page 17
15
Replacing the Language EPROM
PowerView can be configured to display text in a language other than
the default English by replacing the unit’s language EPROM with one
of the alternate language EPROMs included with the unit. Follow
these steps to replace the unit’s language EPROM:
Note: The device being replaced is static sensitive. Do not re-
move it from the protective carrier until you are ready
to insert it in the unit.
1. Remove the four (4)Phillips screws on the rear of the unit and
separate the front half of the case from the rear.
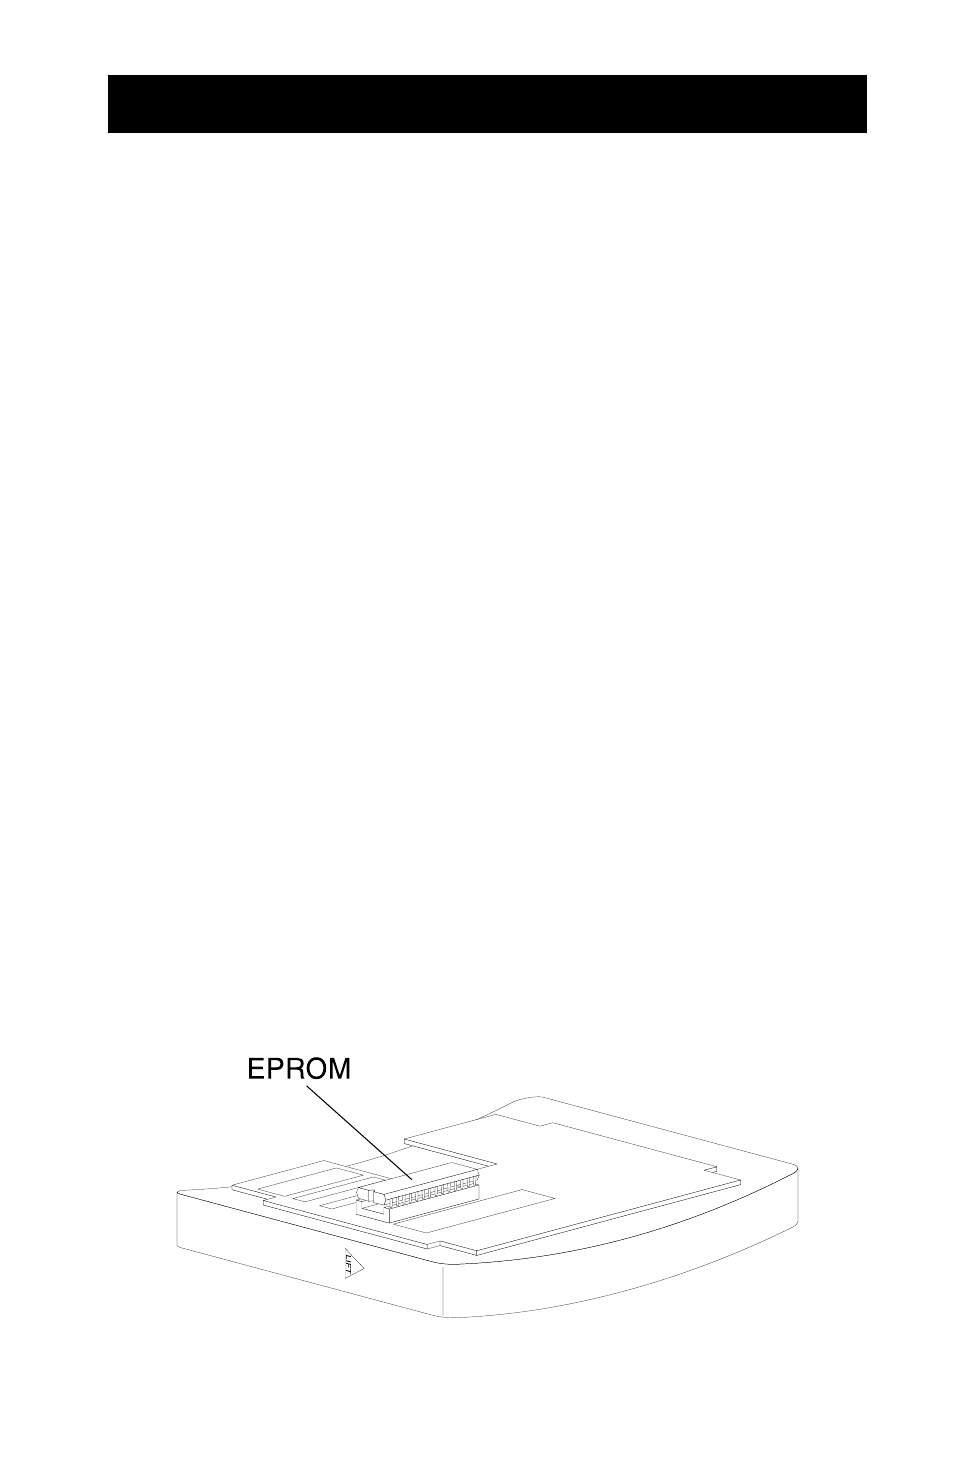
2. Identify the language EPROM. This is a 28-pin integrated circuit
located in a socket and adjacent to the large 40-pin device. The
language EPROM will have a white label bearing the name of the
language for which it is programmed. Note which end of the
EPROM has the semicircular notch (pin 1); the new EPROM must
be installed with the same orientation as the original.
3. To remove the EPROM, insert a small screwdriver or similar tool
between the EPROM and its socket. Gently twist the blade to lift
the EPROM from the socket. In order to avoid bent pins, the
EPROM should be loosened gradually, one side at a time, until it
is free of its socket.
4. Position the new EPROM on its socket with the notch in the same
relative position as the original. Carefully check that all pins are
aligned with the socket. Realign if necessary. Apply even pressure
with fingers to the top of the EPROM until it is fully seated in its
socket.
5. Replace the rear cover and re-install the four (4) Phillips screws.
Figure 5
Location of Language EPROM