Installing a drive in bay 1 or bay 2, Locating, Spare – Lenovo ThinkCentre A57e User Manual
Page 26: Retainer, Bracket, Installing, Drive
Installing
a
drive
in
bay
1
or
bay
2
To
install
a
drive
in
bay
1
or
bay
2:
1.
Remove
the
computer
cover.
See
2.
Remove
the
front
bezel.
See
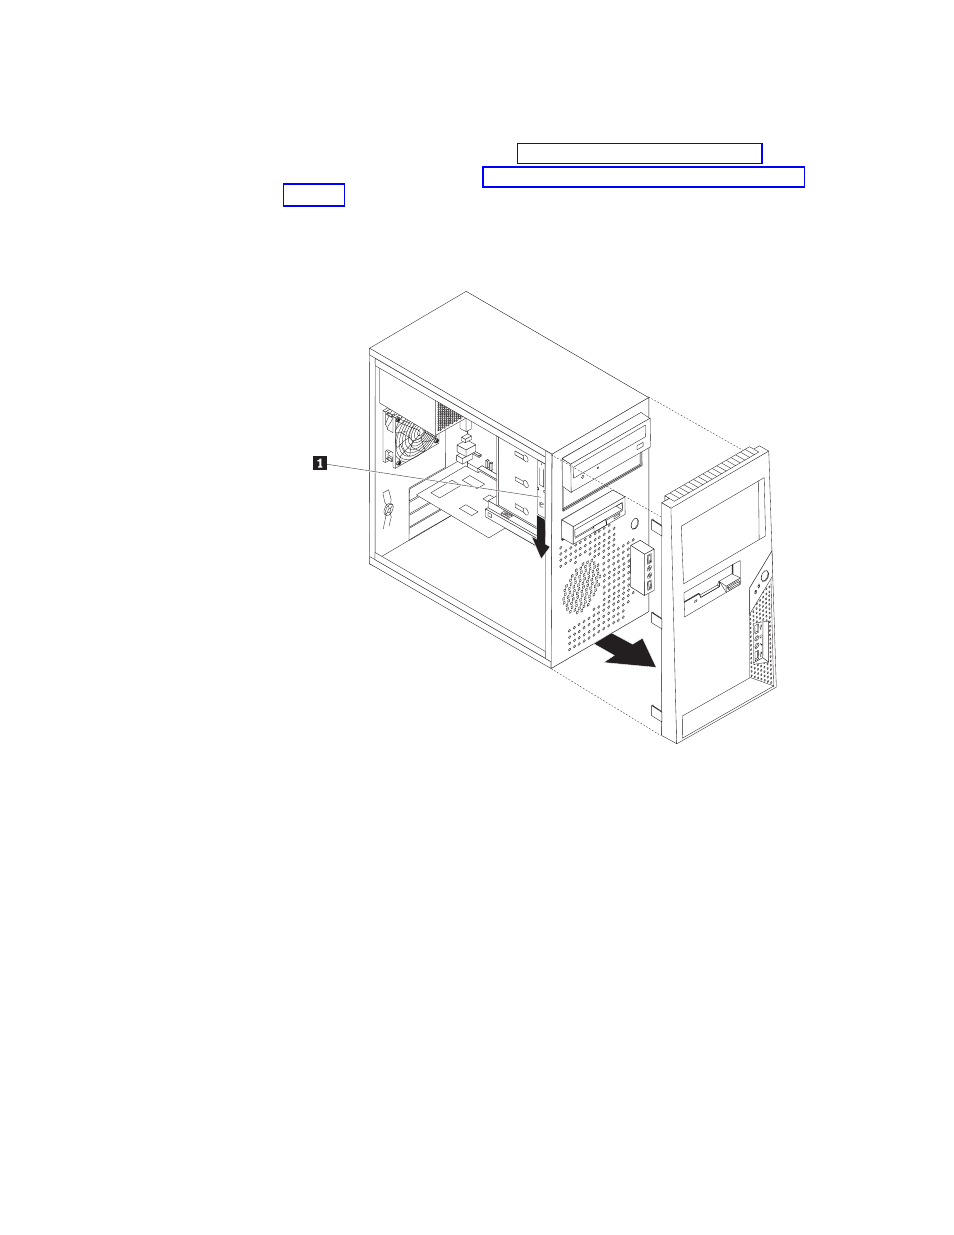
Note:
Notice
the
spare
retainer
bracket
1
attached
to
the
side
of
the
upper
drive
cage.
3.
Remove
the
metal
static
shield
from
the
drive
bay
using
your
fingers
to
pull
it
outward.
4.
If
you
are
installing
a
drive
with
accessible
media,
such
as
an
optical
drive,
remove
the
plastic
panel
in
the
bezel
for
bay
2
by
squeezing
the
plastic
tabs
that
secure
the
panel
on
the
inside
of
the
bezel.
5.
Remove
the
retainer
bracket
from
the
upper
drive
cage
by
sliding
it
downward.
Figure
10.
Locating
the
spare
retainer
bracket
18
Hardware
Installation
and
Replacement
Guide
See also other documents in the category Lenovo Computers:
- IdeaCentre B325 (27 pages)
- IdeaCentre B325 (53 pages)
- IdeaCentre B320 (1 page)
- IdeaCentre B310 (64 pages)
- C325 (47 pages)
- IdeaCentre Q150 (33 pages)
- H320 Desktop (47 pages)
- IdeaCentre K320 (37 pages)
- IdeaCentre A320 (57 pages)
- IdeaCentre K320 (43 pages)
- H330 Desktop (49 pages)
- 3000 H Series (41 pages)
- 6077 (80 pages)
- 1048 (130 pages)
- 5023 (94 pages)
- 5053 (78 pages)
- 6393 (68 pages)
- THINKSTATION S10 (4 pages)
- THINKSTATION D10 (58 pages)
- 3856 (154 pages)
- 3000 J (90 pages)
- THINKSTATION 4157 (66 pages)
- THINKSTATION 4158 (74 pages)
- Think 6429-16x (4 pages)
- THINKSERVER 387 (248 pages)
- 0B39663 (52 pages)
- ThinkVision E50 (62 pages)
- TD230 (3 pages)
- 3000 J Series (96 pages)
- 6522 (216 pages)
- 1045 (140 pages)
- 6436 (88 pages)
- TS200V (96 pages)
- 1040 (26 pages)
- 4013 (94 pages)
- IdeaCentre D400 (1 page)
- 6447 (112 pages)
- THINKSERVER 3823 (304 pages)
- THINKSTATION S10 (62 pages)
- Think 5500 Series (2 pages)
- 3650 (98 pages)
- 6491 (98 pages)
- 6434 (96 pages)
- 6432 (284 pages)
- H320 Desktop (35 pages)