Vollrath 112 User Manual
Page 21
13
A. Assemble all "O" Rings onto parts dry, without lubri-
cation. Then apply a thin film of sanitary lubrication to
exposed surfaces of the "O" Rings. Apply a thin film of
sanitary lubricant to metal part of rear seal. Also apply
a thin film of sanitary lubricant inside and outside of the
front auger support bushing.
B. Assemble the rear seal onto the auger with the large
end to the rear. Be sure the "O" Ring is in place before
installing the rear seal.
C. Lubricate the auger drive (rear) with a small amount of
white socket lubricant. A small container of socket
lubricant is shipped with the freezer.
D. Screw the springs onto the studs in plastic flights.
Springs must be screwed into the flights com-
pletely to provide proper compression (Fig. 25).
CAUTION
DO NOT PLACE THE MIX INLET REGULATOR
INTO THE HOPPER BEFORE INSTALLING THE
AUGER.
E. Install the two plastic flights onto rear of the auger and
insert part way into freezer barrel.
F. Install the remaining plastic flights, push the auger into
the freezer barrel and rotate slowly until the auger
engages the drive shaft.
G. Install the bushing and auger support into the front of
the auger with one leg of the support pointing straight
up.
NOTE
Apply a small amount of Petro-Gel to the surface of
the cam on the spigot handle prior to assembly of
handle to the spigot body.
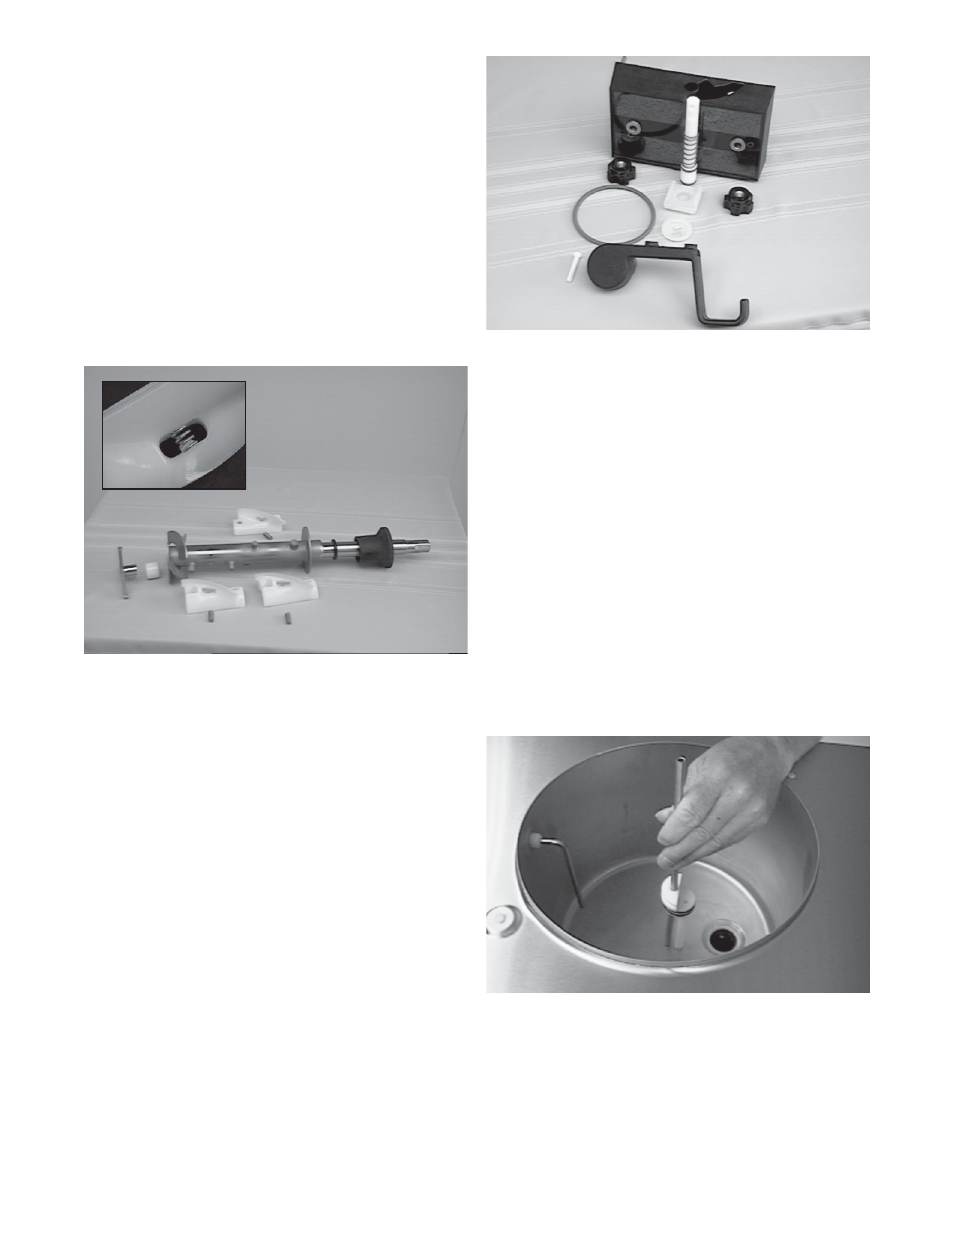
H. Install the spigot body with "O" Rings and spring into
the front door from bottom (Fig. 26). Push straight up
until the spigot is in place. Place the spigot handle on
top of the spigot and insert clevis pin, then install the
adapter and rosette.
NOTE
The spigot handle can only be installed one way.
I.
Install the front door on the freezer. Shoulder on the
rear of the door must be inside of freezer barrel.
J.
Install the circular knobs on the freezer studs.
CAUTION
FINGER TIGHTEN THE CIRCULAR KNOBS
EVENLY. DO NOT OVERTIGHTEN KNOBS.
Look for the proper seal between the freezer barrel, "O"
Ring, and front door.
K. Install the mix inlet regulator into the freezer with the
air tube to the front of the freezer (Fig. 27).
L.
Install hopper cover and drain tray.
Figure 27. Mix Inlet Regulator
3.12 ROUTINE CLEANING
To remove spilled or dried mix from the freezer exterior,
simply wash in the direction of the finish with warm soapy
water and wipe dry. Do not use highly abrasive materials
as they will mar the finish.
Figure 26. Exploded View of Front Door
Figure 25. Exploded View of Auger (E111 Shown)