Vollrath F131YG User Manual
Page 23
17
Off Time (sec)
Increasing this value will increase the time between
freezing cycles in "Standby Mode" and result in an
increase of product temperature in the barrel.
Stb Time (sec)
This setting determines the total amount of time in
"Standby Mode".
Sl1DrvOn (sec)
Adjustments to this setting affect the amount of
time the auger rotates in the stir cycle. This stir
cycle only occurs in "Sleep 1 Mode".
Sl1DrOff (sec)
Adjustments to this setting affect the time between
stir cycles. The stir cycle only occurs in "Sleep 1
Mode".
Sl2CutIn (°F)
Changing this setting affects the temperature at
which the freezing cycle starts in "Sleep 2 Mode".
Sl2CtOut (°F)
Changing this setting affects the temperature at
which the freezing cycle stops in "Sleep 2 Mode".
DftOffTm (sec)
In "Serve Mode", this value determines the
maximum time without a freezing cycle. If this
value is met, a freezing cycle will start. In the event
of a freezing cylinder temperature sensor failure,
this value affects the amount of time between
freezing cycles during "Serve Mode".
Refriger
This setting changes how the control handles the
storage refrigeration cycle. The setting for the
E131 and F131 is 2 Hopper on the left control and
None on the right control.
HprCutIn (°F)
This setting determines the temperature at which
the hopper refrigeration cycle starts. This setting
is only available on the left control.
HprCtOut (°F)
This setting determines the temperature at which
the hopper refrigeration cycle stops. This setting
is only available on the left control..
Hpr Off (min)
If the temperature sensor in the hopper fails, this
setting determines the time between hopper
refrigeration cycles. This setting is only available
on the left control..
Hpr On (sec)
If the temperature sensor in the hopper fails, this
setting determines the length of the hopper
refrigeration cycle. This setting is only available
on the left control..
4.8
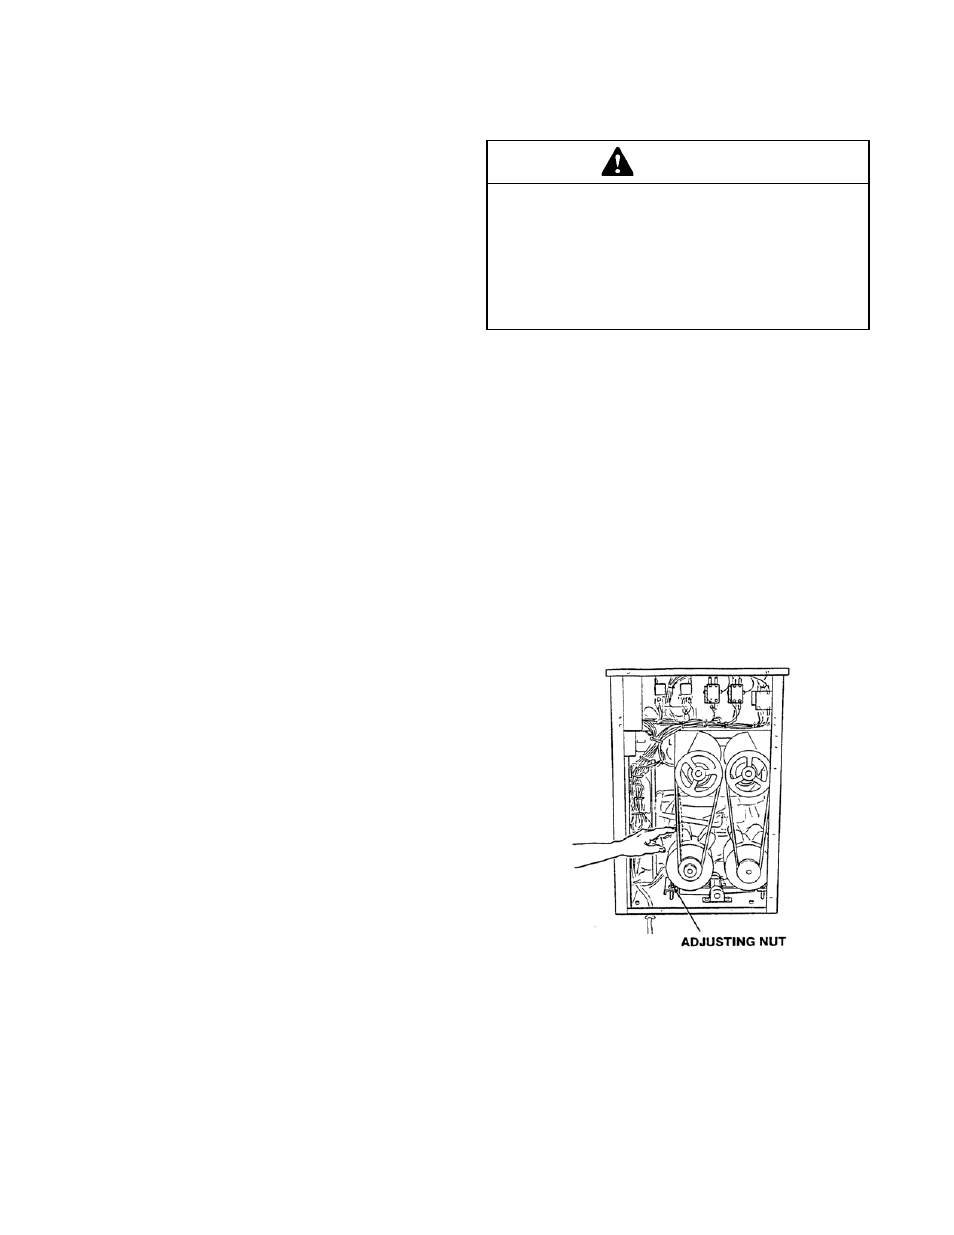
DRIVE BELT TENSION ADJUSTMENT
To check belt tension, refer to Figure 4-4 and follow the
steps below:
A.
Remove the back panel.
B.
Use a Burroughs Belt Tension Gauge to set the
tension for the drive belt. Set the belt tension to 35-
40 lbs.
C.
If an adjustment is necessary, loosen the four
motor plate retaining nuts, adjust belt tension then
retighten the four nuts.
D.
Using a straightedge, check that the drive motor
pulley is aligned with the speed reducer pulley.
Align the pulley if necessary.
NOTE
Belt life will be increased if new drive belts are tight-
ened after two or three weeks of operation.
4.9
CONDENSER CLEANING
The air-cooled condenser is a copper tube and aluminum fin
type. Condensing is totally dependent upon airflow. A
plugged condenser filter, condenser, or restrictions in the
louvered panel will restrict airflow. This will lower the
capacity of the system and damage the compressor. The
condenser must be kept clean of dirt and grease. The
machine must have a minimum of 3” (7.5 cm) of ventilation
WARNING
Hazardous voltage
The Main Freezer Power switch must be placed in
the OFF position when disassembling for servicing.
The freezer must be disconnected from electrical
supply before removing any access panel. Failure to
disconnect power before servicing could result in
death or serious injury.
Figure 4-4 Belt Tension Adjustment