Instrucciones para el armado, Using pot with drain valve, Using the pot with the drain hook basket – Masterbuilt Propane Turkey Fryer with Turkey Tap (20020507) User Manual
Page 18: Using the pot with the turkey hook, Listado de piezas, Lista de herrajes
17
Using Pot with Drain Valve:
Units are sold with and without drain valves:
1. Valve must be in the OFF position before adding oil or water.
2. Secure valve cap onto drain valve.
3. Oil or water must be below 100ºF (37ºC) before draining.
CAUTION: Do not drain oil or water until the temperature of the
liquid is below 100ºF (37ºC). Hot water or oil can cause
serious burns and injury.
Drain
Valve
with Cap
Using the Pot with the Drain Hook Basket:
Do not overfill pot with oil or water. A fill line is
marked on the larger frying and boiling pots.
Smaller fry pans may not be marked.
1. Place seasoned food into basket.
2. Slowly lower basket into oil or water using lifting
hook. (Wear Protective Gloves) Stay away from
hot steam.
3. Cover with lid.
4. When food is ready to remove, turn the burner
to OFF position. Remove lid and use the lifting
hook to pull basket up slowly. (Wear Protective
Gloves) Stay away from hot steam.
5. Hook basket to the side of the pot with the drain
hook, allowing the food to drain and cool.
Using the Pot with the Turkey Hook:
Do not overfill pot with oil or water. A fill line is
marked on the larger frying and boiling pots.
Smaller fry pans may not be marked.
1. Position turkey hook on side.
2. Slowly slide turkey onto hook, breast cavity first,
as shown below.
3. Lower turkey hook into oil or water using lifting
hook. (Wear Protective Gloves) Stay away from
hot steam.
3. Cover with lid.
4. When food is ready to remove, turn the burner to
OFF position. Remove lid and use the lifting
hook to pull turkey hook up slowly. (Wear
Protective Gloves) Stay away from hot steam.
5. Allow the food to drain and cool.
Lifting Hook
Lifting Hook
Basket
Drain Hook
Turkey Hook
Fill Line
LISTADO DE PIEZAS
Retire la tuerca (B) de la parte inferior del
quemador. Coloque el quemador en la barra de
montura del quemador, introduciendo el perno del
quemador por el orificio que está en el centro de
la barra de montura del quemador.
Nota: No los apriete demasiado. Las roscas
deben quedar alineadas. No conecte a la fuerza
la manguera al quemador, pues pueda dañar las
roscas.
Coloque el regulador de aire (5) en el quemador,
según se ilustra. Deslice el extremo del resorte
pequeño (6) por el extremo de la manguera.
Enrosque el extremo de la manguera en el
quemador y apriételo a mano, girándolo en el
sentido de las agujas del reloj.
NOTA: No apriete demasiado los herrajes.
Coloque la pata (2) dentro del protector contra el
viento. Con el tornillo (A) y la tuerca (C), fije la
pata al protector contra el viento, como se ilustra.
Repita la operación con las otras patas. Fije el
anillo inferior (3) en cada pata con tornillo (A) y
tuerca (C).
En este momento, apriete todos los herrajes.
LEA DETENIDAMENTE TODAS LAS INSTRUCCIONES Y LAS ADVERTENCIAS ANTES DE
ARMAR O DE HACER FUNCIONAR LA FREIDORA DE PAVOS.
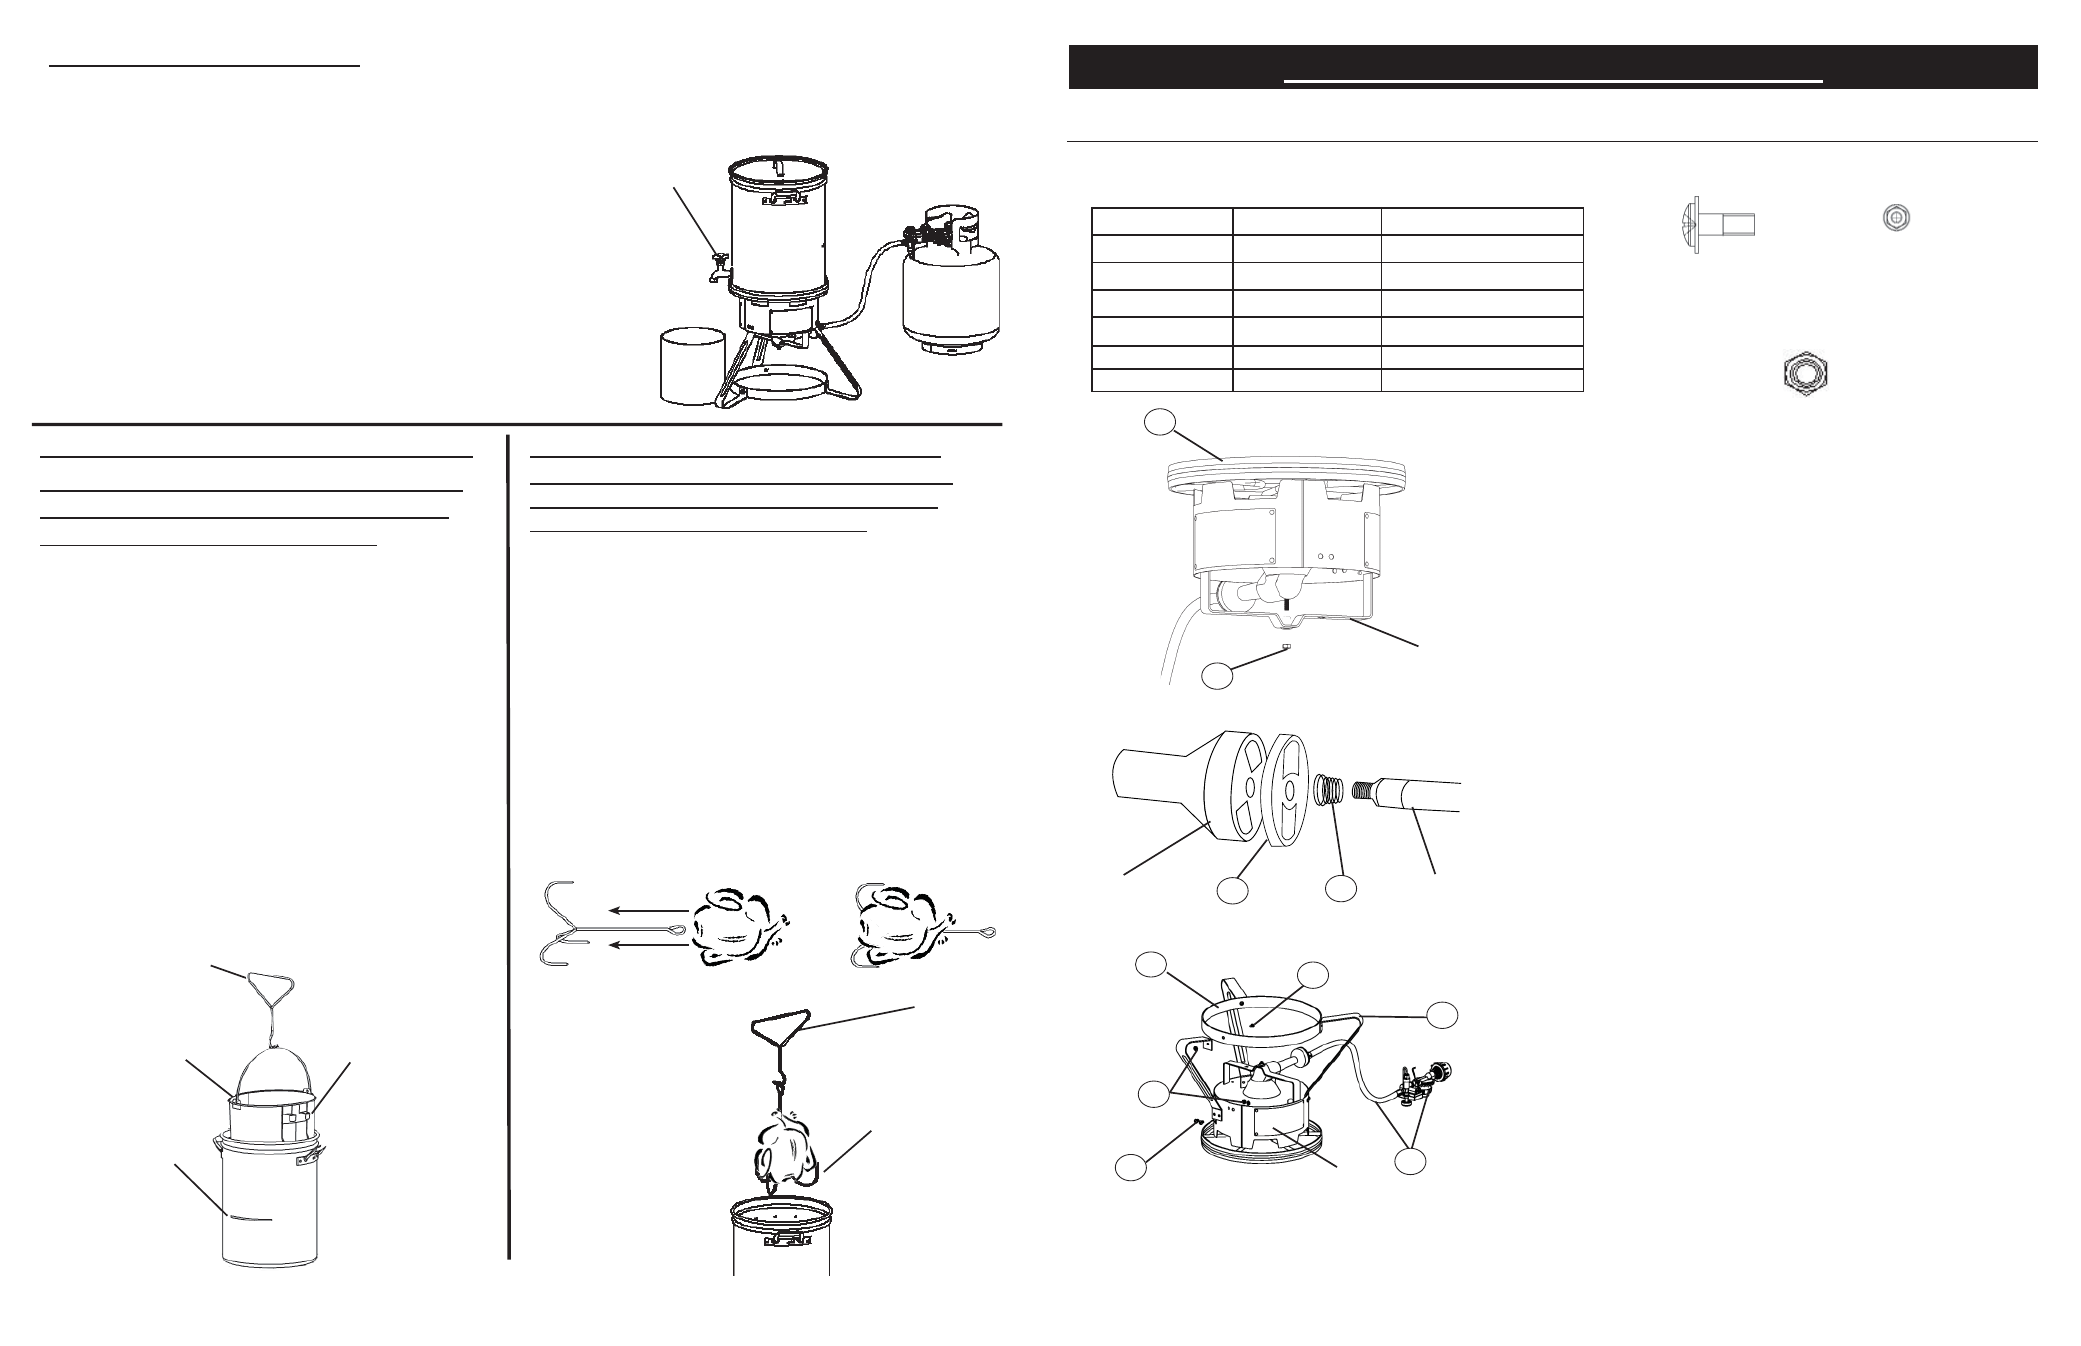
PASO 1 Armado del quemador
PASO 2 Cómo montar la manguera y el regulador
en el quemador
PASO 3 Cómo montar las patas
Barra para montar
los quemadores
Tubo Venturi
Manguera
Protector contra
el viento
LISTA DE HERRAJES
Antes de cada uso, revise todos los tornillos y tuercas para verificar que estén bien apretados y fijos.
INSTRUCCIONES PARA EL ARMADO
4
5
6
1
B
3
A
C
A
2
(A)
M6 x 13
Tornillo Phillips con brida
Cant.: 9
(B)
Tuerca del
quemador
Cant.: 1
(C)
Brida de la tuerca hexagonal
M6
Cant.: 9
ART. NO.
CANTIDAD
DESCRIPCIÓN
1
1
Cabezal de la freidora
2
3
Patas
3
1
Anillo inferior
4
1
Regulador y manguera
5
1
Regulador de aire
6
1
Resorte
6