M&G DuraVent DuraLiner® User Manual
Page 7
7
pipe with a 5/32” (4 mm) diameter twist drill
bit. Next, install the pop rivets. Drilling is
not needed to connect sections of rigid pipe.
Connect first rigid section of DuraLiner on
top of flex section with (4) stainless steel pop
rivets.
Note: For insulating DuraLiner Flex, refer to
the "Insulating Flex" Instruction section later in
this document.
Connector fits on top vented appliances with
oval or rectangular openings.
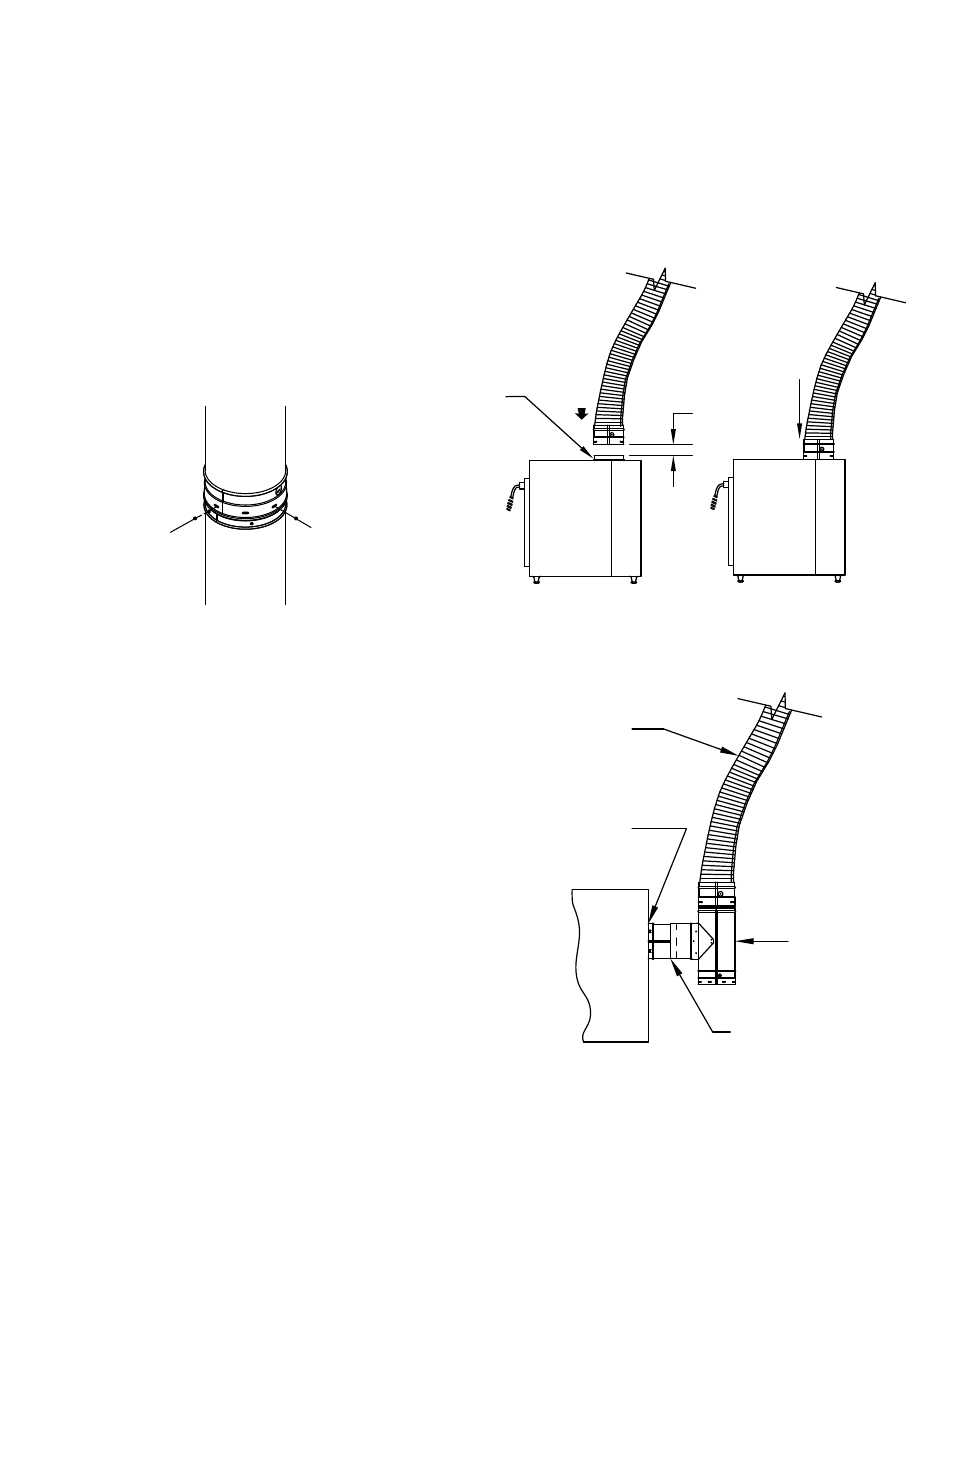
STEP FIVE: Connect appliance to DuraLiner.
(Fig.9)
Figure 9
FLex PIPe
STOVe CONNeCTOR
1/2"
POP RIVeT OR
SCReW FLex PIPe TO
STOVe CONNeCTOR
Figure 8
RIVeT PIPe
SeCTIONS
Note: If you have a round flue outlet on your
appliance, and you have used Oval Flex or
Oval-To-Round flex through the damper area,
a Round-To-Oval flex piece or adapter will be
needed for the appliance conection.
If appliance has a round rear exit, allign tee
with exit of appliance. An adjustable sleeve
Figure 10
RIgID Tee OVAL OR
ROUND
ADjUSTAbLe SLeeVe (MIN.
OVeRLAP 2")
FLex PIPe
OVAL OR
ROUND
STOVe
CONNeCTOR
After pipe is riveted together, lower through
the Top Plate and clamp the pipe to support
(Fig.6). Attach next pipe section- Alternately
tighten and loosen the Top Plate clamp
assembly to hold and lower the pipe sections.
Repeat until the flex section reaches the
smoke shelf area. As the pipe is being
lowered down, bend the flex pipe to fit through
the damper area. Lower DuraLiner to final
position.
STEP FOUR: Connect appropriate DuraLiner
adapter to appliance (Fig.4). The DuraLiner
round Appliance Connector fits either a top
vented or rear vented round flue appliance.
Place the proper sized connector over the flue
exit and mark on the appliance the locations of
the holes where the connector will be attached.
Drill and tap hole in top or rear of appliance
or use self tapping screws. before attaching
permanently, put a bead of high temperature
sealant between applinace connector and
insert. The DuraLiner oval appliance