Extend-a-cap installation – M&G DuraVent DuraLiner® User Manual
Page 11
11
Check the appliance manufacturer’s
installation instructions to ensure proper
positioning with relation to combustibles.
Complete the installation with Connector Pipe
Sections and Fittings as required. Inspect the
completed job to ensure it is done in a careful
and workman-like manner.
EXTEND-A-CAP INSTALLATION
The cap may be installed on both round and
oval rigid systems.
STEP ONE: Center the base plate on the top
of the masonry chimney (Fig.18). Trim to fit
the chimney as required. Use non-hardening
sealant to seal the base plate to the masonry
chimney, but this can be done after the liner
has been lowered into place. Anchors or
screws are recommended but not required, as
the base plate will ultimately be supporting the
entire weight of the installation.
STEP TWO: Assemble and position the clamp
assembly on top of the base (Fig.6, Fig.18).
Adjust the bolts on the clamp assembly so that
pipe sections will just pass through the clamp.
STEP THREE: Once the desired length of
liner has been achieved, tighten the clamp
assembly bolts, until the system is firmly
supported by the base. There should not be a
Duraliner pipe joint above the clamp assembly.
Attach the storm collar, and seal with non-
hardening silicone (500°F) sealant. Install Cap
to pipe, using #8 sheet metal screws. (Fig.19).
Figure 16
Figure 17
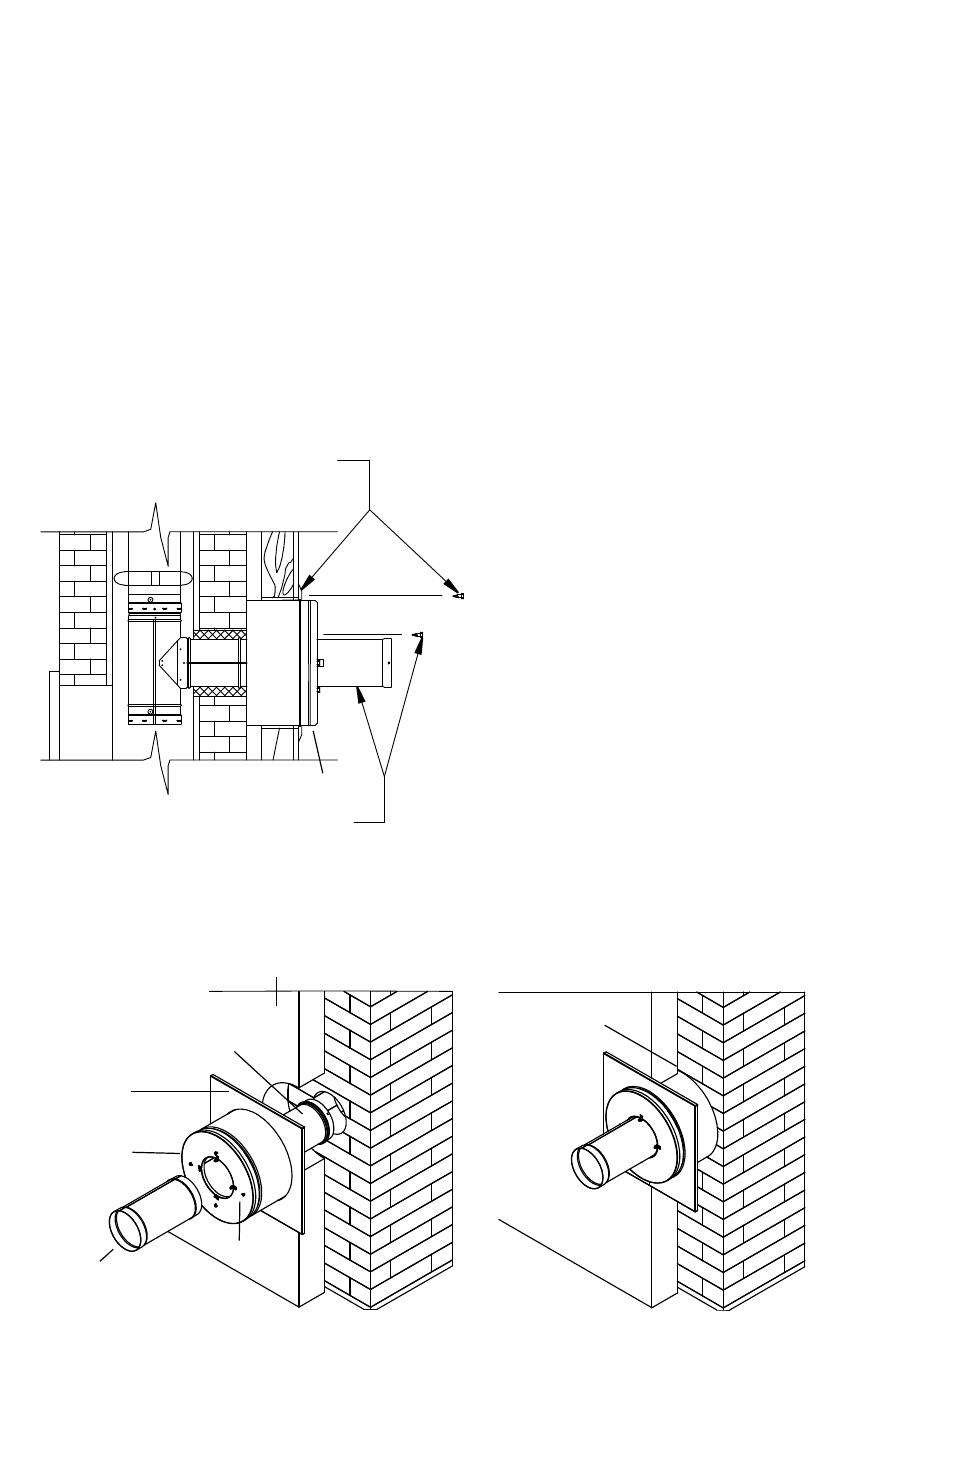
2" INTO THe ROOM
COMbUSTIbLe WALL
10" LONg
RIgID PIPe SeCTION
INSULATeD WALL
PASS THROUgH
TRIM PLATe
ADjUSTAbLe
SLeeVe
WALL PASS
THROUgH AgAINST
MASONRY
HARDWARe
TRIM COLLAR
AND SCREWS
(COMPONENTS OF
WALL PASS-THRU
ASSEMBLY)
RIGID PIPE
AND SCREWS
(COMPONENTS OF
WALL PASS-THRU
ASSEMBLY)