5 connecting and operating the 622t, 622r, Connecting and operating the 622t, 622r – Kramer Electronics 622T User Manual
Page 11
8
622T, 622R - Connecting and Operating the 622T, 622R
5
Connecting and Operating the 622T, 622R
Always switch off the power to each device before connecting it to your
622T, 622R. After connecting your 622T, 622R, connect its power and
then switch on the power to each device.
We recommend testing your system configuration by first connecting
the entire system (as illustrated in
), using short copper cables
instead of optical fiber cables.
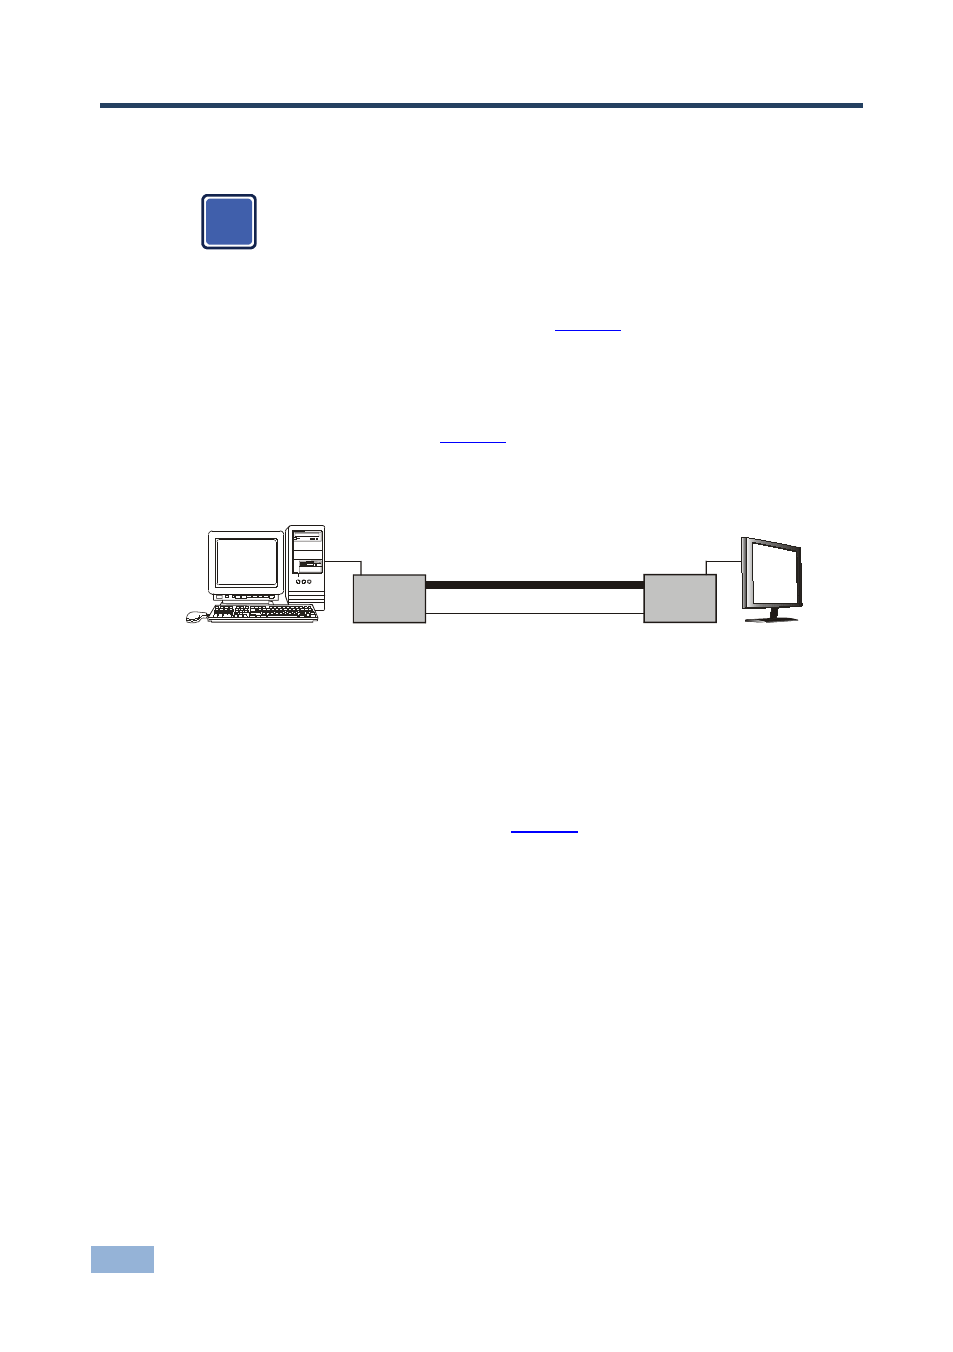
You can use the
622T and 622R to configure a dual link DVI optical transmitter and
receiver system as illustrated in
: the source
connects to the 622T, the
622R connects to the display, and both transmitter and receiver are
interconnected via fiber optics and UTP cabling.
Figure 3: 622T and 622R Dual Link DVI Optical Transmitter and Receiver System
5.1
Connecting the 622T/622R Dual Link DVI Optical
Transmitter/Receiver
To connect the
622T Dual Link DVI Optical Transmitter with the 622R Dual Link
DVI Optical Receiver, as the example in
illustrates, do the following:
1. Connect the DVI source (for example, a set top box) to the 622T DVI IN
connector, using the dual link DVI copper cable.
Make sure that the system is not powered up when connecting the DVI
source.
2. On the 622R, connect the DVI OUT connector to the DVI acceptor (for
example, a display), using the dual link DVI copper cable.
3. Remove the module dust covers and connect each duplex LC fiber cable
one-by-one to each of the eight LC receptacles of the 622T and 622R.
4. Carefully recheck the polarities and ensure that the duplex connectors are
fully engaged.
i
Receiver
621R
Transmitter
621T
Optic Fiber Cables up to 100 meters
DDC Cabling up to 100 meters