3 installing the mounting bracket, Installing the mounting bracket, Figure 2: installing the fixed bracket – Kramer Electronics SPK-W612(PAIR) User Manual
Page 7: Ac b d
SPK-W612 - Installing the SPK-W612
5
4. Unscrew the negative (black) screw-type connector, insert the wire from the
negative terminal on the receiver, and retighten.
5. Unscrew the positive (red) screw-type connector, insert the wire from the
positive terminal on the receiver, and retighten.
6. Insert the brackets (see
Section 4.3
4.3
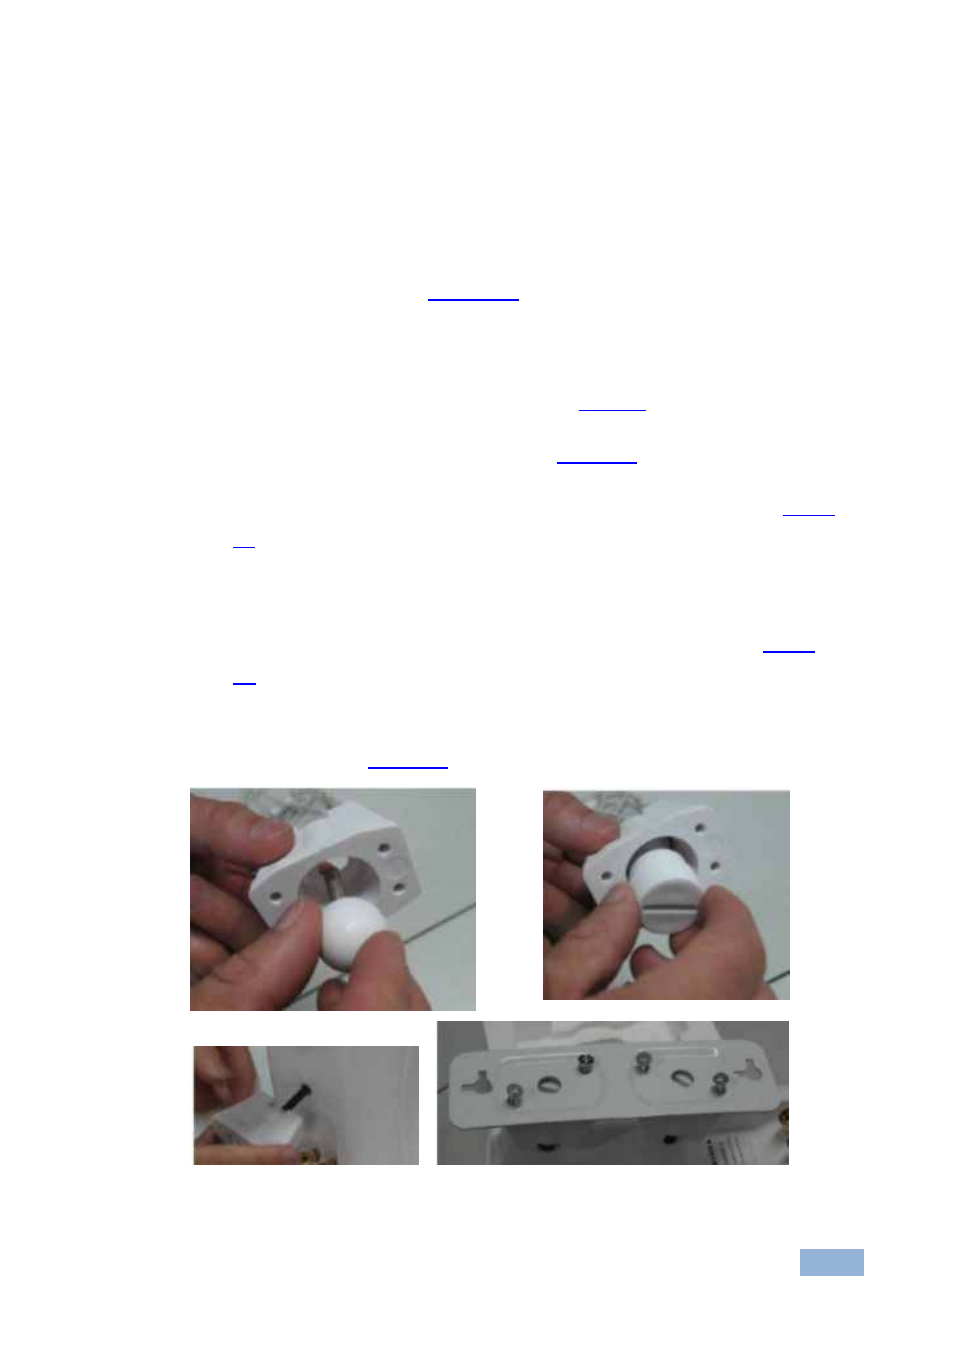
Installing the Mounting Bracket
To install the mounting brackets, as illustrated in
, do the following:
1. Insert the ballmount into the fixture (see
).
2. Insert the ABS screw mount into the fixture over the ball mount (see
).
3. Using the bracket, or any metal piece, tighten the ABS screw.
4. Screw the fixture into the two threaded holes on the speaker (see
).
5. Place the metal bracket on the two fixtures, insert the four bracket screws
and tighten (see
).
Figure 2: Installing the Fixed Bracket
A
C
B
D