Technical drawing – Muxlab Wall Mount Balun Fixture User Manual
Page 2
© MuxLab Inc. 2008
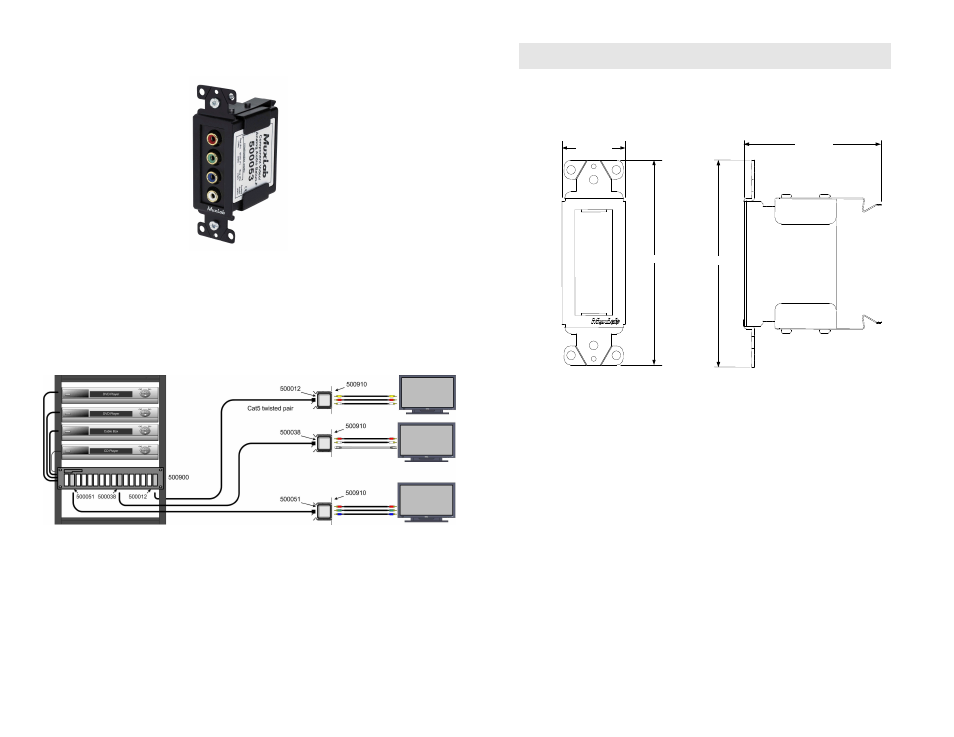
4.
Insert the MuxLab square balun into the Wall Mount Balun Fixture by pressing
the balun against the spring clips to open them up.
5.
Plug the Cat5 cable into the back of the balun and attach the completed
assembly to a mud ring or junction box using with the built-in mounting
screws.
6.
Attach a Decora™ compatible wall plate (not included) over the installed
fixture using 6-32 screws.
7.
The following diagram shows a typical application.
Technical Drawing
The following drawings provide the basic dimensions.
4.04" (10.26cm)
1.3" (3.3cm)
2.7" (6.8cm)
4.04" (10.26cm)