Rivera Primo Slimline Belt Drive User Manual
Page 4
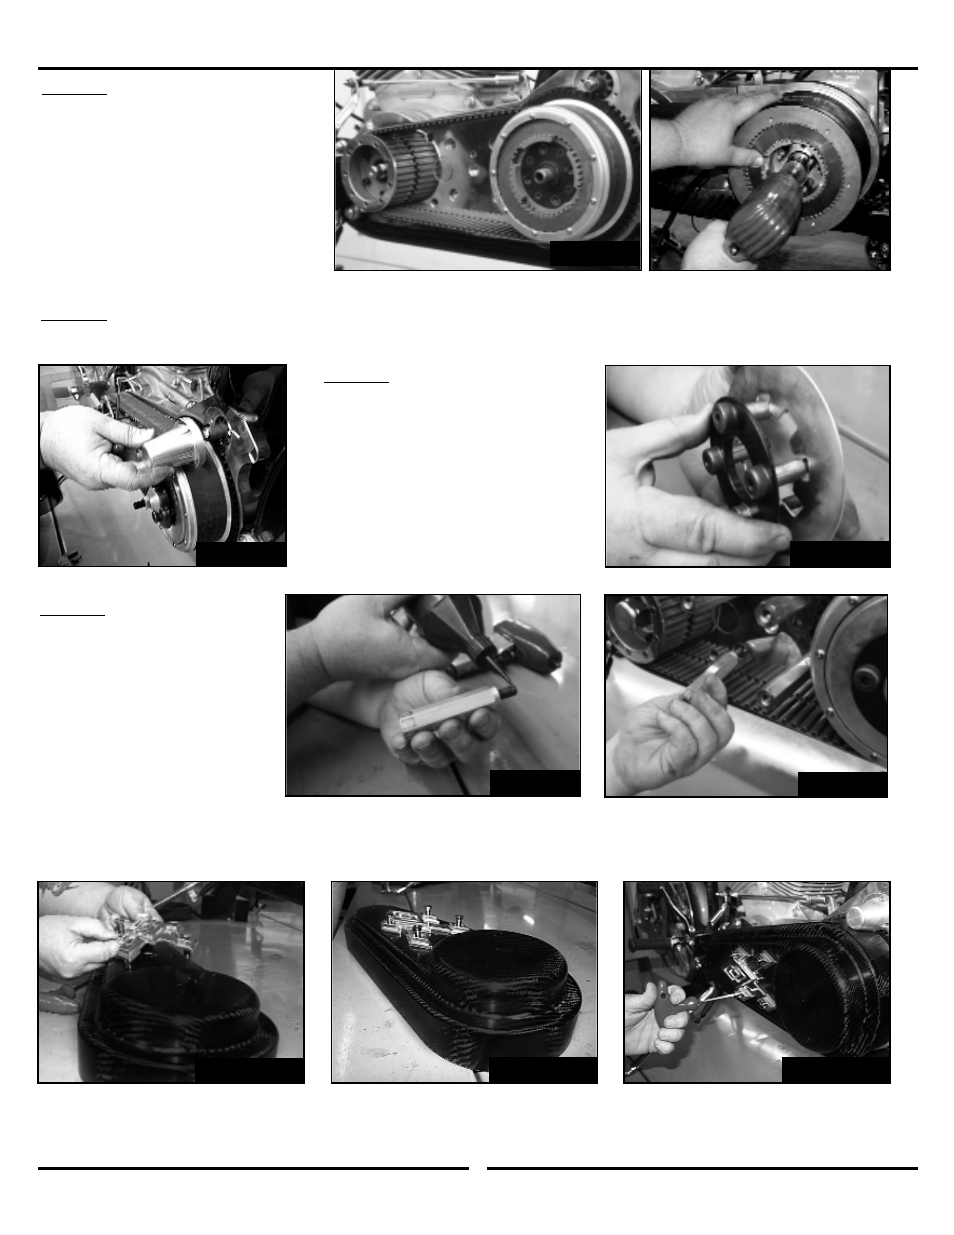
Figure 15
4
Step 12
Remove both pulleys after align-
ment is done and install primary
belt. Use 3 drops of blue thread-
locker on both engine nut & clutch
hub nut then torque the engine nut
to 150-165 ft. lbs. and the clutch
hub nut to 70-80 Ft. Lbs.
(See figure 14)
Step 13 Install starter support housing using (3 each) 10-24 x .500 socket head cap screws.
Use 1 drop of blue threadlocker and tighten.
(See figure 15)
Step 15
Install (4 each) stand-off
s
using 1 to 2 drops of blue
threadlocker & torque to 40
ft. lbs.
(See figure 17 & 18)
Install outer belt cover and
aluminum outer support with
4 (each) 3/8-16 x 1.000
socket low head cap screws
using 1 to 2 drops of blue threadlocker and torque to 40 ft. lbs.
(See figures 19A, 19B, 19C)
.
Re-install the battery & reconnect cables. Make one final check of all work that has been done.
Figure 16
Figure 17
Figure 19A
Figure 19B
Figure 19C
Figure 18
Step 14
Install aluminum pressure plate
followed by the diaphragm
spring/spring retainer & (4 each)
shouldered screws with 1 drop of
blue threadlocker and torque to
40 ft. lbs.
(See figure 16)
Adjust clutch per Pro-Clutch
instructions. (
See page 5)
Figure 14
N O W YOU ARE READY TO ENJOY YOUR NEW GENUINE SLIMLINE BELT DRIVE