Pg.6, Drive shaft modifications to original unit – Rugged Ridge NP231 Slip Yoke Eliminator (SYE) Kit, 88-06 Jeep Wrangler User Manual
Page 6
STEP 16: Front and rear output yoke, seal, and washer installation. Slide the yoke seals
provided in the kit into position. Prelube the surfaces on the yokes where both the inner
and outer seals will be. Slide the yokes on and tighten the retaining nuts to 140-150
ft/lbs.
STEP 17: Install the speedometer drive housing into the new output housing. Refer to
the marks you made in step 2 for proper location. The housing needs to be positioned in
one of four rotation positions depending upon speedometer gear tooth count. Proper
positioning can also be determined by rotating the speedometer housing until proper
engagement is achieved. Be sure to place a small amount of RTV sealant around the
housing o-ring.
STEP 18: Reinstall the transfer case into the vehicle. Be sure to fill it to the
recommended level with the proper fluid. Reconnect all the required items like the front
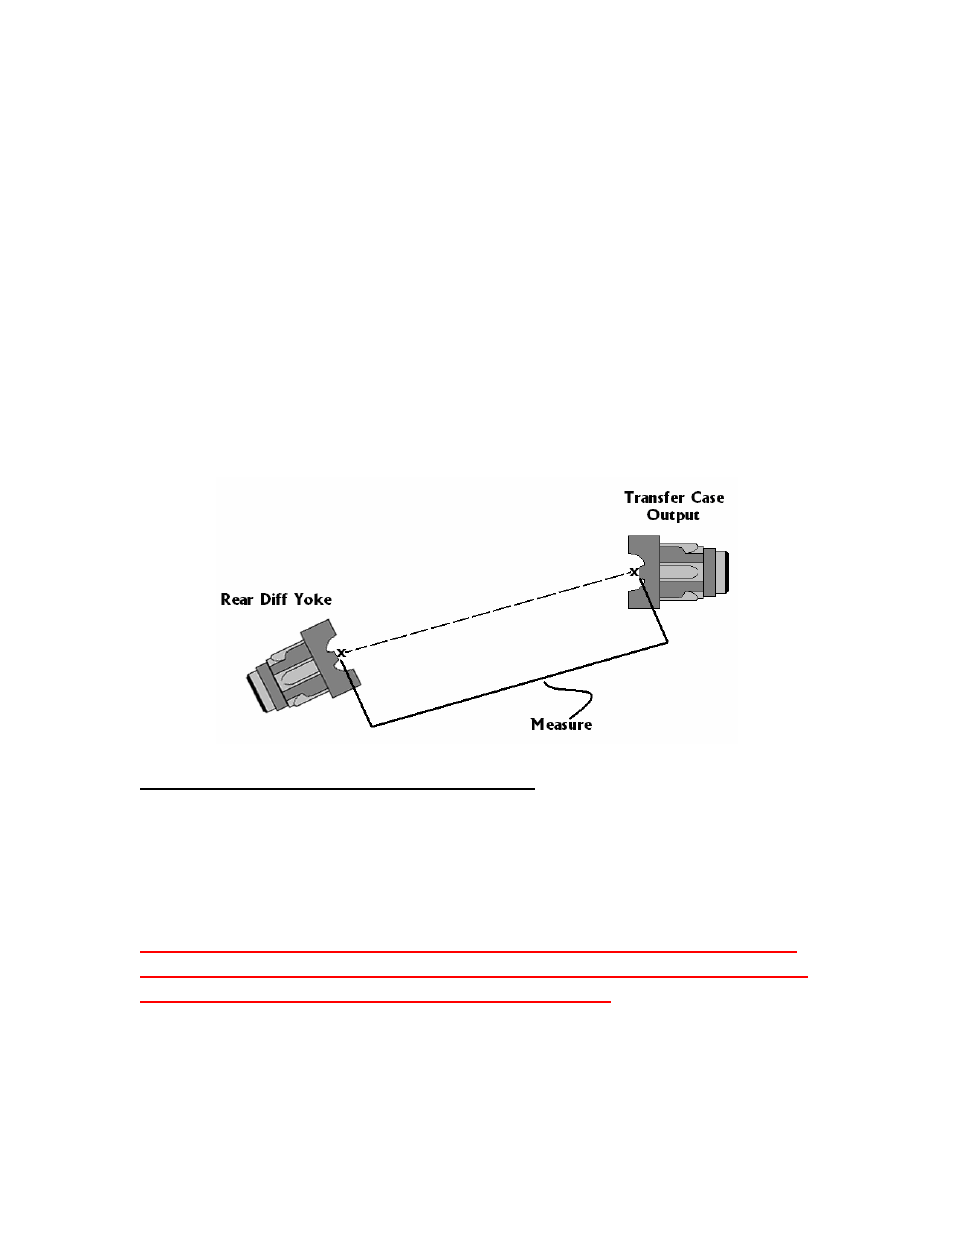
drive shaft, shift linkages, speedometer wiring or cable, etc. Take measurements for the
required CV-equipped rear drive shaft. Measure a straight line from the transfer case rear
output yoke to the rear pinion yoke to determine the required length of your new
driveshaft.
Drive shaft modifications to Original Unit.
The modification of your drive shaft should be performed by a local driveline repair shop
that is capable of balancing your finished assembly.
Note: Use a C.V. joint & a long slip spline style shaft assembly to avoid problems
with lifted vehicles
.
If you wish to have a custom driveshaft fabricated you will need to get your new
driveshaft measurement length. Use the measurement procedures listed in step #18.
Note: for proper C.V. type drive shaft operations, the rear differential
yoke should be pointing at the transfer case output yoke. This should be
checked under normal driving conditions and load
Pg.6