Barksdale Series 20313 User Manual
Page 9
Barksdale, Inc. 3211 Fruitland Avenue, Los Angeles CA 90058 (800)835-1060 www.barksdale.com Bulletin No. 272378-B, 4-3-14
9
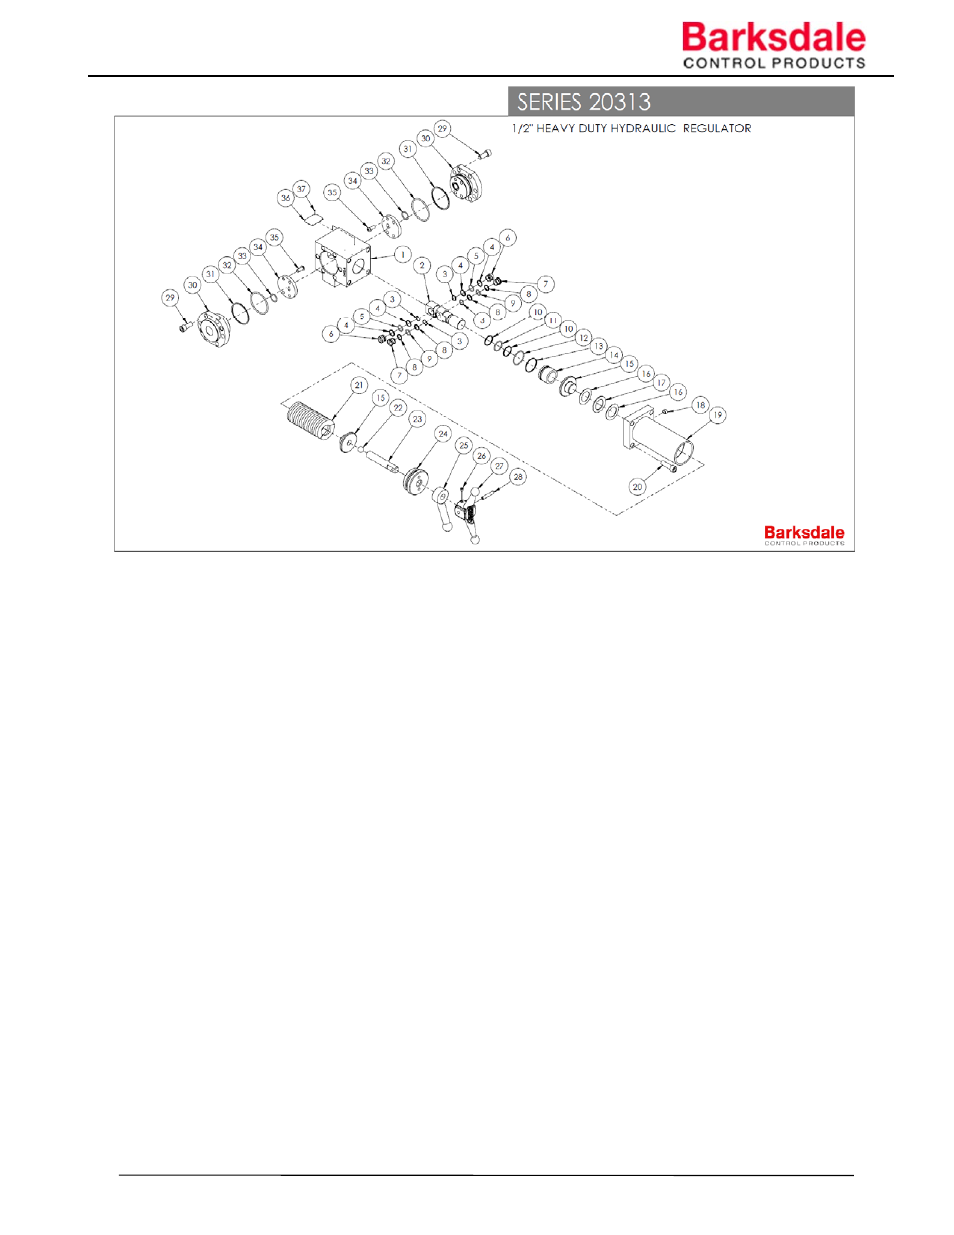
Disassembly
1. Disconnect all fittings from the regulator and pilot motor
2. Turn locking device(25) counterclockwise first. Turn handle(27) counterclockwise to remove load from
compression springs
3. Remove spring housing bolts(20)
4. Lift the spring housing assembly(19) together with spring(21) and SPRING gland(15)
5. Remove flanges (30)
a. Remove bolts(29) from inlet(30) and vent(30) flanges, pull the flanges out
b. Note: If using major repair kit, remove bolts (35) from inlet/vent flange (30). Replace inlet/vent plates (34)
6. Remove piston gland (14) and push out the slide assembly(2, 14) towards the top, (14) and slide(2)
7. Take out pressure seals(6, 7) from slide(2)
8. Uninstall all soft goods (o-rings and back-up rings)
Cleaning and Inspection
1. Thoroughly clean and inspect the slide(2) and piston assembly(2, 14). Look for signs of wear, replace if
necessary
2. Thoroughly clean and inspect the wear plates (34) on the internal side of the internal side of the
inlet/vent(30) flanges. Look for signs of wear or scratching, replace if necessary.
3. Inspect all pressure seals(6, 7) for wear, if signs of damage, replace.
4. Check all o-rings, back-up rings and washers, replace if necessary.
Re-assembly
1. Lightly lube all soft goods from Repair Kit with petroleum based lube (mobile lube)
2. Re-install all o-rings (wherever back-up rings are used, refer to exploded view drawing to assure proper
orientation of back-up rings in relation to o-rings)
3. If using major repair kit, ensure o-rings (33,31) are installed prior to aligning inlet plate (34) to inlet flange
(30) and secure with bolts (35), torque to 35-40 in-lbs. Repeat steps vent side (ensure proper alignment).
4. Re-install pressure seals(6, 7) and wave washers(3) back into the slide(2) (make sure back-up o-rings are
not extruding)
7. Insert slide(2) and piston assembly(2,12) from top face
8. Insert the piston gland(14)
9. Insure up-down movement of slide by hand to make sure it travels freely