Martin Universal Design 92-3010 Weber Monster Amalfi Studio Easel User Manual
Page 4
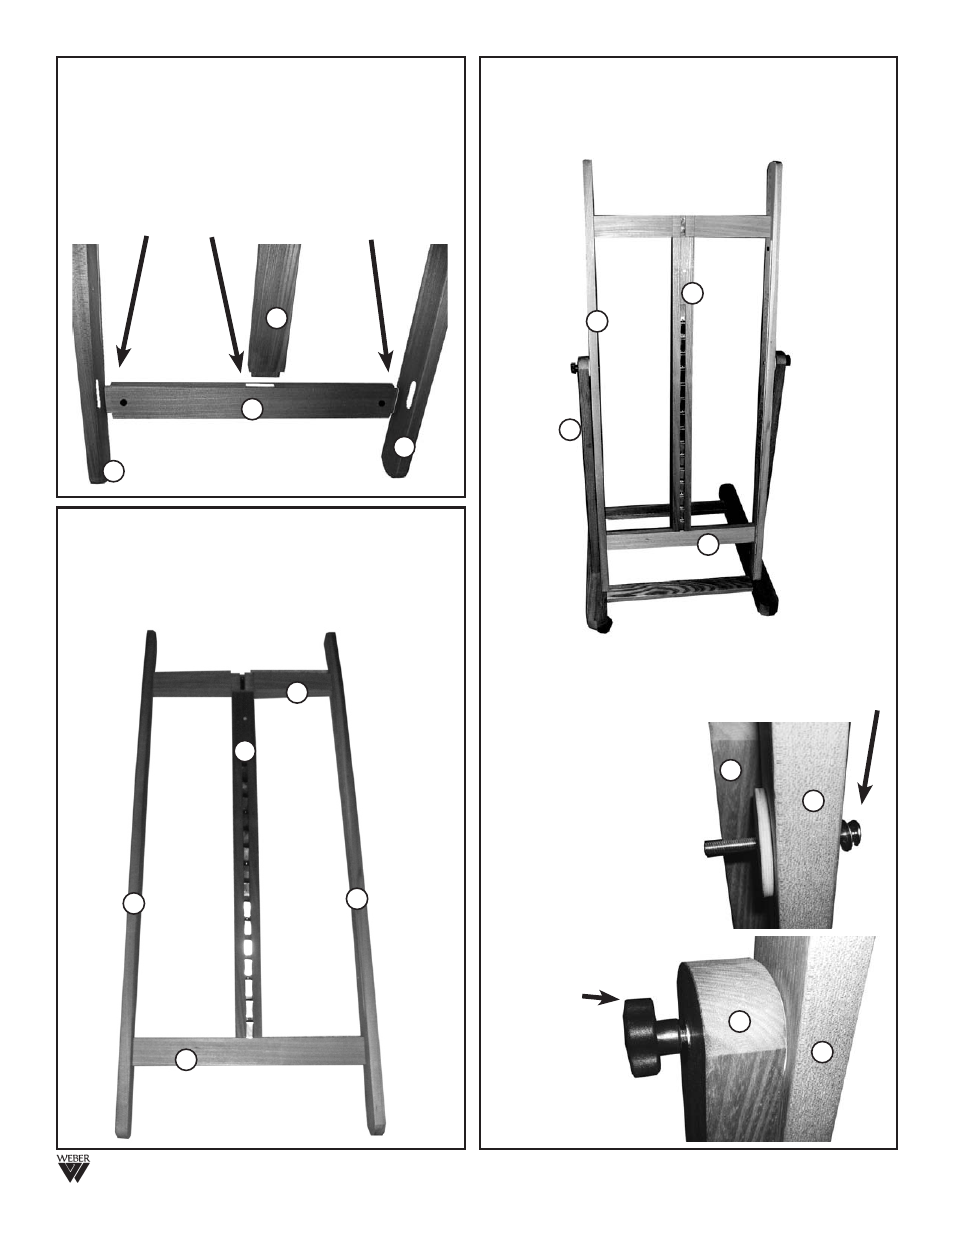
STEP 10. Finish assembling the H-Frame by attaching
the lower cross member
(8) to the ratchet column (7) by
inserting the ratchet column down into the oval hole of
the lower cross member. Secure by fitting the lower cross
member into the oval holes of the channelled sides
(6).
See FIG 10
. Secure this step, using two 6 X 60mm bolts
and Cams as previously described in earlier steps.
(as in Step 3)
STEP 12. Attach assembled H-Frame to easel uprights
found on assembled base. Make sure the metal ratchet
front is facing out towards the front of the easel.
This step involves securing the H-Frame assembly to the
uprights of the easel base as shown in FIG 12.
FIG 10
STEP 11. Your assembled H-Frame should look like
FIG 11.
NOTE: This is the front view of the assembled
H-Frame
FIG 11
7
6
6
8
7
6
6
8
9
Page 4
FIG 12
STEP 13. To secure the H-Frame to the uprights, have
one person hold the H-frame while the other inserts one
part
(G) 6 X 70mm Bolt through the inside edge of the
channelled sides and though the other side, then attach
one wood washer to the bolt
end. See FIG 13a.
Continue through the
upright and secure with
metal washer and black knob.
See FIG 13b.
REPEAT with other side
of H-Frame to
complete this Step.
FIG 13a
FIG 13b
7
6
8
3
6
3
6
3
The completed
assembly should look
like FIG 13b.