Installing the light bulb & glass shade – Minka Group F889-BNW User Manual
Page 18
10
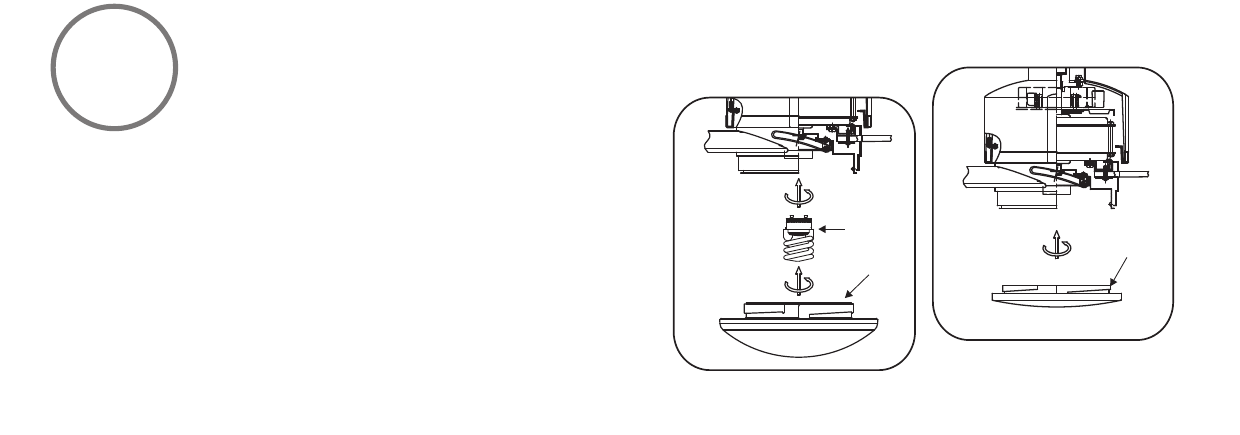
Fig. 18
ATTENTION: The Energy Policy Act of 2005 requires this fan to be
equipped with a 190 watt limiting device. If lamping exceeds 190 watts,
the ceiling fan's light kit will shut off automatically.
Step 1. Install 1x26 Watt GU24(MLS26GUWW) compact fluorescent bulb
(included). Note: This fan and bulb is not designed to dim.
Step 2. Raise glass shade up against bottom of fan housing and secure it to
the fan by turning the glass shade clockwise until snug. DO NOT
OVERTIGHTEN. (Fig. 18)
NOTE: The metal light cover included with your fan is an option to replace
the glass for the light in the event that you prefer not to use the light
feature of your fan. The metal light cover is not necessary for the light
operation; it can be saved for later use if desired. (Fig. 19)
NOTE: Please remove the bulb before installing the optional switch cup
cover.
INSTALLING THE LIGHT BULB & GLASS SHADE
GLASS SHADE
BULB
Fig. 19
METAL
LIGHT
COVER
600-1
(PL019)
600-1
(PL019)
PL-190C