Ultra space saver – American Bicycle Security Company Ultra Space Saver User Manual
Page 4
American Bicycle Security Company
P.O. Box 7359
Ventura, CA 93006
Ph: (800) 245-3723 or (805) 933-3688
Fax: (805) 933-1865
*Tools Needed for Wall Mount Installation
9/16” Wrench/Socket
3/8” or 1/2” Masonry Drill Bit
Tape Measure
Drill (Hammer drill recommended)
Hammer
Level
Marker or pencil
1. Lay out parts on the floor where unit is to be installed and
be sure you have all necessary parts.
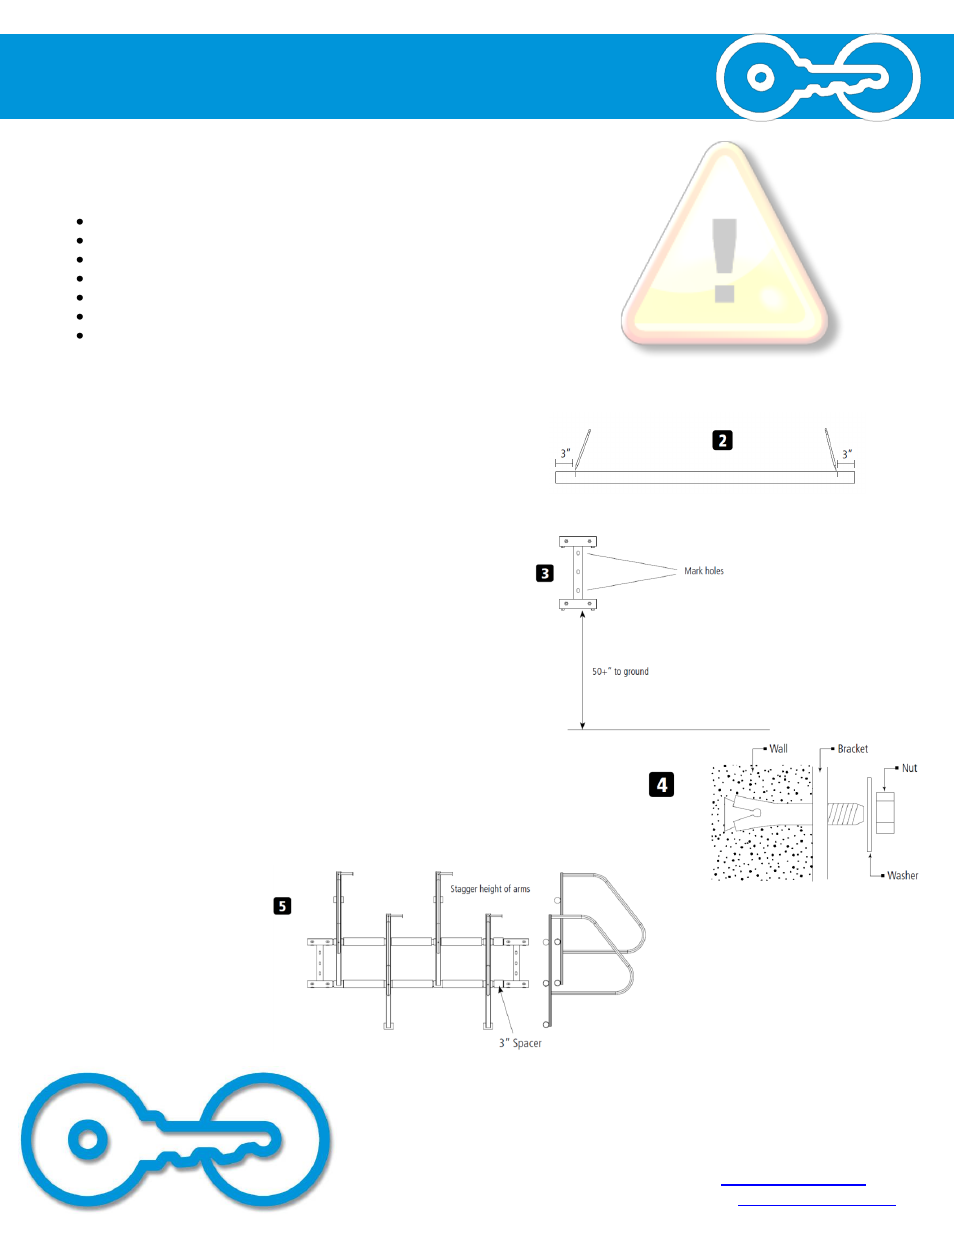
2. On galvanized cross beams, Place a mark three inches
from each end. This mark will show you how far to slide
the cross beam into the wall bracket. See figure 2.
3. Place first wall bracket on wall where you want to install
the bike rack. Bottom of bracket should be at least 50”
from ground. Mark holes for drilling. See figure 3.
4. Drill Holes into wall, put the wall bracket back up and
insert wall anchors through holes in bracket and set the
anchors. For setting the anchors and diameter and depth
of holes, follow instructions sent with the anchors. Make
sure bracket is level. See figure 4.
5. Thread 3/8” by 3/4” tightening bolts into holes in bracket.
Insert crossbeams into bracket. Slide on arms and
spacers, make sure arms are staggered. At end of last
arm place 3” spacers and install end bracket, making sure
cross beams are level. See figure 5
6. If installing more than one set of Ultra Space Saver arms,
continue from last installed wall bracket and repeat steps
3-5 above.
Ultra Space Saver
Installation
Before installing make sure the wall is strong
enough to accommodate the rack fully
loaded with bikes. Steel stud walls are NOT
suitable for installation.
Installation Steps: