Installation – Pitco Frialator CRTE Counter Top Rethermalizer User Manual
Page 5
INSTALLATION
3
L20-259, rev. 7 (09/13)
1.2. INSTALLATION
CLEARANCES
The clearances shown below are for combustible and non-combustible installations and will allow for
safe and proper operation of your appliance.
In addition to the above clearances there must also be at least 16 inches (40.64cm) of aisle space in
front of the unit.
1.3. INSTALLATION
TO
COUNTER
After the appliance is in its permanent location, check to ensure that it is level. Level the counter as
needed.
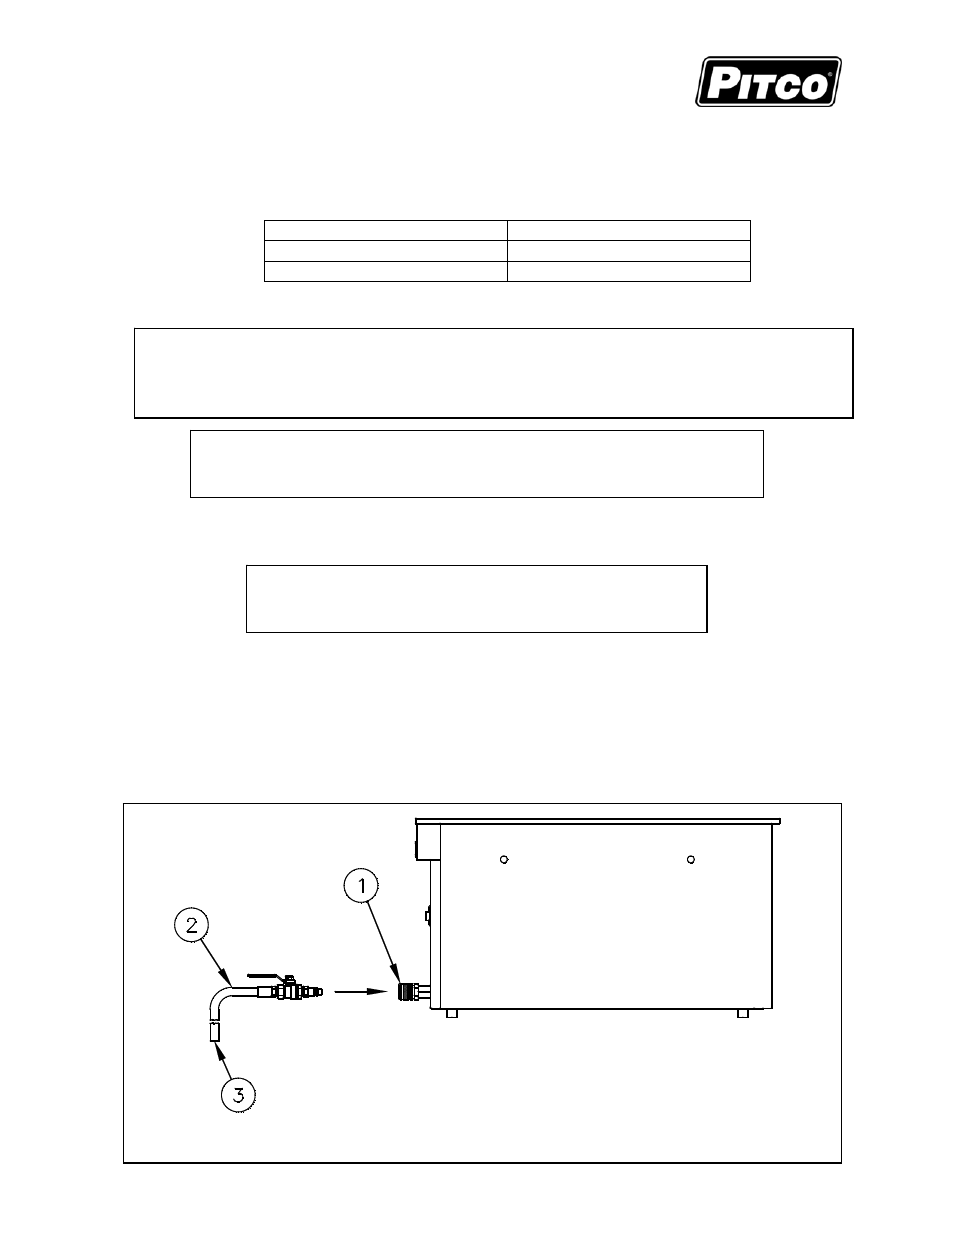
1.4. DRAINAGE
CONNECTIONS
The plumbing installation should be done by a licensed plumber and must comply with local and national
codes. The drainage connection is located at the front of the appliance in the bottom left corner and is
equipped with a 3/8" quick disconnect.
This appliance has a drain that can be inserted into a drainage system. The drain hose must be inserted
into the tank quick disconnect fitting before the appliance can drain correctly. Drain connections for this
appliance are to be made at the end of the 36” (91.44 cm.) long drain hose (3/8” (0.95 cm.) ID tubing).
Combustible Construction
Non Combustible Construction
Inches
(centimeters)
Inches (centimeters)
Back
6.0" (15.24cm)
0.0" (0.0cm)
Sides
6.0" (15.24cm)
0.0" (0.0cm)
Counter
4.75" (12.07cm)
0.0" (0.0cm)
1) Tank Quick Disconnect Fitting
2) Drain Hose
3) Drainage outlet
WARNING
DO NOT obstruct the flow of ventilation, or air openings around the appliance. Adequate
clearance around the appliance is necessary for servicing and proper component ventilation.
Ensure that you meet the minimum clearance requirements specified in this manual.
WARNING
The appliance should be secured to the counter top to prevent accidental
moving of the appliance and the splashing of hot liquid on the operator.
WARNING
DO NOT perform leveling procedure when appliance is in
operation or full of hot liquids. Serious injury could result.