Nstallation, Election, Reparation – Nor-Lake envIro-lIne User Manual
Page 14
12
© 2013 Nor-Lake, Inc 07/13 Rev. F 132617
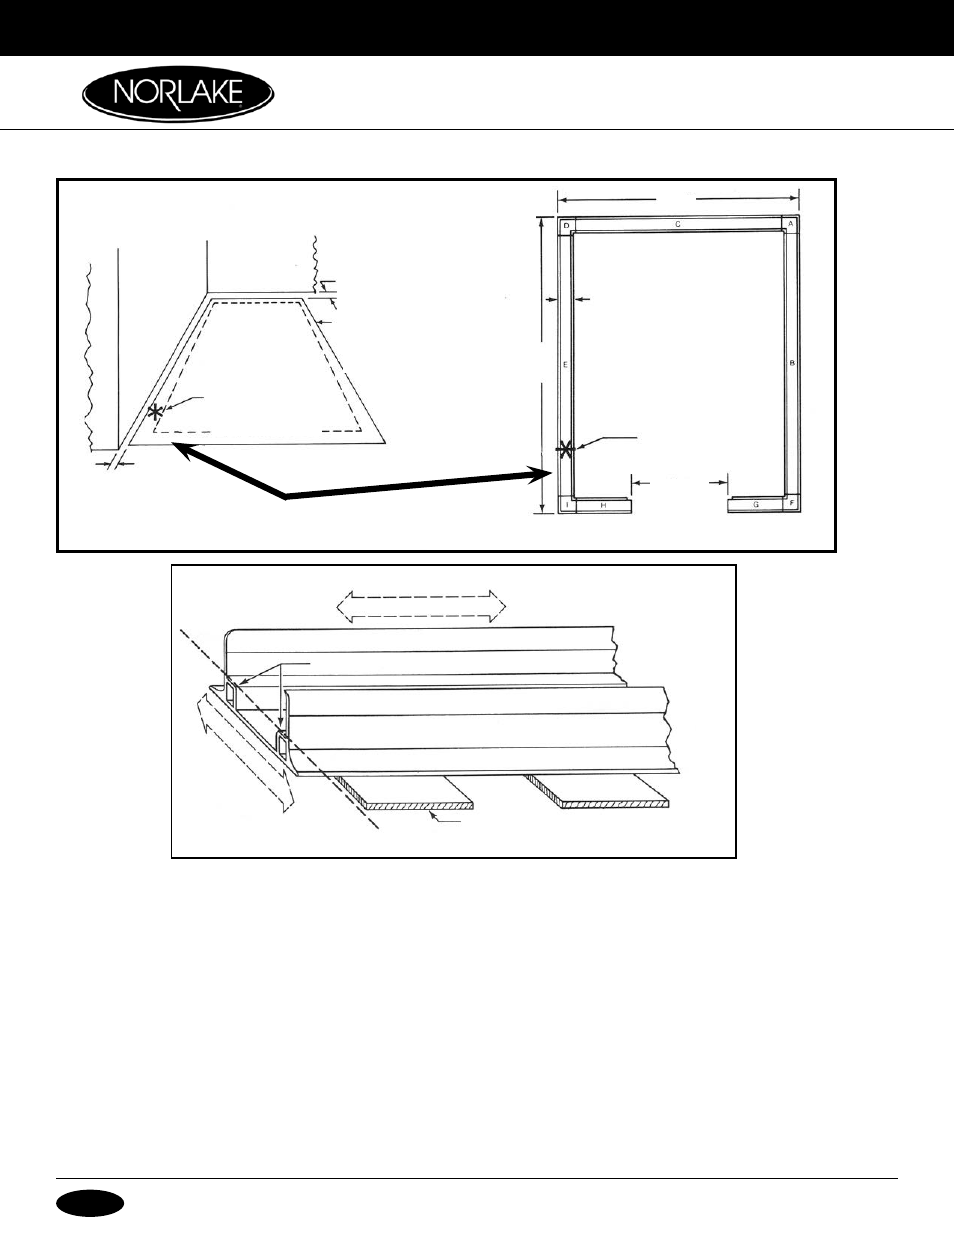
LEVEL
SHIMMING MATERIAL
LEVEL THOSE SHOULDERS IN BOTH DIRECTIONS
EXISTING WALL
EXISTING WALL
HIGHEST POINT
(EXAMPLE ONLY)
HIGHEST POINT
(EXAMPLE ONLY)
2’’ MINIMUM
2’’ MINIMUM
EXACT DIMENSIONS
OF SCREED ASSEMBLY
(REFER TO SCREED
DIAGRAM)
OVERALL SCREED WIDTH THAT
CONTACTS THE FLOOR IS 5 1/2’’
5 1/2’’
8’-1 1/2’’
39 1/2’’
After the first screed section is positioned, it must be LEVELED PERFECTLY not only over its length
but, across its width, as well. To achieve this, shimming material will probably be required. Vinyl floor
tile is ideally suited for this purpose.
However, other materials that are resistant to rotting or compression are
acceptable.
IMPORTANT! EVERY SECTION OF SCREED MUST BE SUPPORTED AT LEAST EVERY
12’’ BY EITHER THE BUILDING FLOOR OR BY SHIMMING (Figure 3).
Assuming that the first screed section has been perfectly leveled, refer to the screed diagram and select an
adjoining screed section and level it perfectly in both directions, shimming wherever necessary. Continue
leveling the remainder of the screed sections until the entire assembly is in position. Check the assembly
to make sure that the outer edges are located exactly on the drawn outline on the building floor.
Figure 3
Figure 2
Sealers may also be
numbered by part
number
(Screed Diagram)
Note: All
sealers lettered
alike are
interchangeable.
Note: Corners are shipped in two pieces.
Installer to silicone together during the installation
W
alk
-i
n
i
nsTallaTion
- s
iTe
s
elecTion
, B
ase
P
RePaRaTion