Step 7 apply nyogel & plug n’ click click – Balboa Water Group Plug N' Click Heater On An Older Spa System User Manual
Page 2
PLUGNCLICK 06/24/2014
©2014 Balboa Water Group. Single Source Solution. All rights reserved.
1382 Bell Avenue | Tustin, CA 92780 | p 714.384.0384 | www.balboawater.com
We reserve the right to change technical data without further notice.
42269_A
STEP 7 APPLY NYOGEL &
PLUG N’ CLICK
CLICK
Cable 25263
Cable 25696
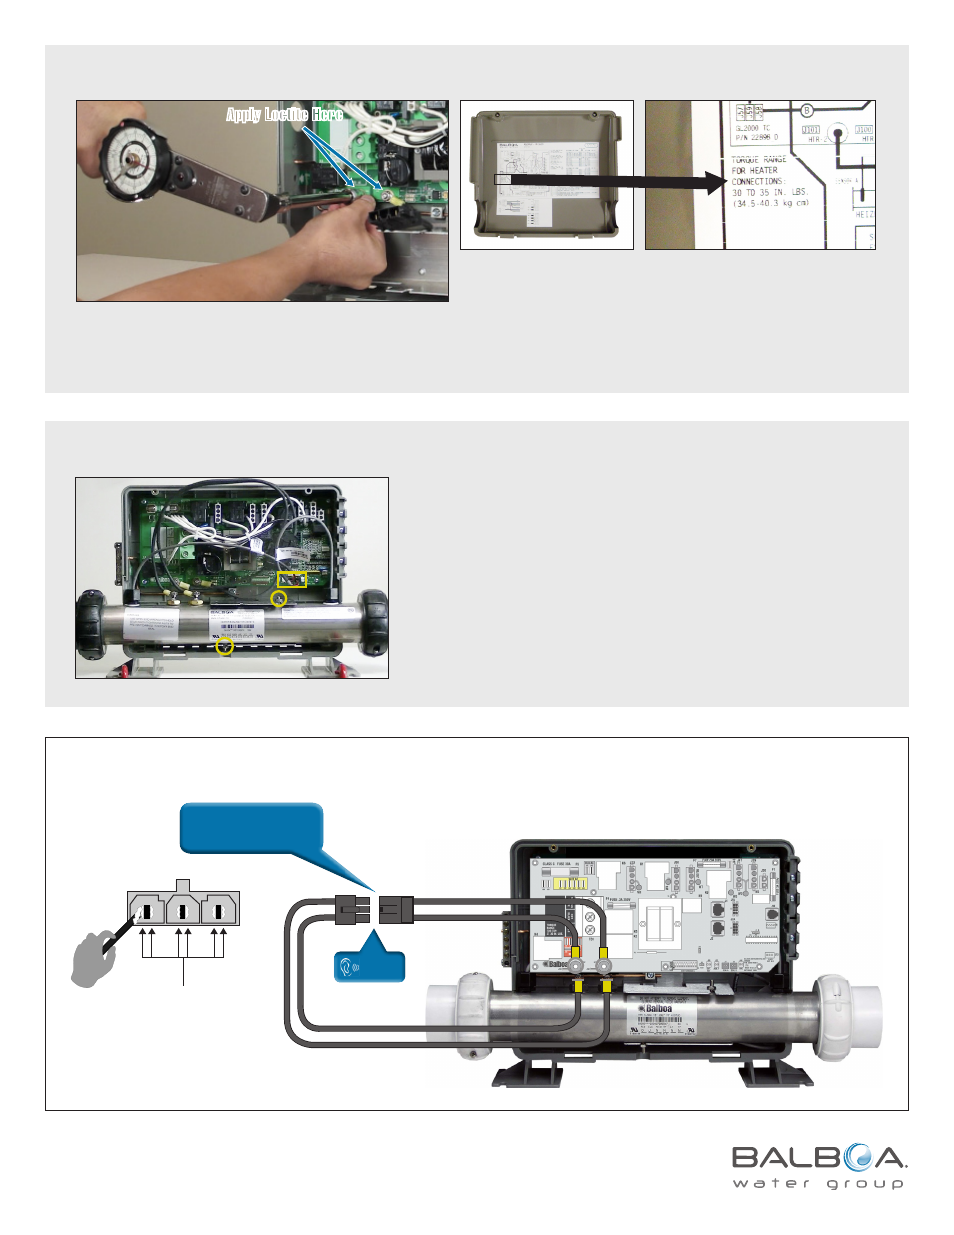
– Attach the Heater Adapter Cable (25696) onto the circuit board (where the copper straps were attached).
– Use a torque wrench to tighten the 2 nuts to manufacture specification. Example the system above shows the
specification as 30-35 lb inch. Then, add 1 drop of Loctite to each nut to seal.
– Place your new heater into the heater rack. Insert the
2 heater sensors and tighten the 2 heater nuts.
STEP 5 INSTALL HEATER CABLES AND TORQUE TO MANUFACTURE SPECIFICATION
STEP 6 INSTALL NEW HEATER AND TIGHTEN THE 2 NUTS
Note: Torque specifications shown above.
Apply NYOGEL 760G here.
Applying NYOGEL
Here
– Use a flat stick apply NYOGEL 760G to all 3 sides of the heater power male
and female terminals.
– Plug N’ Click the 2 cables. Place the cover back on and tighten the 2 screws.
Apply Loctite Here