Connections battery installation/replacement, Connections, Battery installation/ replacement – Panasonic KXTGA717EX User Manual
Page 8
8
Preparation
Connections
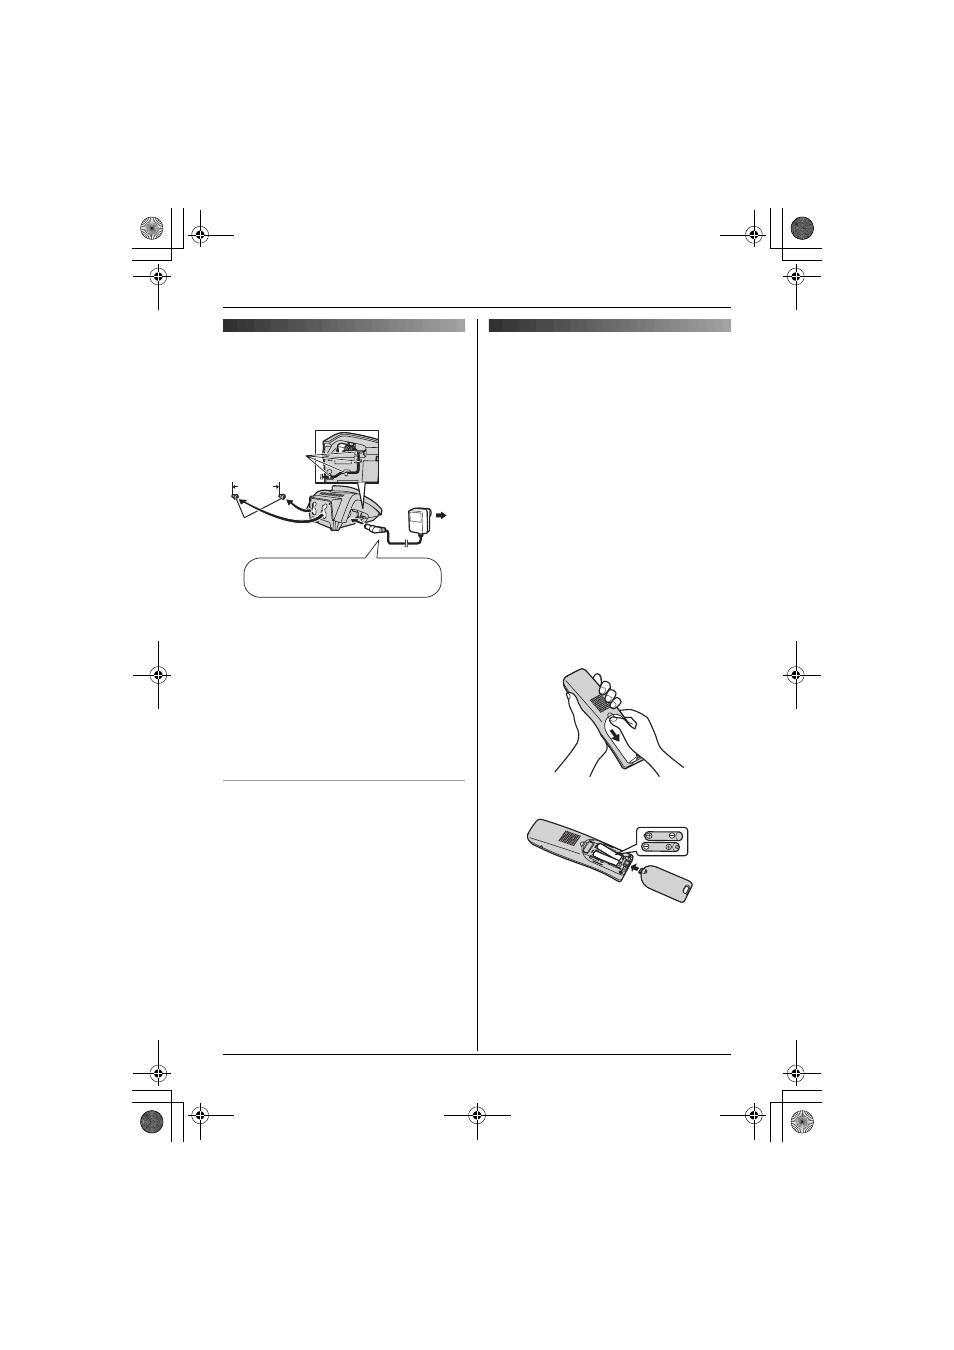
Connect the AC adaptor to the charger and
route the cable as shown. The charger can
be mounted on the wall, if required.
Note:
L
The AC adaptor must remain connected
at all times. (It is normal for the adaptor to
feel warm during use.)
L
The AC adaptor should be connected to a
vertically oriented or floor-mounted AC
outlet. Do not connect the AC adaptor to a
ceiling-mounted AC outlet, as the weight
of the adaptor may cause it to become
disconnected.
Location
L
For maximum distance and noise-free
operation, place your base unit:
– away from electrical appliances such as
TVs, radios, personal computers or
other phones.
– in a convenient, high and central
location.
Battery installation/
replacement
Important:
L
Use only the included rechargeable
batteries noted on page 3, 5.
L
When replacing batteries, we recommend
using the Panasonic rechargeable
batteries noted on page 4, 5.
L
Wipe the battery ends (S, T) with a dry
cloth.
L
When installing the batteries, avoid
touching the battery ends (S, T) or the
unit contacts.
1
Press the notch on the handset cover
firmly and slide it in the direction of the
arrow.
L
When replacing batteries, remove the
old batteries positive (S) end first.
2
Insert the batteries negative (T) end first.
Close the handset cover.
(220–240 V,
50 Hz)
Screws
25 mm
Hooks
Use only the included AC adaptor.
TGA715EX_717EX(e-e).book Page 8 Wednesday, August 30, 2006 2:09 PM