Sony VGN-NW180J User Manual
Page 3
VGN-NW Series Optical Disk Drive
Replacement Instructions
P/N 989200136
Rev. B
3/3
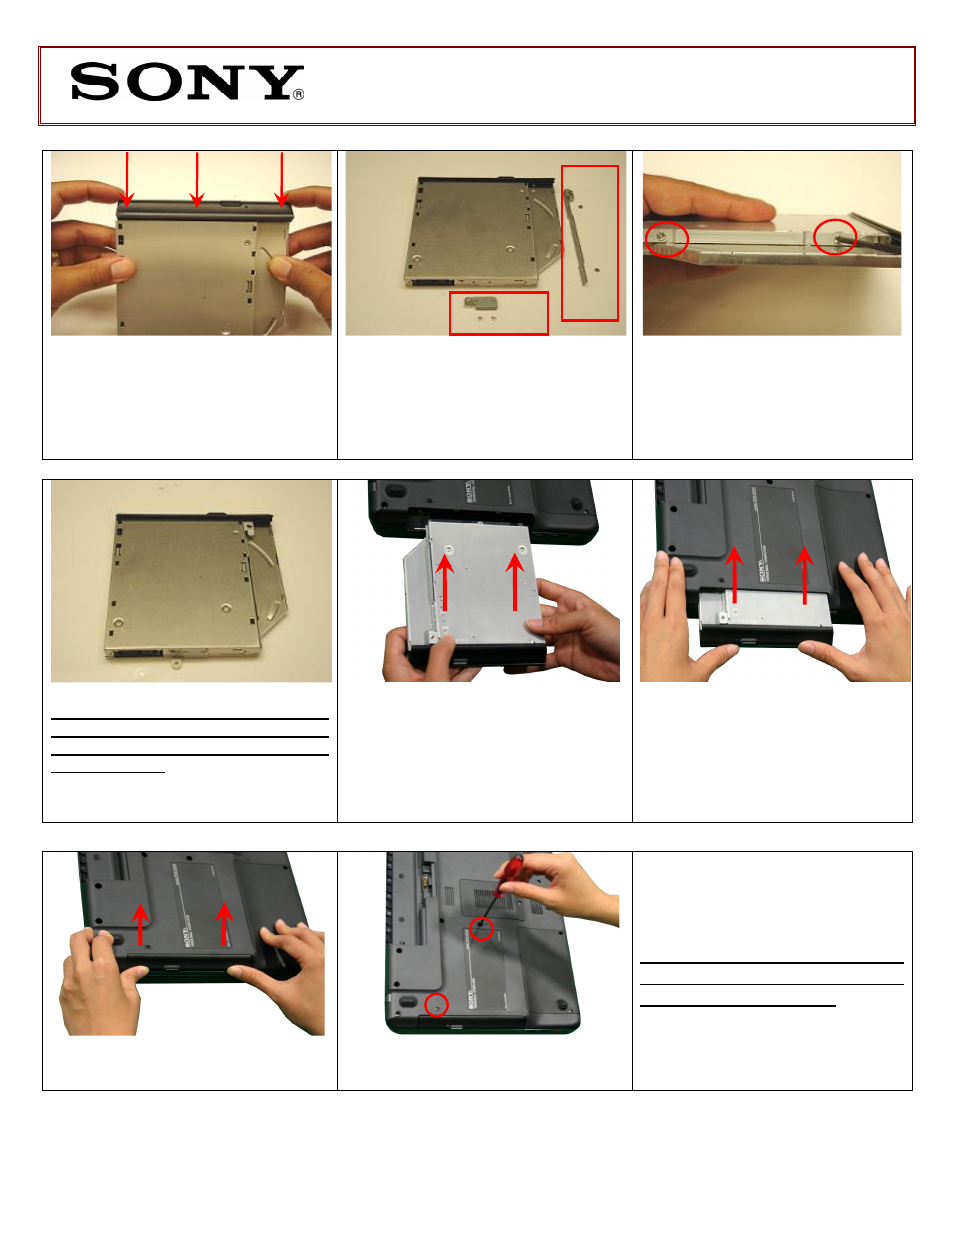
Step 12. Align the tabs on the bezel
with the tab holes located on the ODD.
Firmly but carefully press the bezel into
place.
Step 13. Position the new ODD (Label
side down) and identify the correct
bracket with the correct side it is to be
mounted. Notice the different shapes
for each bracket and the way the
available screw holes should align.
Step 14. Firmly but carefully hold the
ODD and begin the re-installation of
the screws & brackets.
Note! All brackets should sit flush.
The stamped letters located on the
brackets should all be facing the
same direction.
(ODD Reinstallation Steps 15-17)
Step 15. Hold the new ODD assembly
by the edges and align it with the
opening.
IMPORTANT! Install the new ODD in the
correct position as shown in picture.
Step 16. With an even force slide in
the new ODD Bay.
Step 11. Reinstall the battery pack
and AC Adaptor.
Return the old ODD to Sony
following
the
included
shipping instructions.
Step 17. Make sure the new ODD is
seated flush on the edge of the
computer.
Step 18. Reinstall the two screws
previously removed.
R
B