Sony HDR-CX7 User Manual
Page 53
53
E
d
it
in
g
5
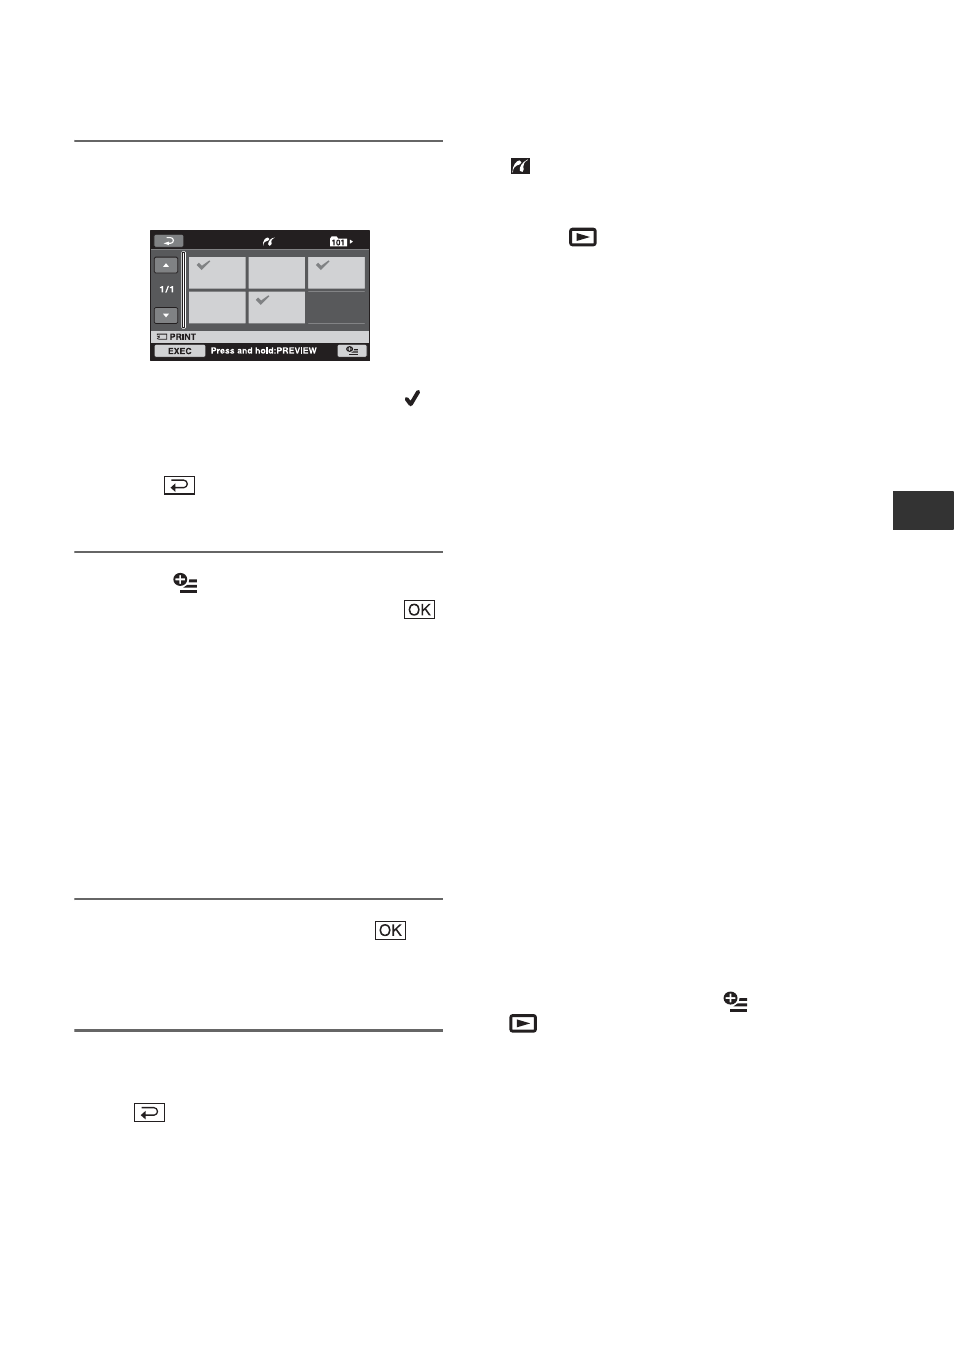
Touch the still image to be
printed.
The selected image is marked with
.
Press and hold the image on the LCD
screen to confirm the image.
Touch
to return to the previous
screen.
6
Touch
(OPTION), set the
following options, then touch
.
[COPIES]: Set number of copies of a
still image to be printed. You can set up
to 20 copies.
[DATE/TIME]: Select [DATE],
[DAY&TIME], or [OFF] (no date/time
printed).
[SIZE]: Select the paper size.
If you do not change the setting, go to
step 7.
7
Touch [EXEC]
t [YES] t
.
The image selection screen appears
again.
To finish printing
Touch
on the image selection screen.
b
Notes
• We can guarantee the operation of only models
that are PictBridge compatible.
• Refer also to the instruction manual of the
printer to be used.
• Do not attempt the following operations when
is on the screen. The operations may not be
performed properly.
– Operate the POWER switch.
– Press
(VIEW IMAGES).
– Remove your camcorder from the Handycam
Station.
– Disconnect the USB cable from the
Handycam Station or the printer.
• If the printer stops working, disconnect the USB
cable, turn the printer off and on again, and
restart the operation from the beginning.
• You can select only the paper sizes that the
printer can print.
• On some printer models, the top, bottom, right,
and left edges of images may be trimmed. If you
print a still image recorded in a 16:9 (wide)
ratio, the left and right ends of the image may be
trimmed widely.
• Some printer models may not support the date
printing function. Refer to your printer’s
instruction manual for details.
• The images described below may not be printed
out:
– The image edited by a computer
– The image recorded by other devices
– The image file exceeding 3 MB
– The image file larger than 2,848 × 2,136
pixels
z
Tips
• PictBridge is an industry standard established
by the Camera & Imaging Products Association
(CIPA). You can print still images without using
a computer by connecting a printer directly to a
digital video camera or digital still camera,
regardless of model or manufacturer.
• You can print a still image on the still image
playback screen by touching
(OPTION)
t
tab
t [PRINT].