Sony PCG-R505DLP User Manual
Page 64
Change text in this variable definition to document title.
64
4
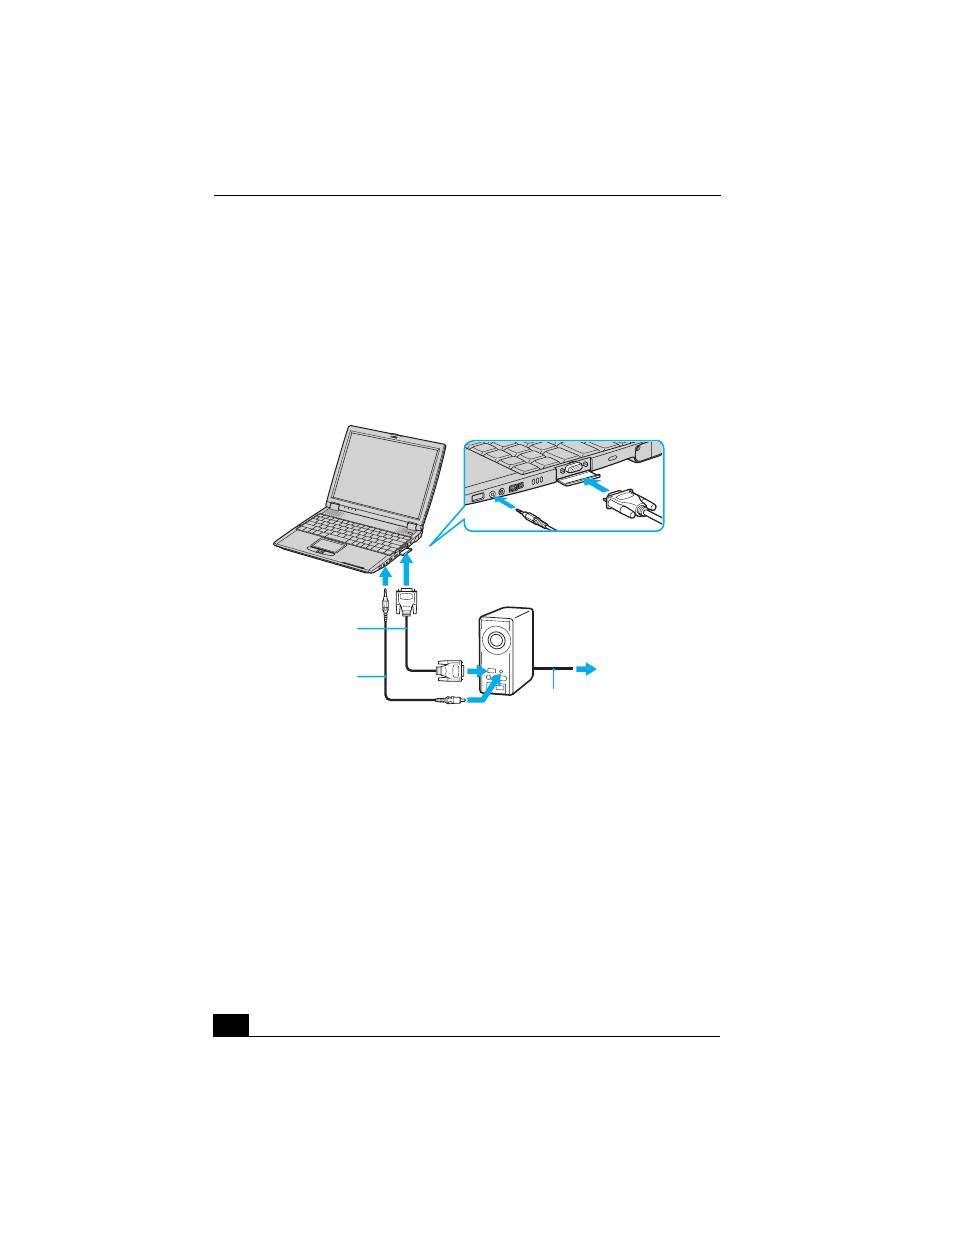
Plug the audio cable into the green Headphone jack on the right side of the
notebook, and make sure it is connected to the projector.
5
Press the key combination Fn + F7 to change the display to projector.
6
See the manual that came with your projector for more information on
installation and operation.
To connect a projector (such as a Sony LCD Projector) to your docking station
1
Make sure the projector is plugged into an AC outlet.
2
Open the rear panel of the docking station, and locate the monitor port.
3
Plug the RGB signal cable into the monitor port, and make sure it is
connected to the projector.
4
Plug the audio cable into the green Headphone jack on the right side of the
notebook, and make sure it is connected to the projector.
Connecting Projector to the Notebook
Projector
Power cord
To Headphones
Audio cable
To Monitor
RGB signal cable
(optional)
(optional)