Configuring the network settings of the receiver, Configuring the network settings, Of the receiver – Sony STR-DN840 User Manual
Page 36: Using a wired lan connection
36
US
* To select “SP B” or “SP A+B”, set the “SB
Assign” to “Speaker B” in the Speaker Settings
menu (page 90).
This setting is not available when headphones are
connected.
To cancel Auto Calibration
The Auto Calibration function will be
canceled when you perform the following
during the measurement process:
– Press ?/1.
– Press the input buttons on the remote
control or turn the INPUT SELECTOR
on the receiver.
– Press .
– Press SPEAKERS on the receiver.
– Change the volume level.
– Connect the headphones.
To set up the receiver
manually
See “Adjusting Settings” (page 86).
Configuring the network
settings of the receiver
The network settings for the receiver must
be set correctly to use the Home Network,
SEN, AirPlay, and PARTY STREAMING
functions.
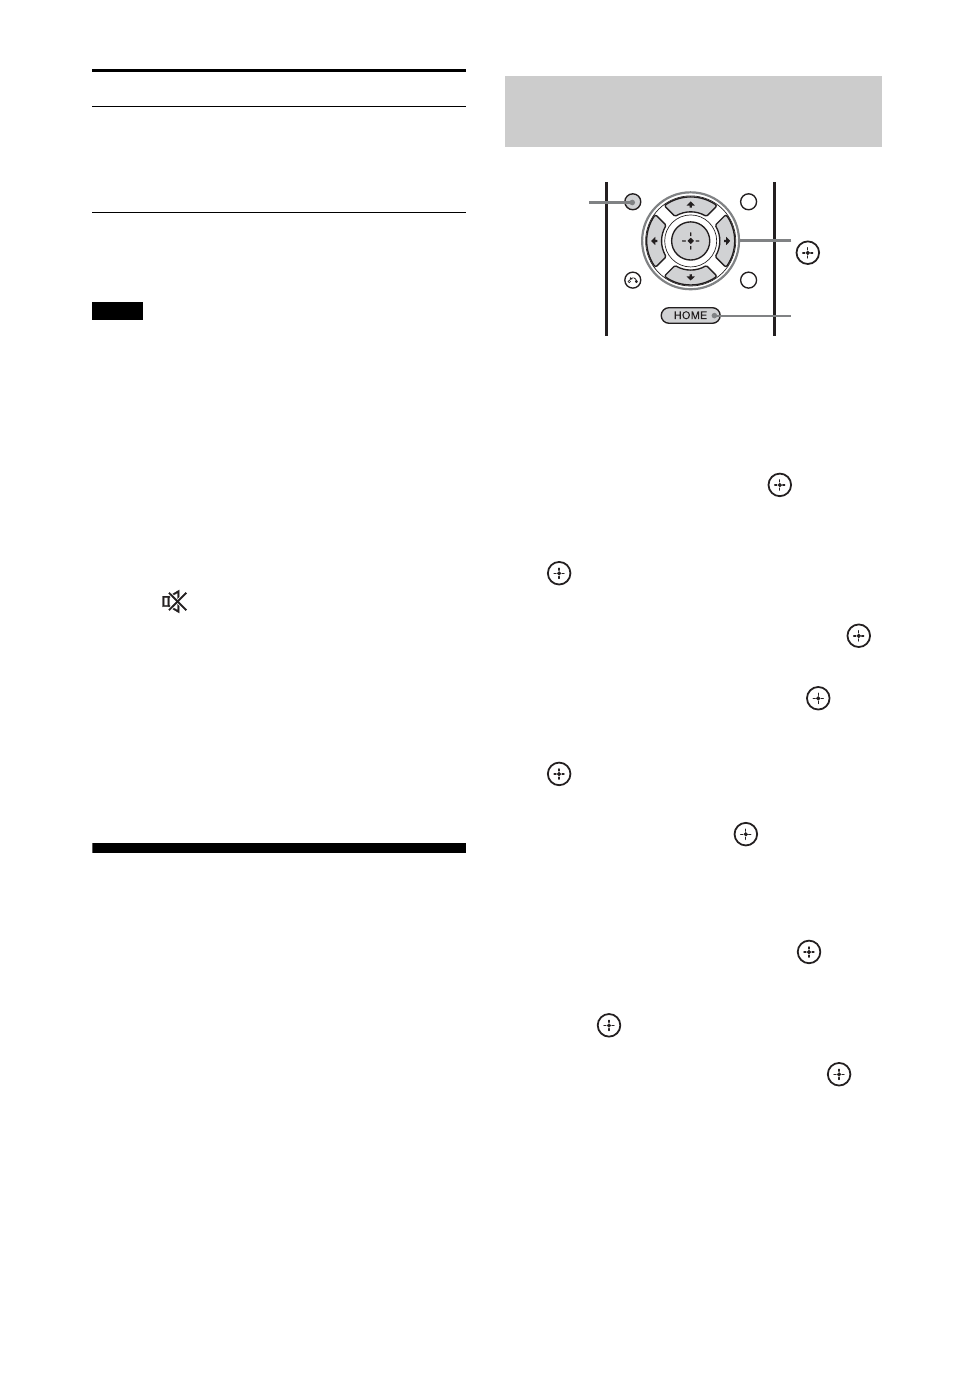
1
Press HOME.
The home menu is displayed on the TV
screen.
2
Press
V/v repeatedly to select
“Settings”, then press
.
3
Press
V/v repeatedly to select
“Network Settings”, then press
.
4
Press
V/v repeatedly to select
“Internet Settings”, then press
.
5
Press
V/v repeatedly to select
“Wired Setup”, then press
.
If “Change Settings?” appears on the
TV screen, select “OK”, then press
.
6
Press
V/v repeatedly to select
“Auto”, then press
.
IP settings information appears on the
TV screen.
When using a fixed IP address
Select “Custom”, then press
. The
IP Address Setting appears on the TV
screen.
Press .
Press
V/v to select the value
for “IP Address”. Press
b to key in the
value for the next position. Press
to
exit cursor.
Next, enter the value for “Subnet
Mask” and “Default Gateway”. Press
b for DNS Settings page. Then enter
the value for “Primary DNS” and
“Secondary DNS”.
“SPK OFF” appears on the
display panel.
No audio signals are output from
any speaker terminals.
Note
Indicators Selected speakers
Using a wired LAN
connection
HOME
DISPLAY
V/v/B/b,