Installing the formula8200 in the rack, If the rubber feet are attached, remove them, Attach the mounting brackets to the side of the – Allied Telesis FORMULA 8200 User Manual
Page 9: Align the holes in the mounting brackets to the, Attach the power cord to the back of the switch, Proceed to the section, “attaching a console to, Installing the formula 8200 in the rack
FORMULA 8200 Fiber Switch Installation Guide
5
Installing the FORMULA 8200 in the Rack
Caution
When mounting the switch in a rack, do not stack units directly on top
of one another.
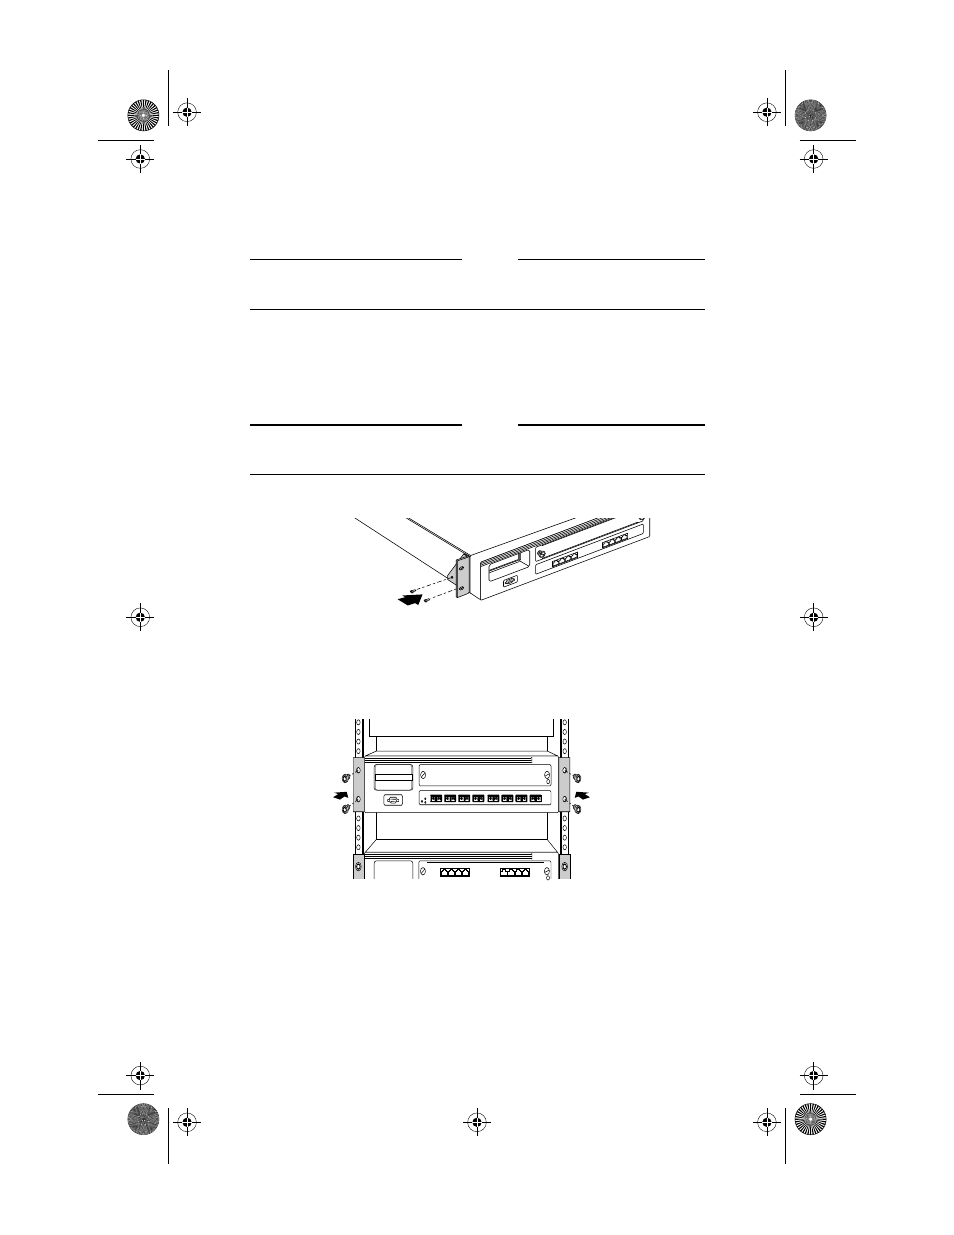
1.
If the rubber feet are attached, remove them.
2.
Attach the mounting brackets to the side of the switch using the M4 x
8 mm screws provided (Figure 4).
Caution
Use only the M4 x 8 mm screws provided. Longer screws may contact
the internal components, damaging the unit.
Figure 4:
Attaching the Mounting Brackets
3.
Align the holes in the mounting brackets to the holes in the rack
(Figure 5) and secure with the screws provided.
Figure 5:
Rackmounting the Switch
4.
Attach the power cord to the back of the switch. Then attach the other
end of the power cord to a grounded AC power outlet.
5.
Proceed to the section, “Attaching a Console to the Switch.”
Fiber_Book Page 5 Tuesday, February 17, 1998 1:43 PM