Allied Telesis AT-WDM02 User Manual
At-wdm02 management module installation guide, Overview, Related documents
Overview
The AT-WDM02 module is an optional management module for the
AT-WD1008 Wavelength Division Multiplexer. The module allows you to
manage the multiplexer from a terminal connected to the management
module or from a management station on your network. With the module
you can monitor the status of the ports on the multiplexer, enable or
disable ports, run diagnostics, and more. The AT-S47 Management
Software and the management interface, a menu-oriented program that
makes managing the multiplexer simple and easy, come pre-installed on
this optional management module.
10BASE-T POR
T
RS-232
TERMINAL
COL
RX
LNK
STATU
S
POWER
RESET
Related Documents
The Allied Telesyn web site at www.alliedtelesyn.com contains the most
recent documentation, software, and technical information for all of our
products. For details on the features and functions of your Allied Telesyn
AT-WD1008 chassis, refer to the following manuals from our web site:
❑ AT-WD1008 Gigabit Ethernet Wavelength Division Multiplexer
Installation Guide
PN 613-50367-00
❑ AT-S47 Management Software User’s Guide
PN 613-50371-00
Package Contents
Make sure the following items are included in the shipping package. If any
item is missing or damaged, contact your Allied Telesyn sales
representative.
❑ One AT-WDM02 Management Module
❑ One management cable
❑ This installation guide
❑ Warranty card
Installing the AT-WDM02 Management Module
1.
Power OFF the AT-WD1008 Multiplexer using the ON/OFF power
switches on the back panel of the unit. If the unit contains a
Redundant Power Supply (RPS), be sure to power OFF the RPS as well.
Caution
Installing the AT-WDM02 Management Module with the multiplexer
powered ON can damage the management module.
2.
Using a flathead screwdriver, loosen the captive screw that secures the
blank faceplate over the management module expansion slot and
remove the faceplate.
LNK TS
T
TX
RX
LNK TST
TX
RX
CH 3
TX
RX
RX
TX
CH 4
SNMP
MODULE
WEST
EAST
TX
RX
RX
TX
CH 5
TX
RX
RX
CH
POWER
SUPPL
Y A
POWER
SUPPL
Y B
WEST
EAST
NORM
AL
LNK TST
3.
Remove the AT-WDM02 Management Module from the shipping
package.
Caution
The management module can be damaged by static electricity. Be
sure to observe all electrostatic discharge (ESD) precautions to
avoid damaging the module. You should wear an antistatic wrist
strap and handle the module only by the edges or the front
faceplate.
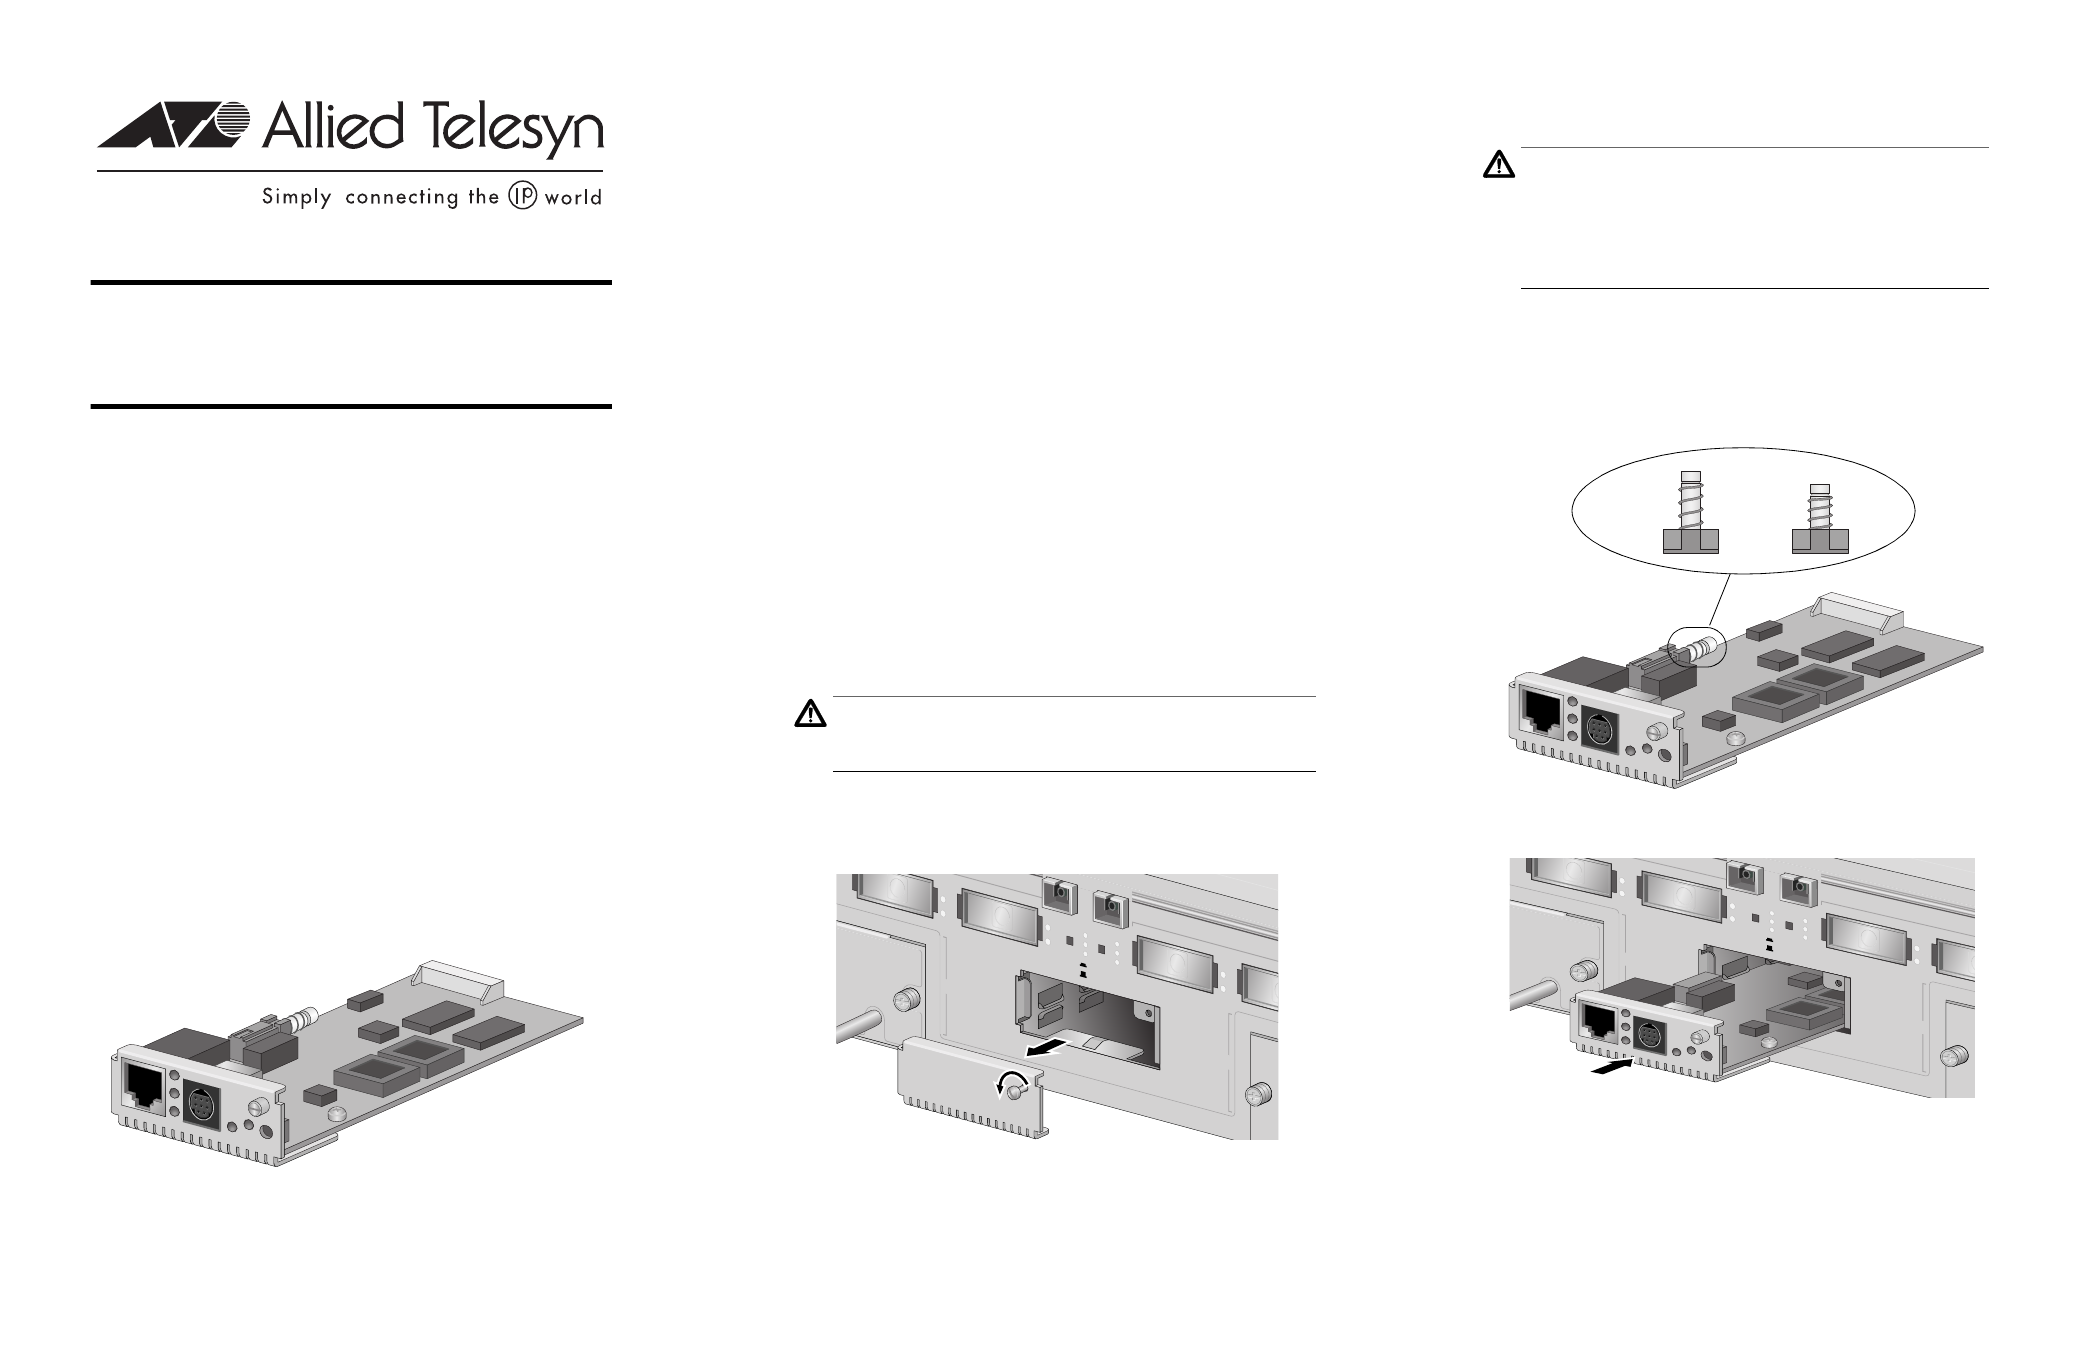
4.
If you intend to manage the multiplexer from a remote
management workstation on your network, set the 10Base-T port on
the module to either MDI or MDI-X using the switch located on the
module behind the 10Base-T port. This will eliminate the need for a
crossover cable. If you will be connecting the 10Base-T port to an
Ethernet switch or hub, the correct setting in most cases will be MDI.
5.
Slide the management module into the expansion slot.
10BASE-T POR
T
RS-232
TERMINAL
COL
RX
LNK
STATUS
POWER
RESET
MDI
MDI-X
LNK TST
TX
RX
LNK TS
T
TX
RX
CH 3
TX
RX
RX
TX
CH 4
SNMP
MODULE
WEST
EAST
TX
RX
RX
TX
CH 5
TX
RX
RX
CH
POWER
SUPPL
Y A
POWER
SUPPL
Y B
WEST
EAST
NORM
AL
LNK TS
T
10BASE-T PORT
RS-232
TERMINAL
COL
RX
LNK
STATUS
POWER
RESET
AT-WDM02
Management Module
Installation Guide
Allied Telesyn, Inc.
960 Stewart Drive, Suite B
Sunnyvale, CA 94085 USA
Tel 1 (408) 730-0950 • Fax 1 (408) 736-0100
Visit our web site at: www.alliedtelesyn.com
PN 613-50368-00 Rev A
1
2
3