At-8201 optional upgrade card installation instruc, Turn off the power on the switch and unplug the, Loosen the thumbscrews on the blank upgrade pan – Allied Telesis AT-8201 User Manual
Page 11: Remove the blank upgrade panel (pull firmly tow, Make sure that the upgrade card is handled using p, Insert the upgrade card in the slot and seat it, Align and tighten the thumbscrews on the upgrad, Tighten the locking screw in the lower right co, Reconnect the power, and turn on the switch, Thumbscrews blank upgrade panel
AT-8201 Installation Guide
1
AT-8201 Optional Upgrade Card Installation Instructions
The following steps describe how to install the optional 8-port upgrade
card in your FORMULA 8200
TM
Switch.
1.
Turn off the power on the switch and unplug the unit.
2.
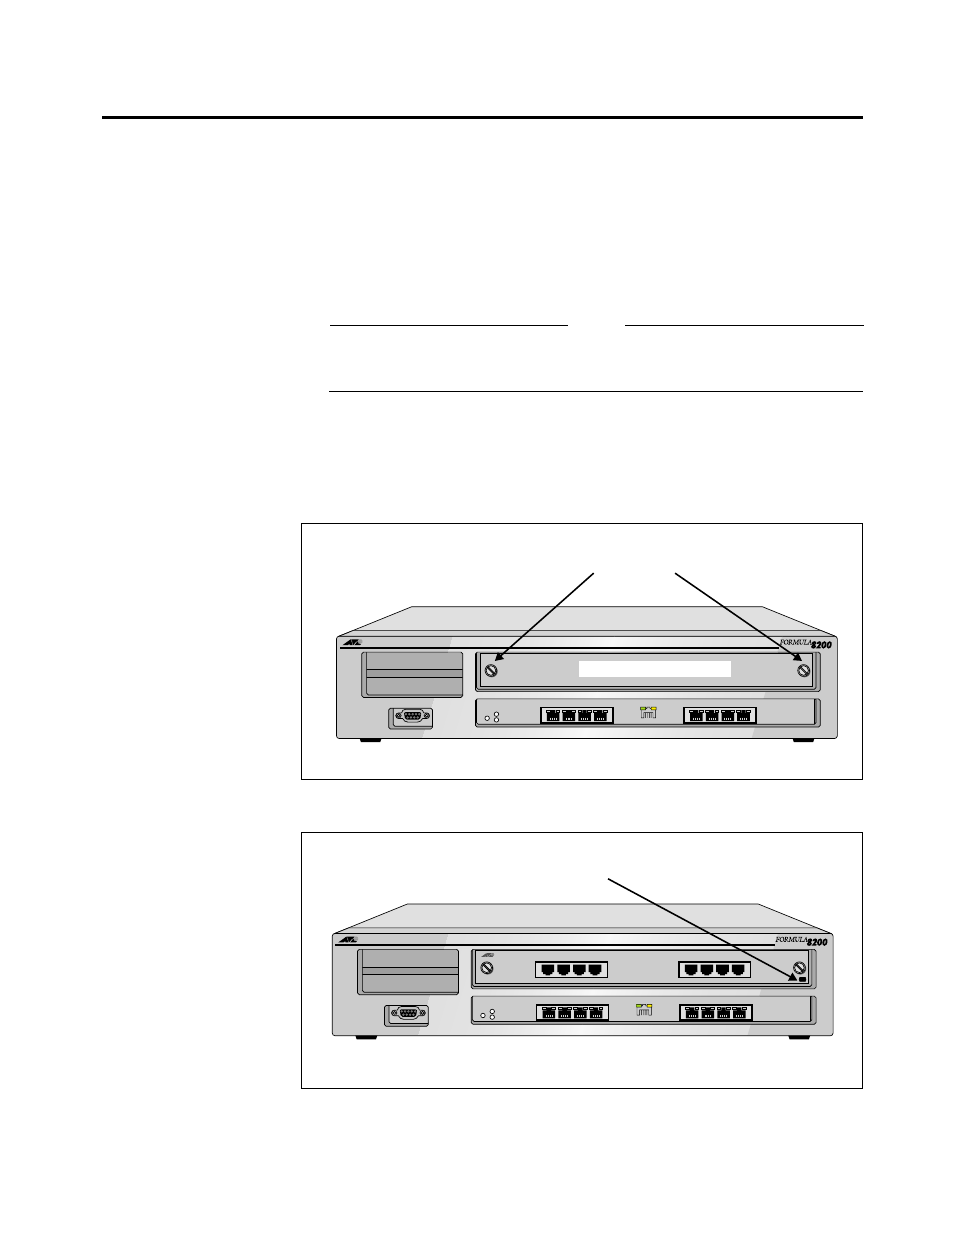
Loosen the thumbscrews on the blank upgrade panel (Figure 1) until
they disengage from the chassis.
3.
Remove the blank upgrade panel (pull firmly toward you) and store for
future use.
Warning
Make sure that the upgrade card is handled using proper static-free
procedures and that you touch a grounded, unpainted surface on the
FORMULA 8200 switch prior to inserting the card.
4.
Insert the upgrade card in the slot and seat it firmly in place (Figure 2).
5.
Align and tighten the thumbscrews on the upgrade card.
6.
Tighten the locking screw in the lower right corner of the upgrade card.
7.
Reconnect the power, and turn on the switch.
Figure 1: FORMULA 8200 with
Blank Panel for
Optional Upgrade
Card
10/100BASE-T NETWORK PORTS
1
2
3
4
10/100BASE-T NETWORK PORTS
5
6
7
8
STATUS
POWER
RESET
GREEN - LINK
YELLOW - DIAG
GREEN - ACTIVITY
YELLOW - COLLISION
RS-232 TERMINAL PORT
Thumbscrews
Blank upgrade panel
Figure 2: FORMULA 8200 with
Upgrade Card
Installed
10/100BASE-T NETWORK PORTS
9
10
11
12
10/100BASE-T NETWORK PORTS
13
14
15
16
8201
10/100BASE-T NETWORK PORTS
1
2
3
4
10/100BASE-T NETWORK PORTS
5
6
7
8
STATUS
POWER
RESET
GREEN - LINK
YELLOW - DIAG
GREEN - ACTIVITY
YELLOW - COLLISION
RS-232 TERMINAL PORT
Locking screw