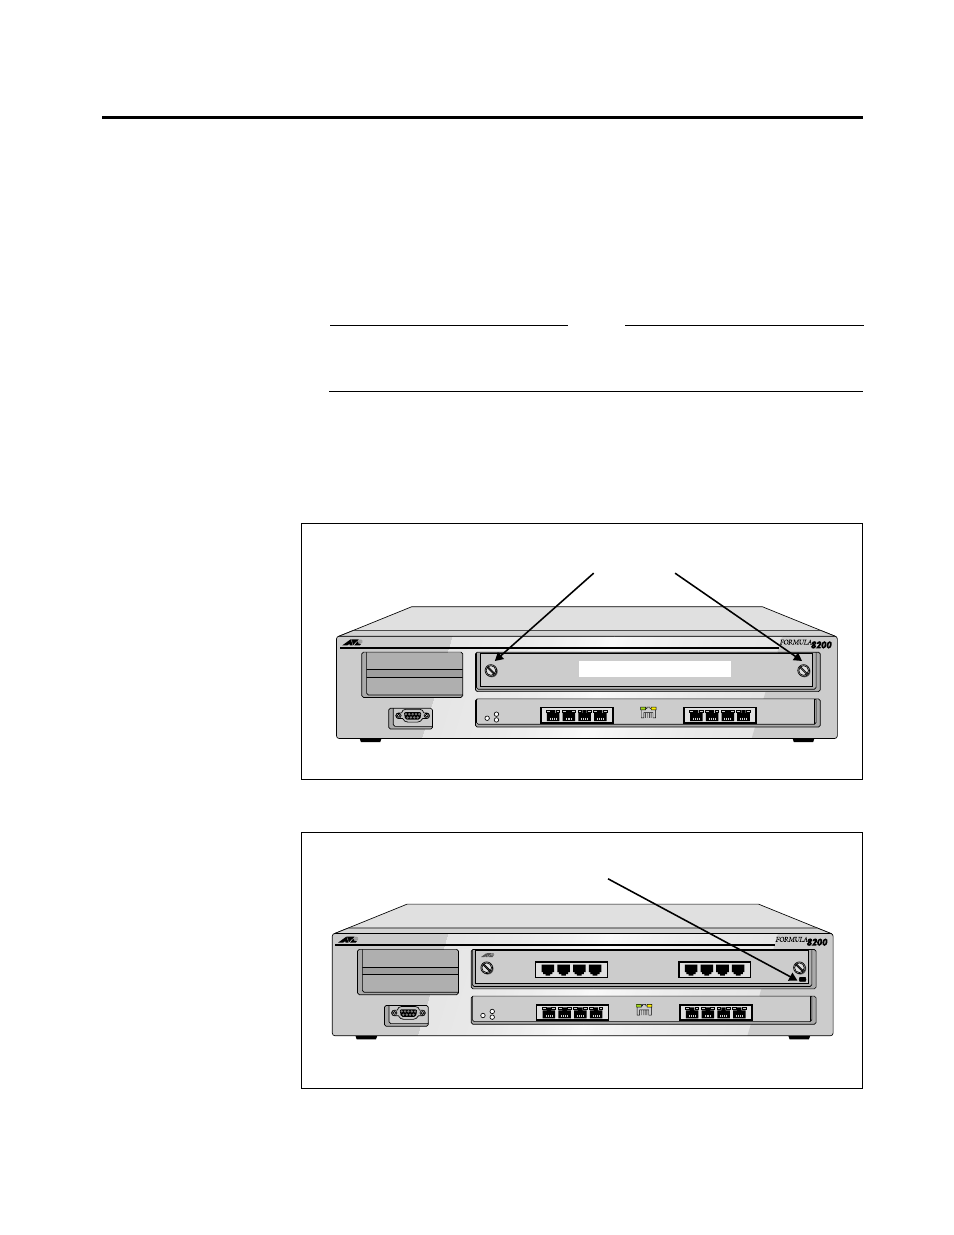
At-8201 optional upgrade card installation instruc, Turn off the power on the switch and unplug the, Loosen the thumbscrews on the blank upgrade pan – Allied Telesis AT-8201 User Manual
Page 11: Remove the blank upgrade panel (pull firmly tow, Make sure that the upgrade card is handled using p, Insert the upgrade card in the slot and seat it, Align and tighten the thumbscrews on the upgrad, Tighten the locking screw in the lower right co, Reconnect the power, and turn on the switch, Thumbscrews blank upgrade panel
 At-8201 optional upgrade card installation instruc, Turn off the power on the switch and unplug the, Loosen the thumbscrews on the blank upgrade pan | Remove the blank upgrade panel (pull firmly tow, Make sure that the upgrade card is handled using p, Insert the upgrade card in the slot and seat it, Align and tighten the thumbscrews on the upgrad, Tighten the locking screw in the lower right co, Reconnect the power, and turn on the switch, Thumbscrews blank upgrade panel | Allied Telesis AT-8201 User Manual | Page 11 / 12