Allied Telesis AT-CVFAN User Manual
Converteon, Family at-cvfan module installation guide, Overview
Overview
The AT-CVFAN module, as shown in Figure 1, is designed for use with the
AT-CV5000 chassis. The same fan module can be installed in either fan slot
labeled A or B, located at the rear of the AT-CV5000 chassis. For proper
operation, an AT-CV5000 chassis comes preinstalled with two field-
replaceable AT-CVFAN modules.
This installation guide provides instructions for the fan replacement in case
one of the AT-CVFAN modules failed.
Figure 1. AT-CVFAN Module
A
T
-CVF
AN
201
Related Documents
This installation guide is an abbreviated version of the installation procedure.
For details on the components, features, and functions of this product, refer to
the following documents on our web site, www.alliedtelesis.com:
❑
AT-CV5000 Media Converter Chassis Installation Guide
(PN 613-50580-00)
❑
AT-S70 Management Software User’s Guide (PN 613-50617-00)
Package Contents
Make sure the following items are included in the shipping package. If any
item is missing or damaged, contact your Allied Telesis sales representative
for assistance.
❑
One AT-CVFAN Module
❑
This Installation Guide
❑
Warranty Card
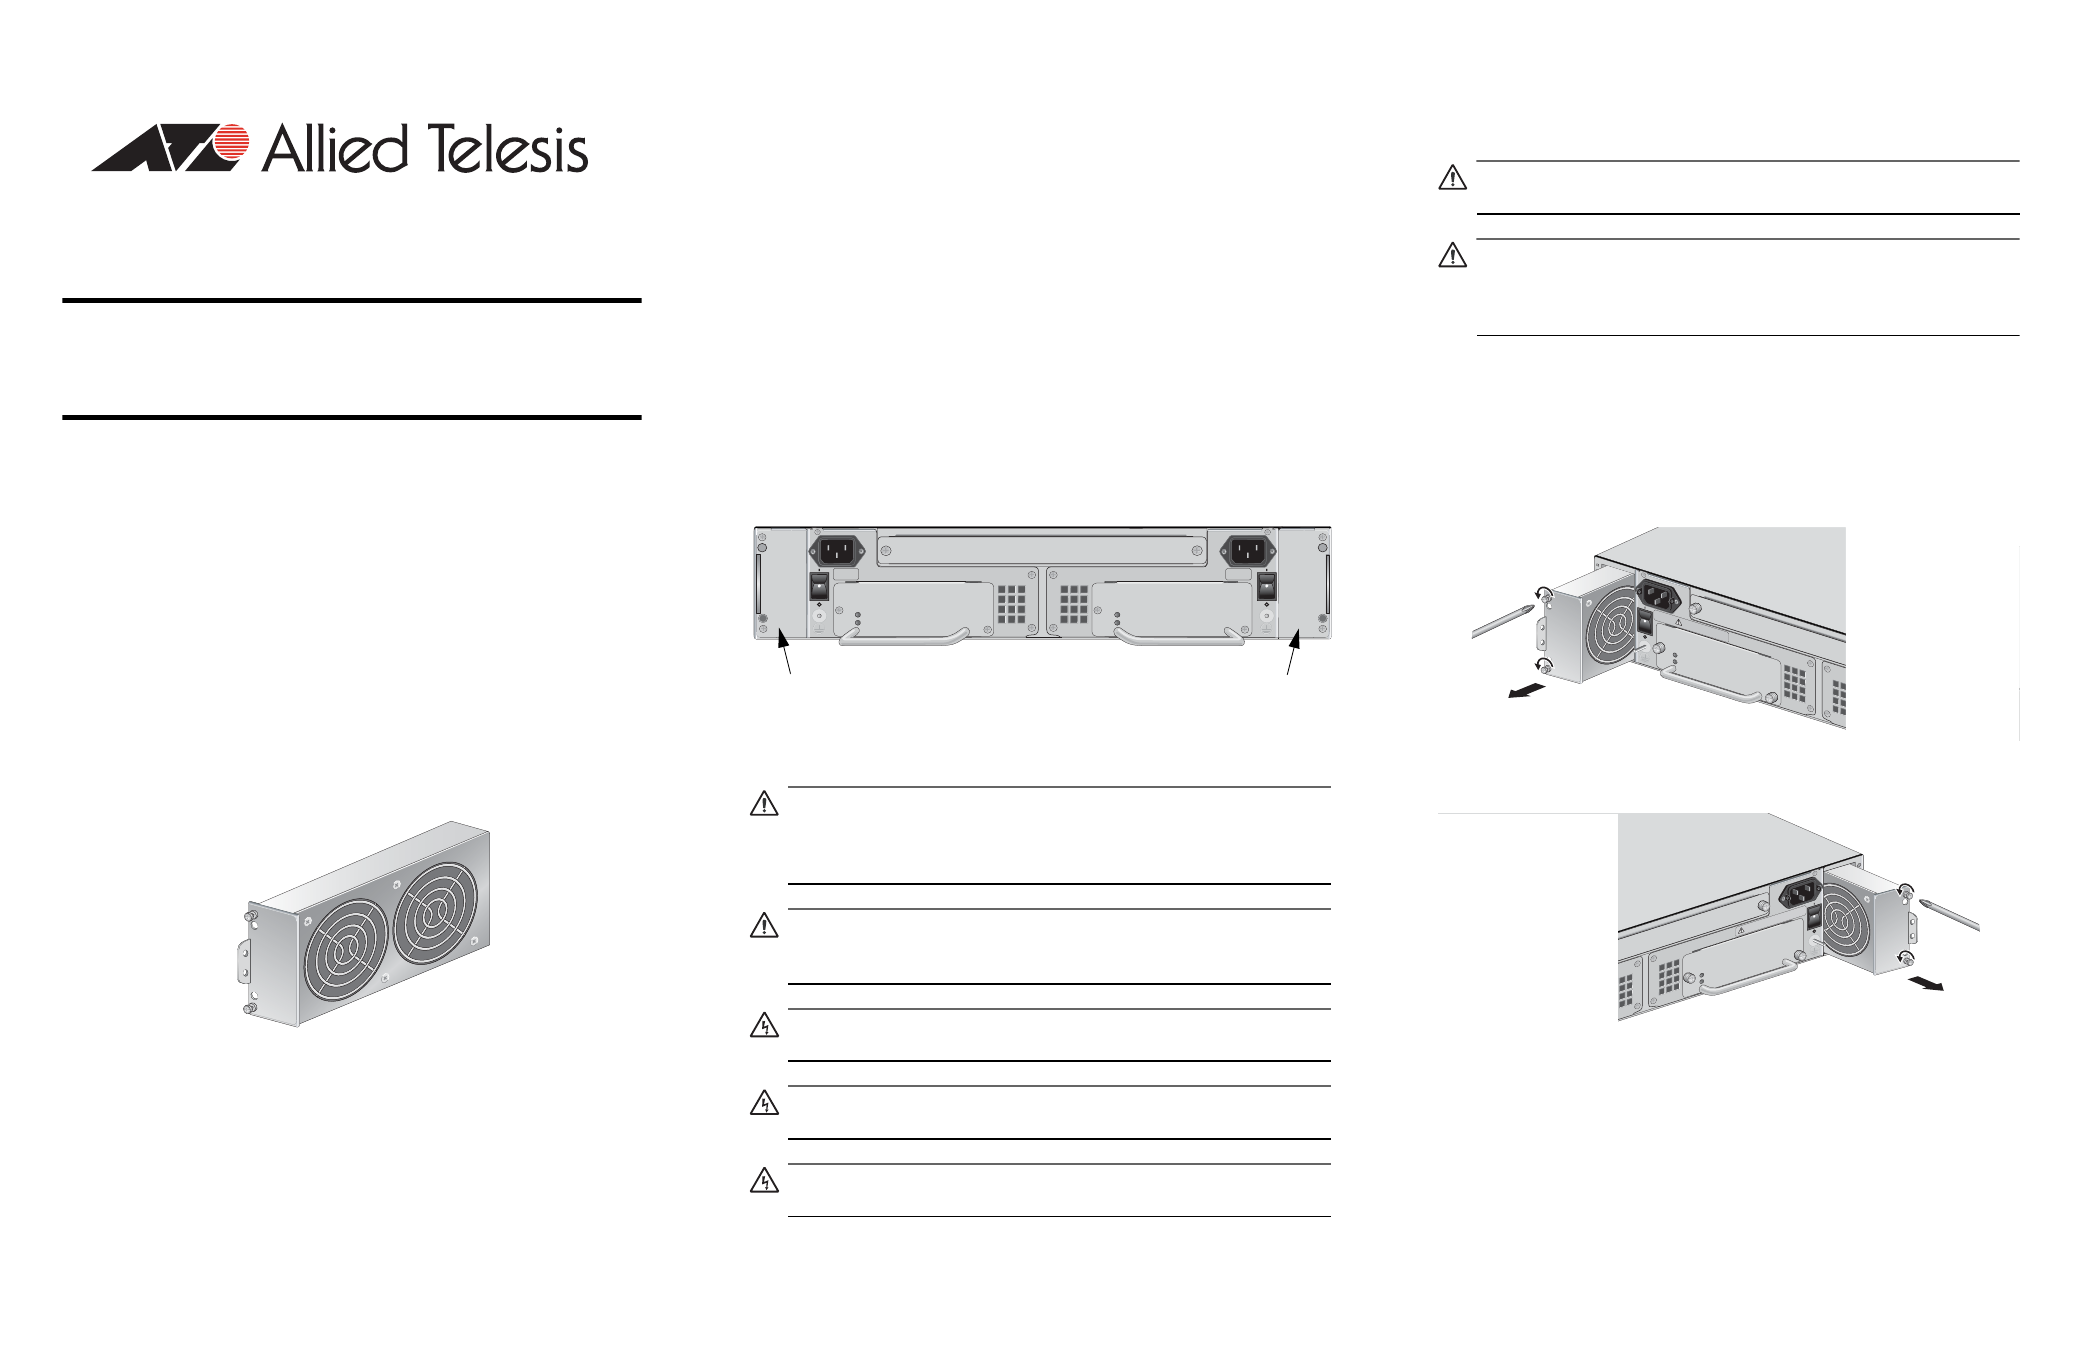
Locations of the Fan Slots
Figure 2 illustrates the locations of the two fan modules at the rear of the
AT-CV5000 chassis.
Figure 2. Locations of Fan Slots A & B on an AT-CV5000 Rear Panel
Before replacing an AT-CVFAN module, please note the following guidelines:
Caution
Be sure to observe all standard electrostatic discharge (ESD) pre-
cautions, such as wearing an antistatic wrist strap, to avoid damaging
the device. A fan module can be damaged by static electricity.
Caution
Refer to the AT-CV5000 Chassis Installation Guide for electrical safety
and emission information.
Warning
Remove jewelry before replacing the fan modules.
Warning
Watch your fingers when handling the fan modules.
Warning
To avoid electric shock, do not intend to touch the inside of the fan slots.
AT-PWR14
POWER
FAULT
AT-PWR14
A
B
100-240VAC
~
AT-CVFAN
A
100-240VAC
~
AT-CVFAN
B
POWER
FAULT
213
Fan Slot A
Fan Slot B
Replacing an AT-CVFAN Module
You can replace the AT-CVFAN module in either one of the two fan slots
located at the rear of the AT-CV5000 chassis.
Caution
For normal operation, both fans must be installed in the chassis.
Caution
The AT-CVFAN modules are field-replaceable; however, they are not
hot-swappable. Therefore, make sure to power OFF the chassis before
installing the fan modules.
To replace an AT-CVFAN module, perform the following procedure:
1. Power OFF the chassis.
2. Using a Phillips screwdriver, loosen the captive screws at the top and
bottom of the installed fan module faceplate.
3. Pull the loosened screws to slide the fan module out of the chassis, as
shown in Figure 3 or Figure 4.
Figure 3. Removing an AT-CVFAN Module from the Fan Slot A
Figure 4. Removing an AT-CVFAN Module from the Fan Slot B
4. While waiting for the fan to spin down, unpack the new AT-CVFAN module
from the shipping package and store the packaging material in a safe
location.
AT-CV5
PWRAC
POWER
FAULT
AT-PWR
14
A
B
100-240VAC
~
POWER
FAULT
A
A
T
-CVF
AN
204
100-240
VAC
~
WARN
ING
This un
it migh
t have m
ore tha
n one p
ower in
put. To
reduce
the ris
k of ele
ctric sh
ock, dis
connec
t all po
wer
inputs b
efore s
ervicin
g unit.
AT-PWR14
AT-CV5P
WRAC
A
B
100
-240
VAC
~
B
POW
ER
FAUL
T
A
T
-CVF
AN
205
100
-240
VAC
~
WA
RNIN
G
This
unit m
ight h
ave m
ore tha
n on
e po
wer in
put.
To
redu
ce th
e ris
k of e
lectr
ic sh
ock,
disc
onn
ect a
ll po
wer
inpu
ts b
efore
ser
vicin
g un
it.
CONVERTEON™
Family
AT-CVFAN Module Installation Guide
For use with the AT-CV5000 Chassis
Allied Telesis, Inc.
www.alliedtelesis.com
613-50584-00 Rev C
1
2
3
*613-50584-00 Rev C*