Allied Telesis AT-CVMT12 User Manual
At-cvmt12 wall-mount bracket installation guide, Overview, Related documents
*613-000549 Rev D*
2
3
613-000549 Rev D
AT-CVMT12 Wall-Mount Bracket Installation Guide
Overview
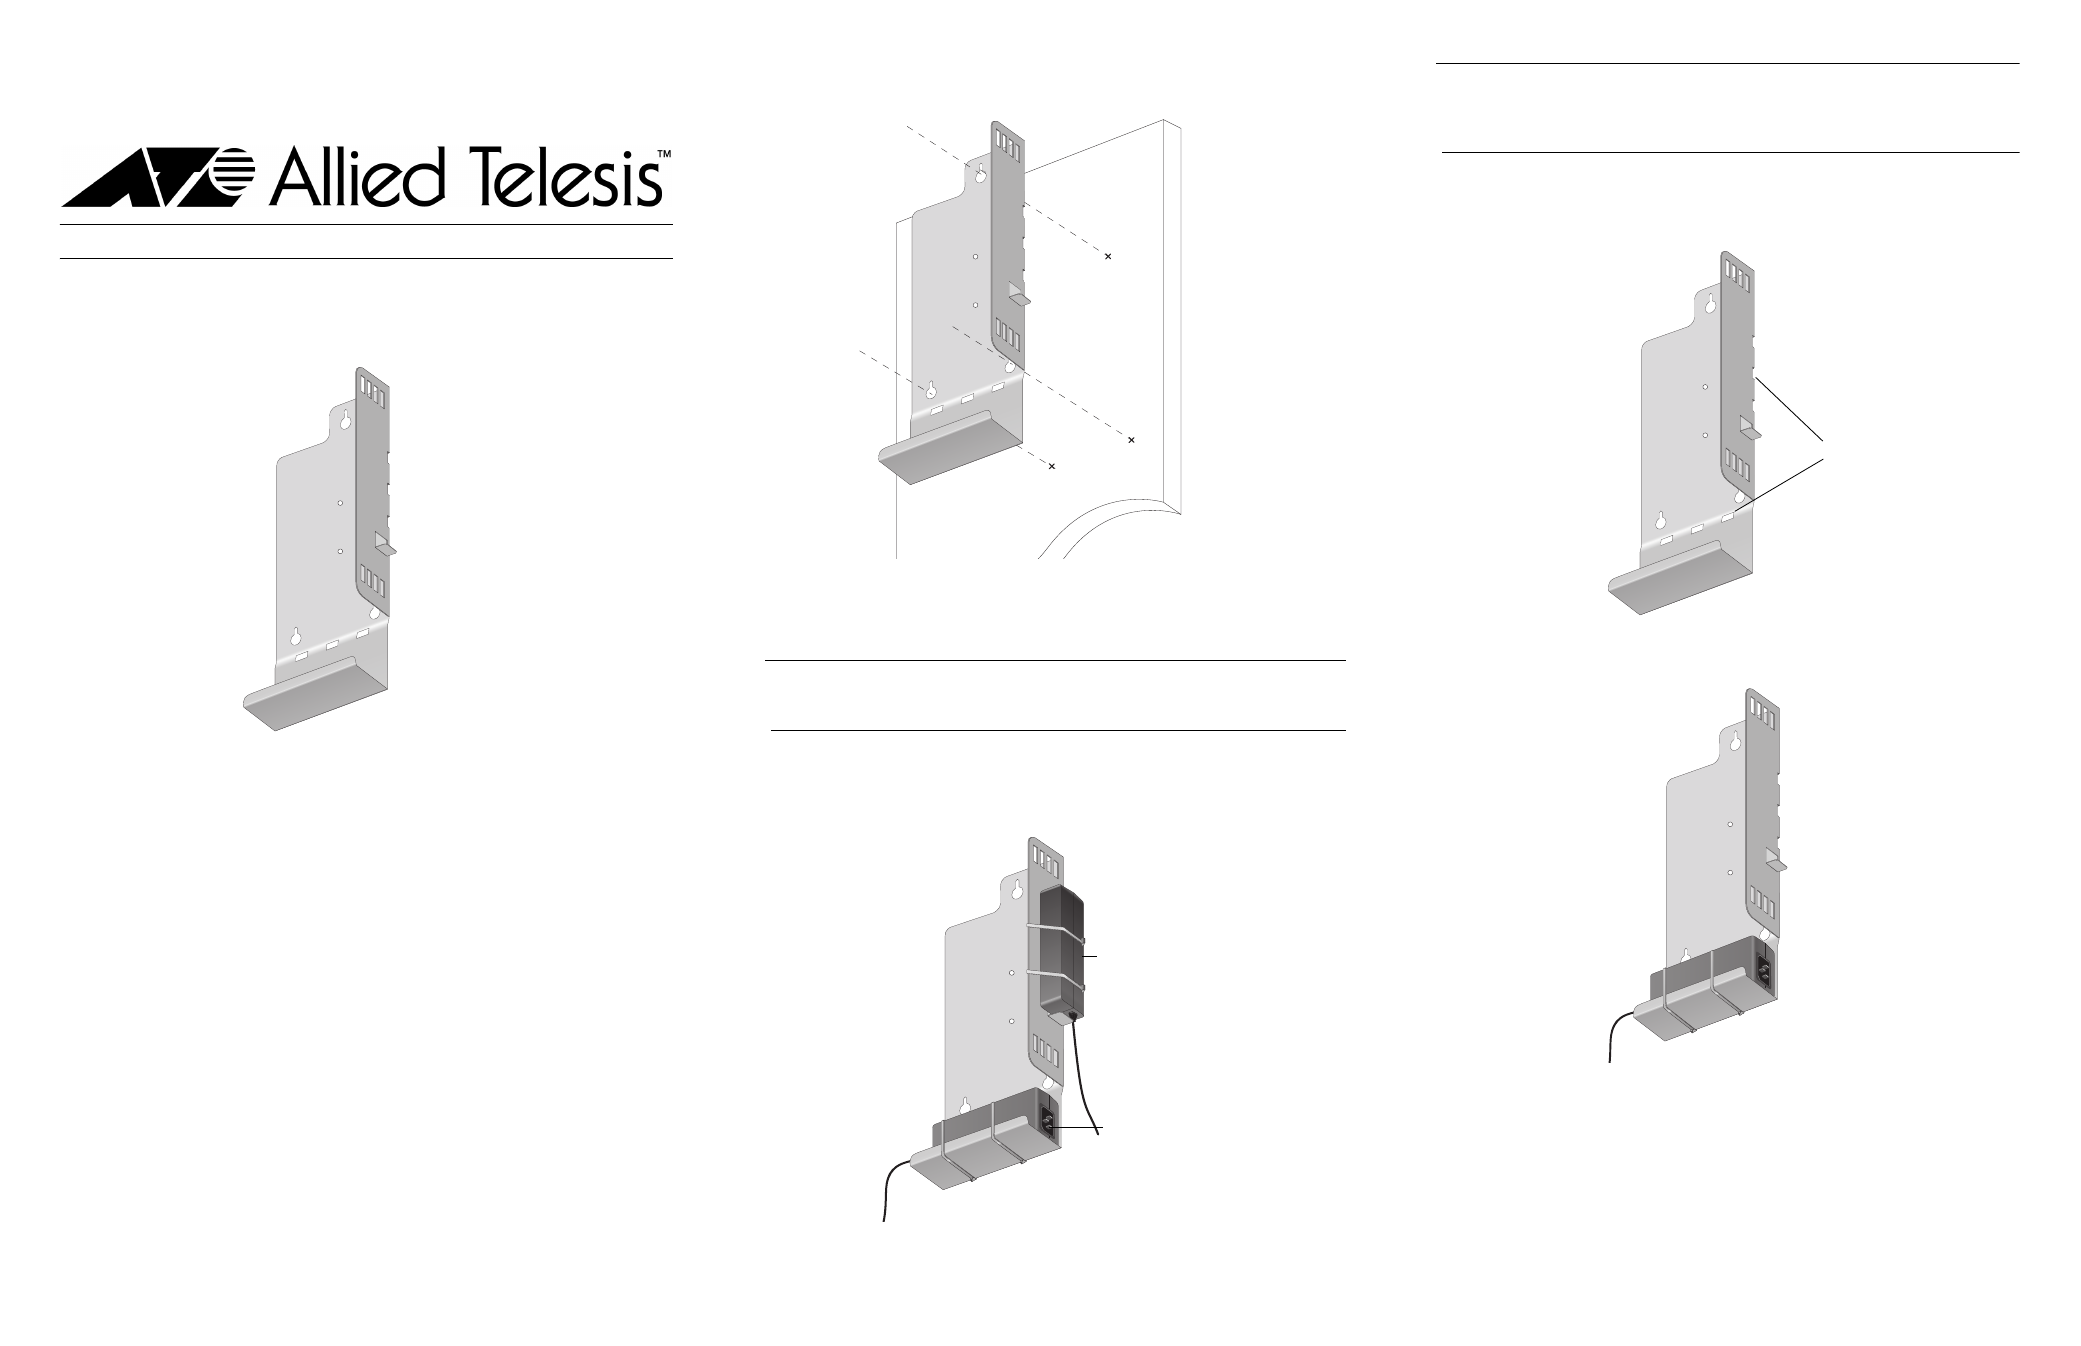
The AT-CVMT12 Wall-Mount Bracket, as shown below, is a shelf style bracket designed
to mount a Converteon™ AT-CV120x chassis and up to two AC power adapters on the
wall.
Related Documents
For details on the components, features, and functions of an AT-CV120x chassis, refer to
the following document on our web site, www.alliedtelesis.com:
❑
AT-CV120x Media Converter Chassis Installation Guide
Package Contents
Make sure the following items are included in the shipping package.
❑
One AT-CVMT12 Wall-Mount Bracket
❑
Three plastic anchors
❑
Three anchor screws
❑
Four small flathead bracket mount screws
❑
Four long wire ties
❑
Two short wire ties
❑
This installation guide
❑
Warranty card
If any item is missing or damaged, contact your Allied Telesis sales representative for
assistance.
Preparing a Wall Location
To prepare a wall location for the AT-CVMT12 Wall-Mount Bracket, perform the following
procedure:
1.
Remove the AT-CVMT12 Wall-Mount Bracket from its shipping package and store the
packaging material in a safe location.
1015
2.
Select the wall location and align the bracket vertically on the wall.
3.
Mark the locations of the mounting holes on the wall, as shown below.
4.
At the marked locations, drill holes for the wall anchors, insert the anchors, and drive in
the anchor screws.
5.
Test and adjust the bracket installation by mounting the bracket on the anchors and
adjusting the screws as necessary so that the bracket fits securely on the wall.
Note
Do not mount the bracket on the wall until you have mounted the AC power
adapter(s) and the AT-CV120x chassis on the bracket.
Attaching the AC Power Adapters
The AT-CVMT12 Wall-Mount Bracket can hold two AC power adapters, one at the bottom
and one along the side, as shown below.
1018
1190
Power Adapter Location 1
Power Adapter Location 2
Note
One AC power adapter is shipped with the AT-CV120x chassis. Only one power
adapter is required to power the chassis. To purchase an additional power adapter
for redundancy purposes, contact your Allied Telesis sales representative.
To mount a power adapter in either or both locations, perform the following procedure:
1.
Locate the long wire ties in the package.
2.
Locate the wire tie slots, as shown below.
3.
To mount a power adapter in location 1, thread two wire ties through 2 of the 3 slots, lay
the power adapter on the shelf with the power connector to the right, and secure the wire
ties, as shown below.
1015
Wire Tie Slots
1019