Cartridge removal, Temperature adjustment, Hot cold – Acorn SV16 VALVE User Manual
Page 6
Page 6 of 8
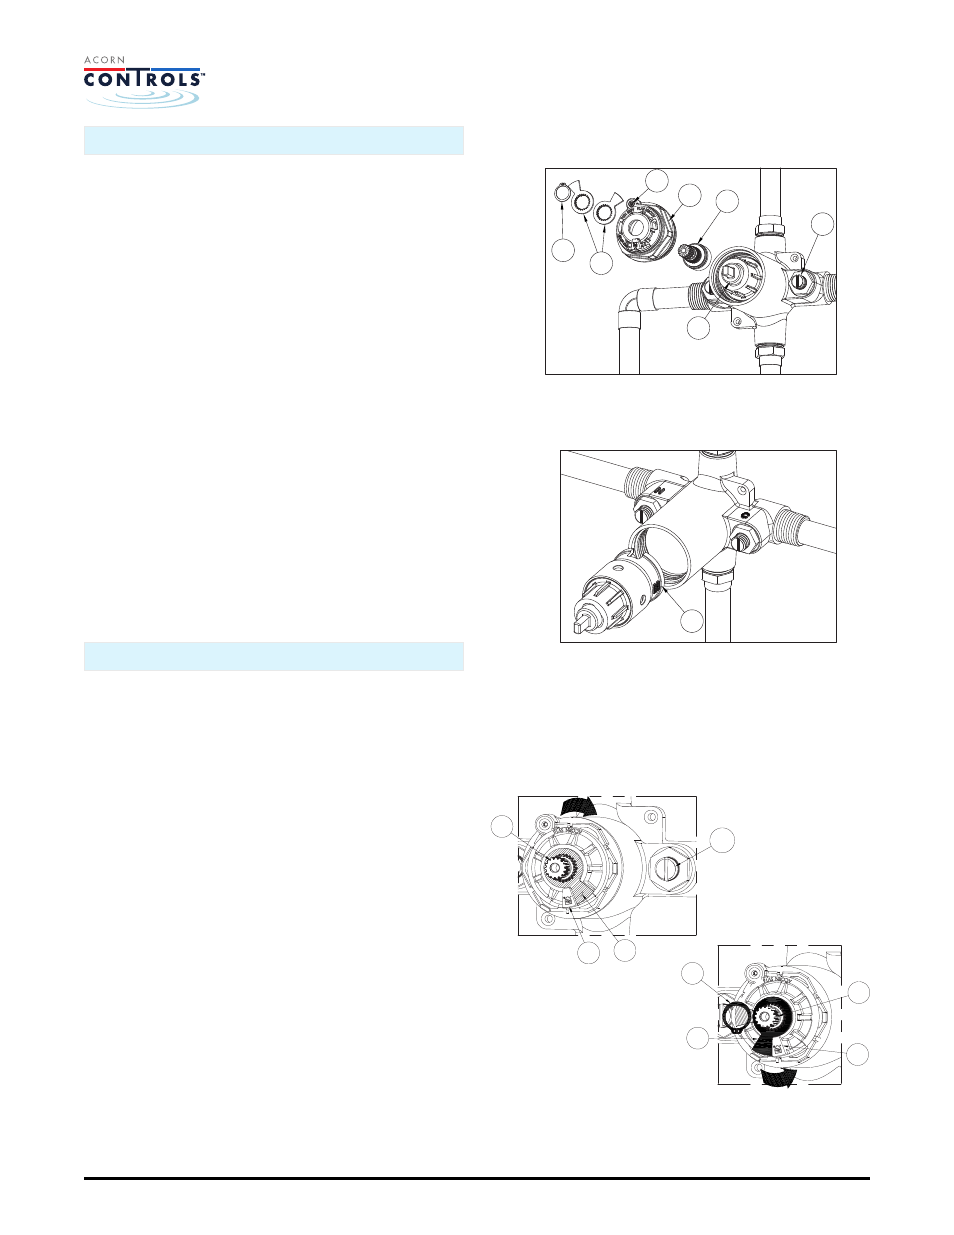
1. Bonnet Removal: Figure 8.
a. Close Check stops 15.
b. Using snap-ring pliers with pins less than
0.03”, by others, remove snap-ring 16.
c. Remove both temperature limit washers
17.
d. Loosen 1/16” hex set screw 18.
e. Unscrew bonnet 19.
f. Remove external valve stem 20.
g. Pull cartridge 21 out.
2. Cartridge Reversal: Figure 9.
a. Rotate cartridge 21 so that the “H” on
cartridge is toward “C” cold water supply
side and slide rib on back side of cartridge
into slot in valve body.
3. Reassemble in reverse order.
4. Temperature Adjusting: Figure 10.
a. Turn main water supply on.
b. Open check stops 15.
c. Turn valve stem 20 clockwise until you
hear a click, continue to turn clockwise
past the off position until you hear a
second click.
d. Rotate stem 20 counter-clockwise back to
the full off position and slide one
temperature limit washer 17 over valve
stem. Ensure side of washer is as close as
possible to the limit stop 22.
e. Turn valve stem 20 counter-clockwise to
increase hot, checking outlet temperature,
until desired temperature is reached. Slide
the second temperature limit washer 17
over valve stem 20 and ensure side of
washer rests against limit stop 22. Secure
onto valve stem with snap-ring 16.
CARTRIDGE REMOVAL:
Acorn Controls
Division of Acorn Engineering Company
®
, A member of Morris Group International
™
TEMPERATURE ADJUSTMENT:
Manual #7802-116-000
Date: 07/10/14
TEMPERATURE ADJUSTMENT
FIGURE 10
FIGURE 8
16
17
18
20
15
21
FIGURE 9
BONNET REMOVAL
VIEW FROM REVERSED SIDE
21
19
HOT
COLD
15
17
22
20
22
17
16
20
SV16 Installation & Operation Manual