Assemble the fixture – LBL Lighting Palm Lane Large CF User Manual
Page 2
2
Rest the fixture upside down and slide the glass shade
onto the fixture base.
Secure the glass shade by installing and tightening the
collared nut onto the socket assembly.
2A
1
1
2
Assemble the Fixture
GLASS SHADE
COLLARED NUT
SOCKET ASSEMBLY
Connect the mounting plate ground wire to a suitable
ground according to local electrical codes.
Connect the white fixture wire to the neutral power line
wire with a wire nut.
Connect the black fixture wire to the hot power line
wire with a wire nut.
Properly place all the wire and wire nut connections into
the fixture and mount it by reversing figure 1A.
2B
1
3
4
5
5
3
4
6
1
2
2C
7
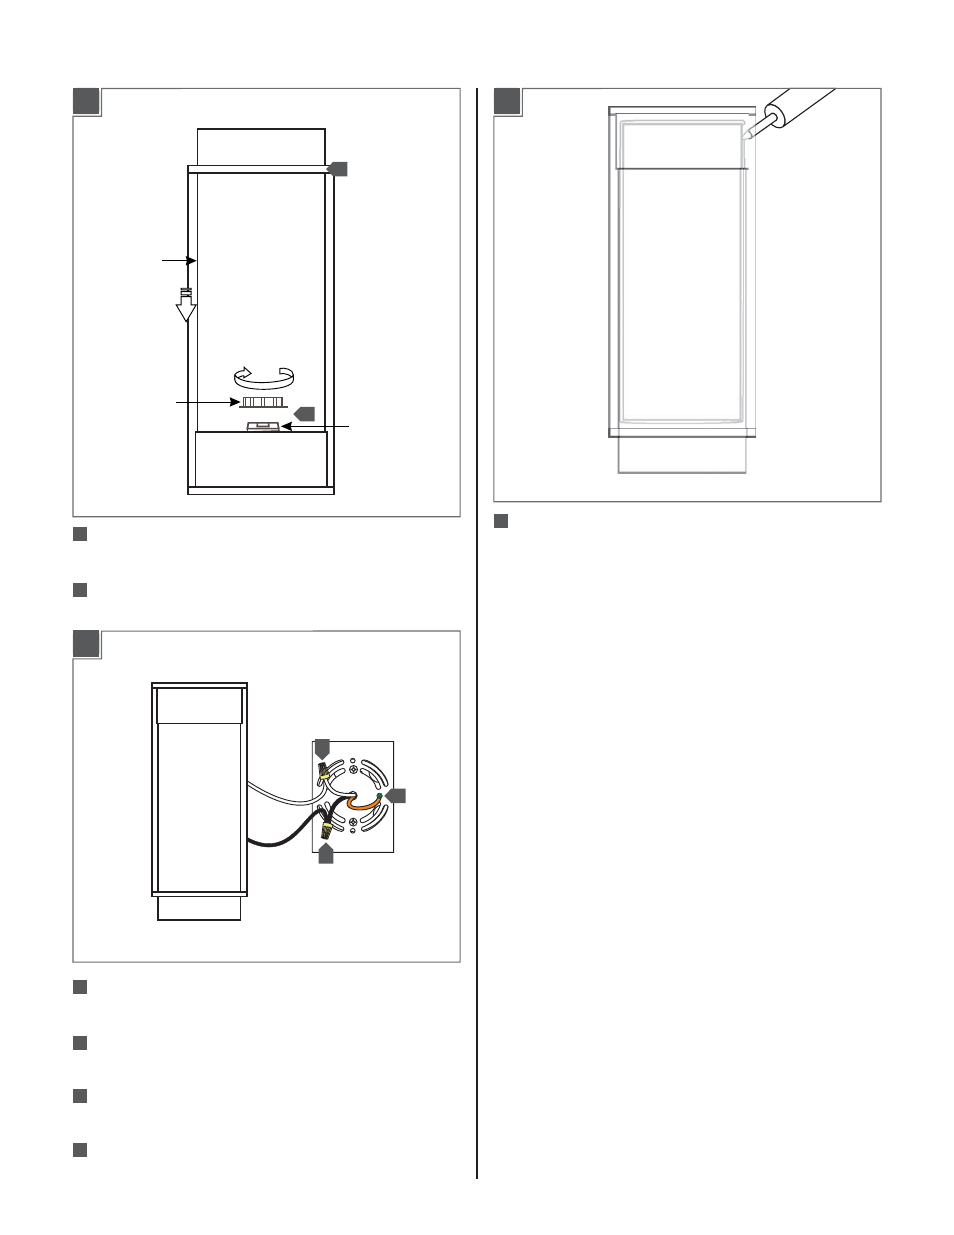
For wet locations, caulk around the base with
waterproof construction sealant.
See also other documents in the category LBL Lighting Lighting:
- KENDALL (2 pages)
- LINNET PENDANT (1 page)
- MEZZO GP (4 pages)
- MEZZO GPCF (4 pages)
- MEZZO P (4 pages)
- MEZZO PCF (4 pages)
- MILO S (4 pages)
- MILO SCH (4 pages)
- RHUTHM S (2 pages)
- SOMEDAY GP (2 pages)
- SOMEDAY GPCF (2 pages)
- SOMEDAY P (2 pages)
- SOMEDAY CF (2 pages)
- Isla SP (1 page)
- Mason Classic (1 page)
- Mason SP (2 pages)
- Mason SPCF (2 pages)
- Aiko SP (1 page)
- Aiko SPCF (1 page)
- Olivia SP (1 page)
- Olivia SPCF (1 page)
- Zuri P (2 pages)
- Vera P (2 pages)
- Vera PCF (2 pages)
- Tindra P (4 pages)
- Akari P (1 page)
- Akari PCF (1 page)
- Isis GP (2 pages)
- Isis GPCF (2 pages)
- Rock Candy Cylinder SP (1 page)
- Rock Candy Cylinder SPCF (1 page)
- Miyu Classic SP (1 page)
- Miyu SP (2 pages)
- Miyu SPCF (2 pages)
- Sora SP (2 pages)
- Sora SPCF (2 pages)
- Julep S (2 pages)
- Julep SCF (2 pages)
- Pavia (2 pages)
- Rhythm PCF (2 pages)
- Rhythm P (2 pages)
- Juniper SF (4 pages)
- Juniper SFCF (4 pages)
- Alaya SP (4 pages)
- Icicle II SP (2 pages)