Install the lamp and shade – LBL Lighting Alban W User Manual
Page 2
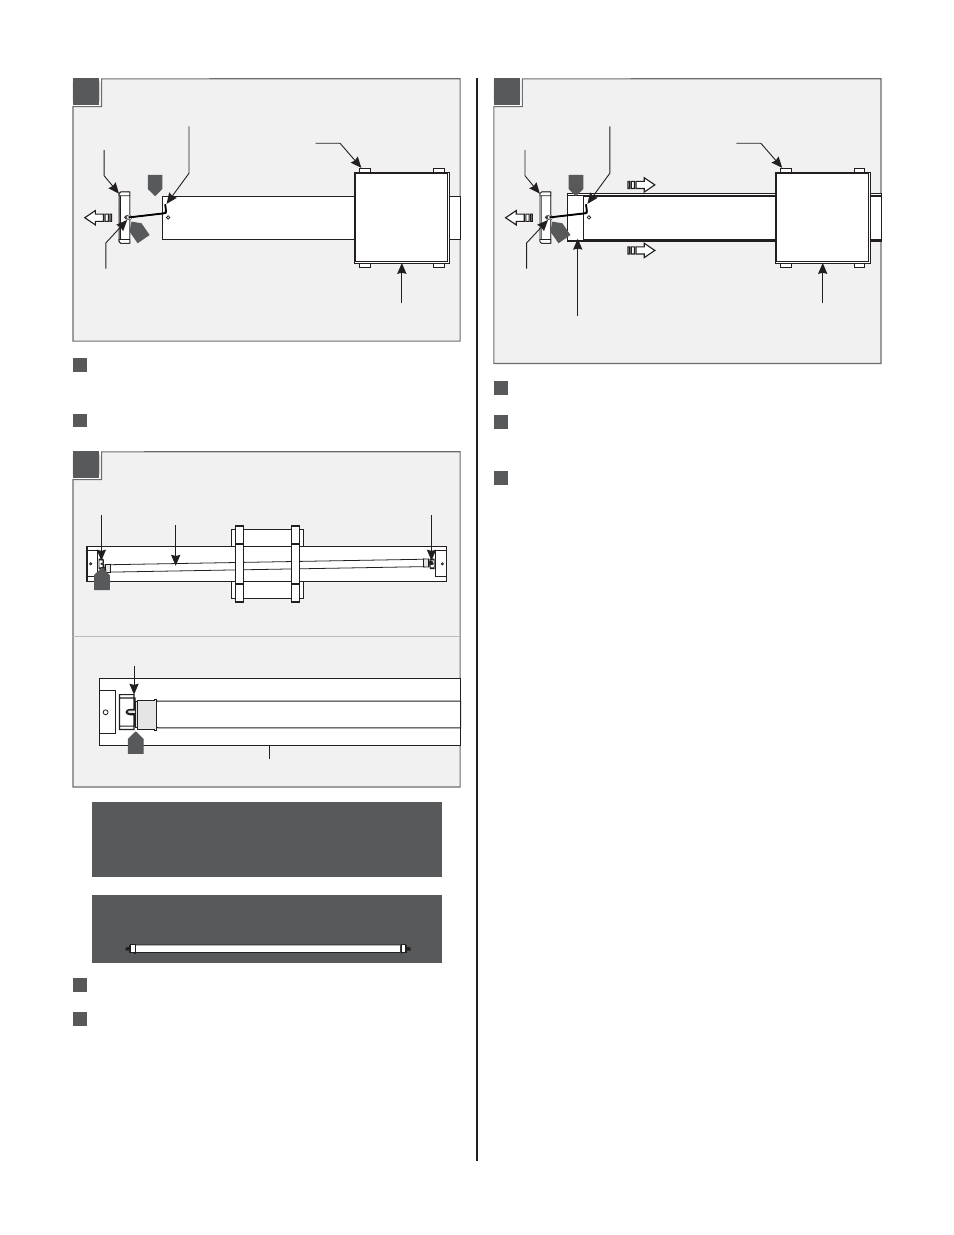
2
Align the lamp pins with socket slots.
Push the pins all the way into the socket slots and rotate
the lamp until it clicks into place.
4
3
Use
type T5 High Output
MAX 24 Watt
linear fluorescent lamp.
CAUTION: To reduce the risk of a burn or electric
shock during relamping, disconnect the power to
the fixture by turning the wall switch off.
LAMP
4
SOCKET
LAMP
SOCKET
SOCKET
2B
Install the Lamp and Shade
3
Remove the two Allen screws located on the rear of the
end caps with the Allen wrench provided.
Remove the two end caps.
2A
1
2
3
END CAP
ALLEN
WRENCH
ALLEN
SCREW
FIXTURE
BASE
FIXTURE
BRACKET
1
Carefully slide the shade into the fixture base brackets.
Reinstall the end caps and Allen screws to secure the
shade in place (reversal of figure 2A).
Follow this section to re-lamp the fixture.
2C
5
6
5
SHADE
END CAP
ALLEN
WRENCH
ALLEN
SCREW
FIXTURE
BASE
FIXTURE
BRACKET
6
7
- KENDALL (2 pages)
- LINNET PENDANT (1 page)
- MEZZO GP (4 pages)
- MEZZO GPCF (4 pages)
- MEZZO P (4 pages)
- MEZZO PCF (4 pages)
- MILO S (4 pages)
- MILO SCH (4 pages)
- RHUTHM S (2 pages)
- SOMEDAY GP (2 pages)
- SOMEDAY GPCF (2 pages)
- SOMEDAY P (2 pages)
- SOMEDAY CF (2 pages)
- Isla SP (1 page)
- Mason Classic (1 page)
- Mason SP (2 pages)
- Mason SPCF (2 pages)
- Aiko SP (1 page)
- Aiko SPCF (1 page)
- Olivia SP (1 page)
- Olivia SPCF (1 page)
- Zuri P (2 pages)
- Vera P (2 pages)
- Vera PCF (2 pages)
- Tindra P (4 pages)
- Akari P (1 page)
- Akari PCF (1 page)
- Isis GP (2 pages)
- Isis GPCF (2 pages)
- Rock Candy Cylinder SP (1 page)
- Rock Candy Cylinder SPCF (1 page)
- Miyu Classic SP (1 page)
- Miyu SP (2 pages)
- Miyu SPCF (2 pages)
- Sora SP (2 pages)
- Sora SPCF (2 pages)
- Julep S (2 pages)
- Julep SCF (2 pages)
- Pavia (2 pages)
- Rhythm PCF (2 pages)
- Rhythm P (2 pages)
- Juniper SF (4 pages)
- Juniper SFCF (4 pages)
- Alaya SP (4 pages)
- Icicle II SP (2 pages)