Install the crystals – LBL Lighting Lulu C User Manual
Page 2
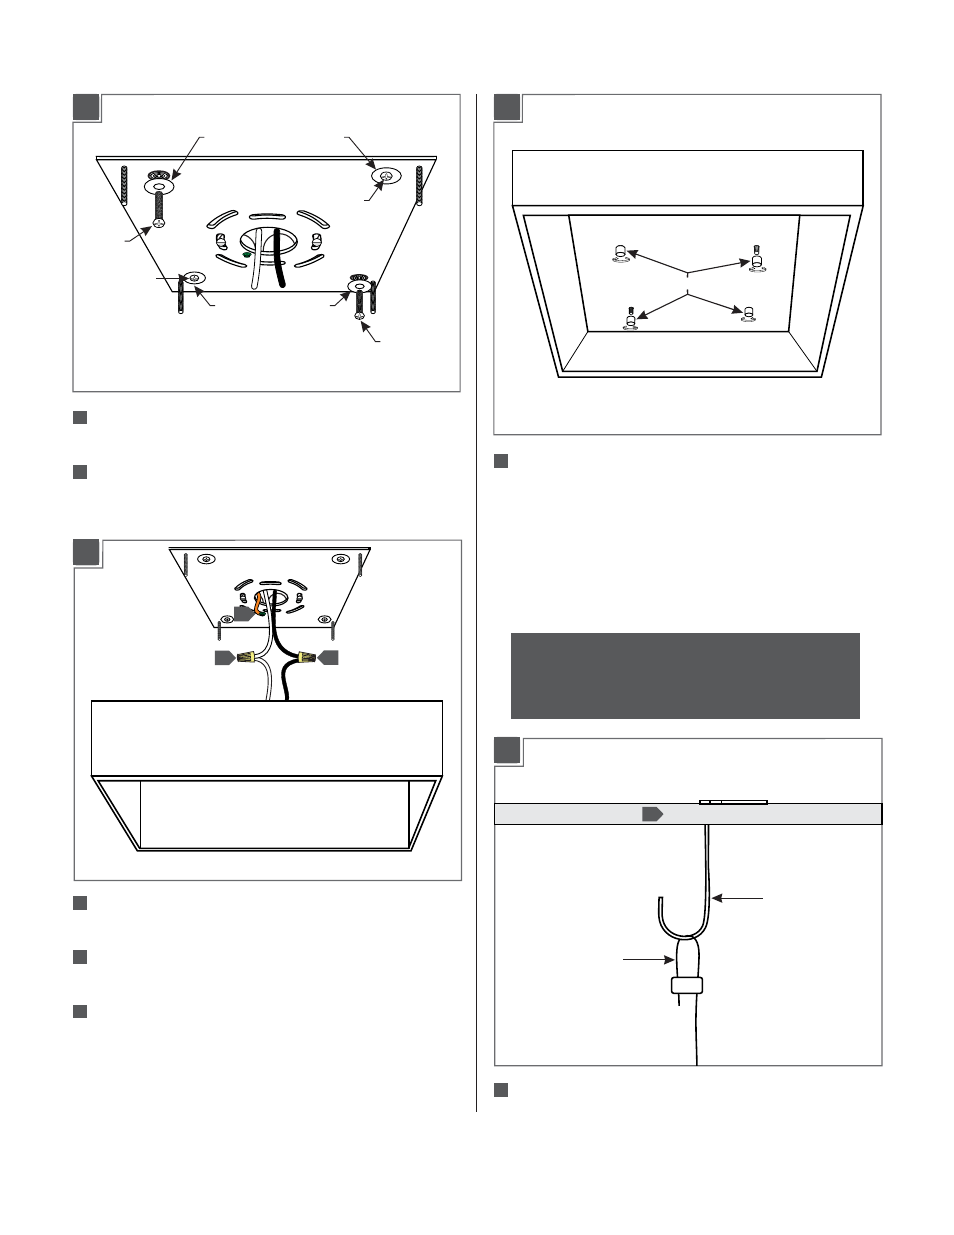
Connect the mounting plate ground wire to a suitable
ground according to local electrical codes.
Connect the white (blue) fixture wire to the neutral
power line wire with a wire nut.
Connect the black (brown) fixture wire to the hot power
line wire with a wire nut.
Mount the fixture base to the ceiling by installing it
onto the mounting plate and securing it tightly with
the four cap nuts.
2
1D
8
9
10
11
9
10
1E
Install the Crystals
Note: An installation guide of the crystals has been
provided by the designer on the next page for an
asymmetrical look. The crystals may be installed in
any configuration as desired.
2A
Install each crystal by placing the looped end of the
cable onto each individual hook.
1
CAP NUTS
CABLE LOOP
1C
SCREW
WASHER
WASHER
SCREW
Slide a #8 screw through a washer and screw it into an
anchor.
Repeat for all four anchors to secure the mounting plate
to the wall.
6
6
6
7
SCREW
WASHER
WASHER
SCREW
8
1
HOOK
- KENDALL (2 pages)
- LINNET PENDANT (1 page)
- MEZZO GP (4 pages)
- MEZZO GPCF (4 pages)
- MEZZO P (4 pages)
- MEZZO PCF (4 pages)
- MILO S (4 pages)
- MILO SCH (4 pages)
- RHUTHM S (2 pages)
- SOMEDAY GP (2 pages)
- SOMEDAY GPCF (2 pages)
- SOMEDAY P (2 pages)
- SOMEDAY CF (2 pages)
- Isla SP (1 page)
- Mason Classic (1 page)
- Mason SP (2 pages)
- Mason SPCF (2 pages)
- Aiko SP (1 page)
- Aiko SPCF (1 page)
- Olivia SP (1 page)
- Olivia SPCF (1 page)
- Zuri P (2 pages)
- Vera P (2 pages)
- Vera PCF (2 pages)
- Tindra P (4 pages)
- Akari P (1 page)
- Akari PCF (1 page)
- Isis GP (2 pages)
- Isis GPCF (2 pages)
- Rock Candy Cylinder SP (1 page)
- Rock Candy Cylinder SPCF (1 page)
- Miyu Classic SP (1 page)
- Miyu SP (2 pages)
- Miyu SPCF (2 pages)
- Sora SP (2 pages)
- Sora SPCF (2 pages)
- Julep S (2 pages)
- Julep SCF (2 pages)
- Pavia (2 pages)
- Rhythm PCF (2 pages)
- Rhythm P (2 pages)
- Juniper SF (4 pages)
- Juniper SFCF (4 pages)
- Alaya SP (4 pages)
- Icicle II SP (2 pages)