Install the lamp & shade, 1d 1c – LBL Lighting Max User Manual
Page 2
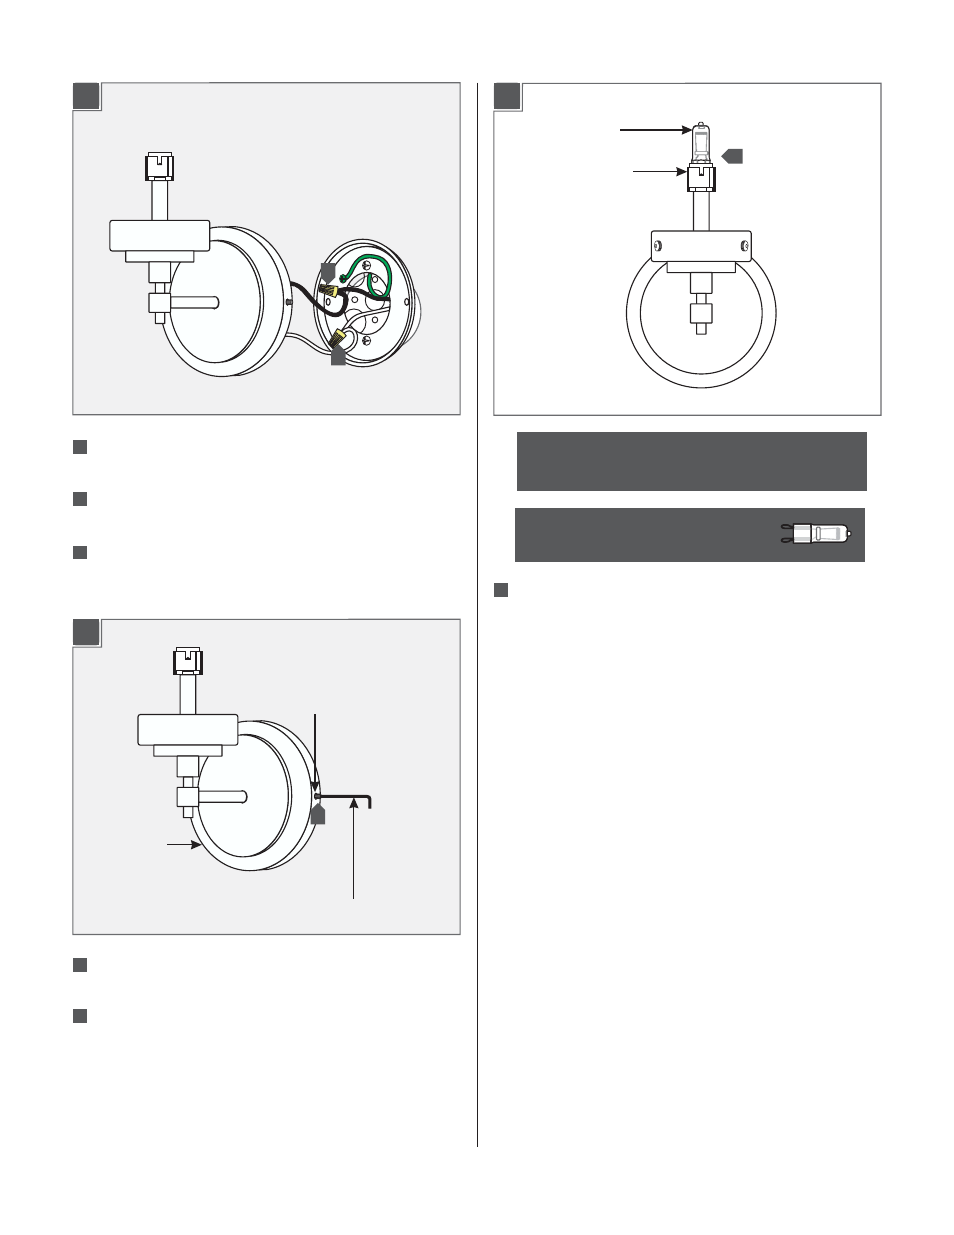
1D
1C
2
Connect the backplate to a suitable ground in accordance with
local electrical codes.
Connect the fixture white wire to the neutral power line wire
with a wire nut.
Connect the fixture black wire to the hot power line wire with
a wire nut.
Place all wires and wire nut connections properly inside the
electrical box.
Place the fixture canopy onto the backplate. Level the fixture
vertically and tighten the two M3 set screws with the 1.5MM
Allen wrench to secure the fixture in place.
CANOPY
M3 SET SCREW
1.5MM ALLEN WRENCH
Install the Lamp & Shade
SOCKET
LAMP
Push the lamp pins completely into the socket holes.
NOTE:
Use only your fingers and a soft cloth to install
the lamp.
Use
120 Volt,
Watt Type T4,
MAX
60
G9 Base, Bi-Pin Halogen Lamp.
5
6
7
7
9
9
6
1
2A
1
8
See also other documents in the category LBL Lighting Lighting:
- KENDALL (2 pages)
- LINNET PENDANT (1 page)
- MEZZO GP (4 pages)
- MEZZO GPCF (4 pages)
- MEZZO P (4 pages)
- MEZZO PCF (4 pages)
- MILO S (4 pages)
- MILO SCH (4 pages)
- RHUTHM S (2 pages)
- SOMEDAY GP (2 pages)
- SOMEDAY GPCF (2 pages)
- SOMEDAY P (2 pages)
- SOMEDAY CF (2 pages)
- Isla SP (1 page)
- Mason Classic (1 page)
- Mason SP (2 pages)
- Mason SPCF (2 pages)
- Aiko SP (1 page)
- Aiko SPCF (1 page)
- Olivia SP (1 page)
- Olivia SPCF (1 page)
- Zuri P (2 pages)
- Vera P (2 pages)
- Vera PCF (2 pages)
- Tindra P (4 pages)
- Akari P (1 page)
- Akari PCF (1 page)
- Isis GP (2 pages)
- Isis GPCF (2 pages)
- Rock Candy Cylinder SP (1 page)
- Rock Candy Cylinder SPCF (1 page)
- Miyu Classic SP (1 page)
- Miyu SP (2 pages)
- Miyu SPCF (2 pages)
- Sora SP (2 pages)
- Sora SPCF (2 pages)
- Julep S (2 pages)
- Julep SCF (2 pages)
- Pavia (2 pages)
- Rhythm PCF (2 pages)
- Rhythm P (2 pages)
- Juniper SF (4 pages)
- Juniper SFCF (4 pages)
- Alaya SP (4 pages)
- Icicle II SP (2 pages)