Assemble the fixture – LBL Lighting Jada User Manual
Page 2
2
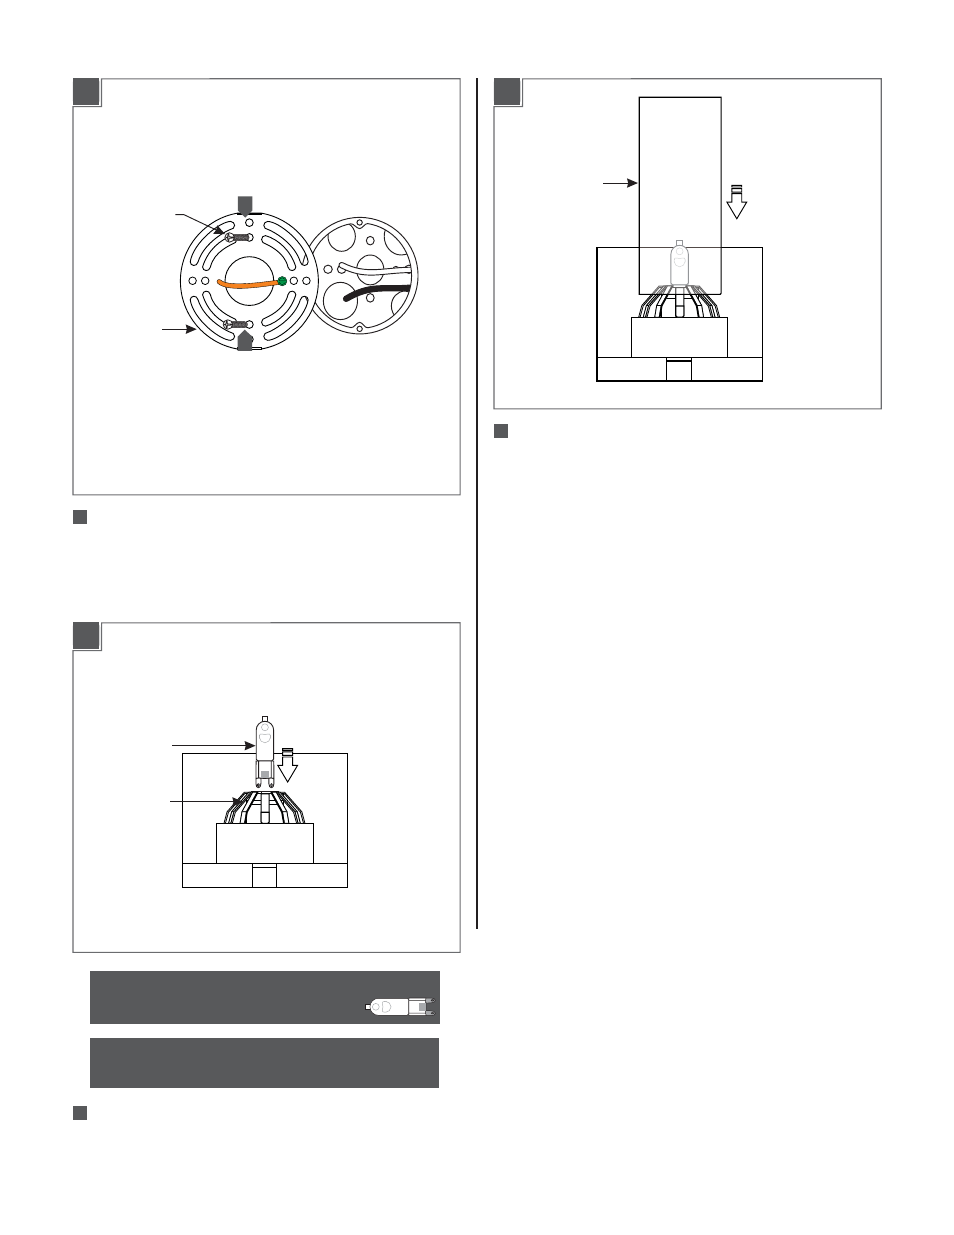
Assemble the Fixture
Attach the mounting plate to the electrical box using
the two #8-32 screws provided.
MOUNTING
PLATE
#8-32 SCREW
3
3
1C
3
With a soft cloth, push the new lamp firmly all the way
into the socket.
NOTE:
Use only your fingers and a soft cloth to
replace the lamp.
Use
Volt,
type T4, G9 base
bi-pin halogen lamp in each socket.
MAX
60
120
Watt
2A
1
LAMP
Install the glass shade by pushing it onto the socket
assembly until it is firmly in place.
GLASS SHADE
2B
2
SOCKET
See also other documents in the category LBL Lighting Lighting:
- KENDALL (2 pages)
- LINNET PENDANT (1 page)
- MEZZO GP (4 pages)
- MEZZO GPCF (4 pages)
- MEZZO P (4 pages)
- MEZZO PCF (4 pages)
- MILO S (4 pages)
- MILO SCH (4 pages)
- RHUTHM S (2 pages)
- SOMEDAY GP (2 pages)
- SOMEDAY GPCF (2 pages)
- SOMEDAY P (2 pages)
- SOMEDAY CF (2 pages)
- Isla SP (1 page)
- Mason Classic (1 page)
- Mason SP (2 pages)
- Mason SPCF (2 pages)
- Aiko SP (1 page)
- Aiko SPCF (1 page)
- Olivia SP (1 page)
- Olivia SPCF (1 page)
- Zuri P (2 pages)
- Vera P (2 pages)
- Vera PCF (2 pages)
- Tindra P (4 pages)
- Akari P (1 page)
- Akari PCF (1 page)
- Isis GP (2 pages)
- Isis GPCF (2 pages)
- Rock Candy Cylinder SP (1 page)
- Rock Candy Cylinder SPCF (1 page)
- Miyu Classic SP (1 page)
- Miyu SP (2 pages)
- Miyu SPCF (2 pages)
- Sora SP (2 pages)
- Sora SPCF (2 pages)
- Julep S (2 pages)
- Julep SCF (2 pages)
- Pavia (2 pages)
- Rhythm PCF (2 pages)
- Rhythm P (2 pages)
- Juniper SF (4 pages)
- Juniper SFCF (4 pages)
- Alaya SP (4 pages)
- Icicle II SP (2 pages)