Assemble the fixture – LBL Lighting Kett User Manual
Page 2
2
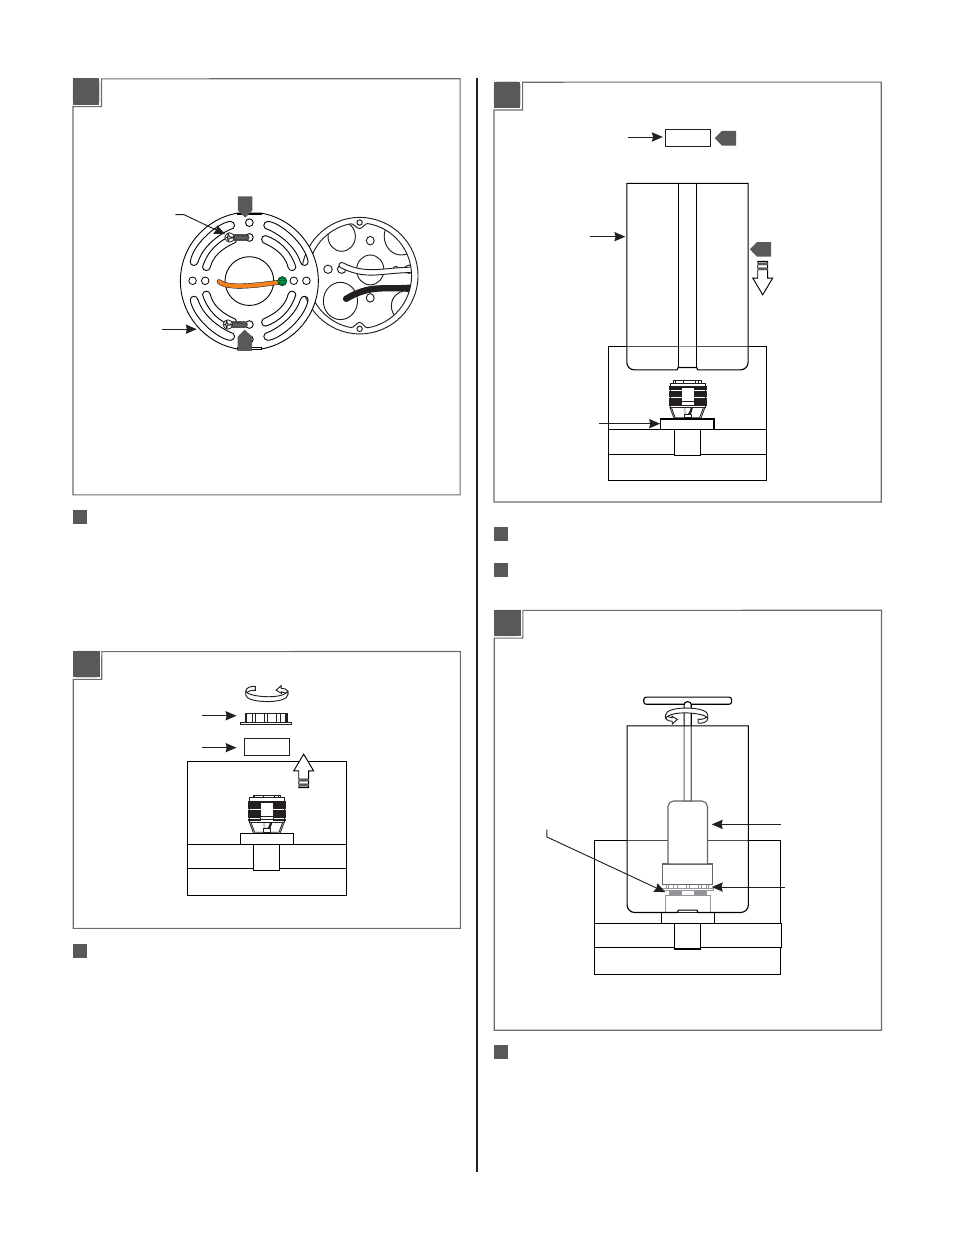
Assemble the Fixture
Unscrew the collared nut and remove both the collared
nut and white spacer.
Install the glass shade by placing it on the stem base.
Reinstall the white spacer.
1
2
3
2A
COLLARED NUT
WHITE SPACER
1
GLASS SHADE
WHITE SPACER
STEM BASE
3
2
2B
Secure the lamp shade assembly by re-installing the
collared nut on the socket assembly and tighten it using
the special tool.
4
1
SOCKET ASSEMBLY
2C
COLLARED NUT
Attach the mounting plate to the electrical box using
the two #8-32 screws provided.
3
SPECIAL TOOL
MOUNTING
PLATE
#8-32 SCREW
3
3
1C
See also other documents in the category LBL Lighting Lighting:
- KENDALL (2 pages)
- LINNET PENDANT (1 page)
- MEZZO GP (4 pages)
- MEZZO GPCF (4 pages)
- MEZZO P (4 pages)
- MEZZO PCF (4 pages)
- MILO S (4 pages)
- MILO SCH (4 pages)
- RHUTHM S (2 pages)
- SOMEDAY GP (2 pages)
- SOMEDAY GPCF (2 pages)
- SOMEDAY P (2 pages)
- SOMEDAY CF (2 pages)
- Isla SP (1 page)
- Mason Classic (1 page)
- Mason SP (2 pages)
- Mason SPCF (2 pages)
- Aiko SP (1 page)
- Aiko SPCF (1 page)
- Olivia SP (1 page)
- Olivia SPCF (1 page)
- Zuri P (2 pages)
- Vera P (2 pages)
- Vera PCF (2 pages)
- Tindra P (4 pages)
- Akari P (1 page)
- Akari PCF (1 page)
- Isis GP (2 pages)
- Isis GPCF (2 pages)
- Rock Candy Cylinder SP (1 page)
- Rock Candy Cylinder SPCF (1 page)
- Miyu Classic SP (1 page)
- Miyu SP (2 pages)
- Miyu SPCF (2 pages)
- Sora SP (2 pages)
- Sora SPCF (2 pages)
- Julep S (2 pages)
- Julep SCF (2 pages)
- Pavia (2 pages)
- Rhythm PCF (2 pages)
- Rhythm P (2 pages)
- Juniper SF (4 pages)
- Juniper SFCF (4 pages)
- Alaya SP (4 pages)
- Icicle II SP (2 pages)