Adjust the fixture height, 2a 2b – LBL Lighting Top-SI Coax User Manual
Page 2
2
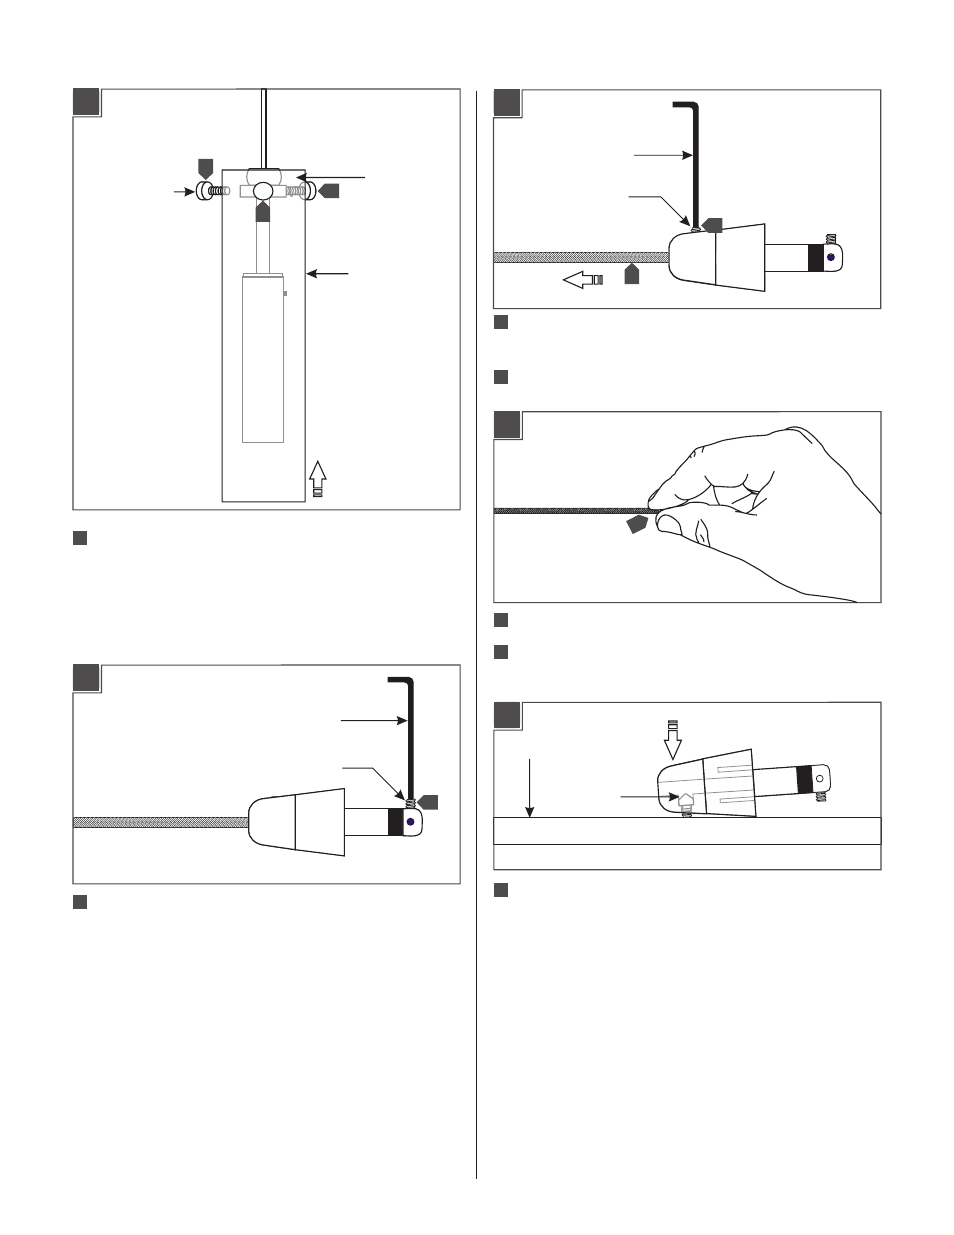
Align the glass shade holes with the bracket holes. Replace and
tighten the three thumb screws to secure the glass shade in
place. Adjust the thumb screws if the glass is not level.
GLASS SHADE
THUMB SCREW
BRACKET
Adjust the Fixture Height
SET SCREW
Back out (do not remove) the set screw on tip of the
connector with the provided Allen wrench.
ALLEN WRENCH
1
Back out (do not remove) the set screw on the conical
connector with the provided Allen wrench.
Pull the coaxial cable out.
SET SCREW
ALLEN WRENCH
3
2
2A
2B
2
3
1
2C
Tap the conical connector on a hard surface with the set screw
facing down, so the plate inside drops into place.
SURFACE
Cut the coaxial cable to the desired length.
Gently twist the end of the coaxial cable between thumb and
forefinger.
5
PLATE
4
5
2D
6
5
1C
5
5
5
- KENDALL (2 pages)
- LINNET PENDANT (1 page)
- MEZZO GP (4 pages)
- MEZZO GPCF (4 pages)
- MEZZO P (4 pages)
- MEZZO PCF (4 pages)
- MILO S (4 pages)
- MILO SCH (4 pages)
- RHUTHM S (2 pages)
- SOMEDAY GP (2 pages)
- SOMEDAY GPCF (2 pages)
- SOMEDAY P (2 pages)
- SOMEDAY CF (2 pages)
- Isla SP (1 page)
- Mason Classic (1 page)
- Mason SP (2 pages)
- Mason SPCF (2 pages)
- Aiko SP (1 page)
- Aiko SPCF (1 page)
- Olivia SP (1 page)
- Olivia SPCF (1 page)
- Zuri P (2 pages)
- Vera P (2 pages)
- Vera PCF (2 pages)
- Tindra P (4 pages)
- Akari P (1 page)
- Akari PCF (1 page)
- Isis GP (2 pages)
- Isis GPCF (2 pages)
- Rock Candy Cylinder SP (1 page)
- Rock Candy Cylinder SPCF (1 page)
- Miyu Classic SP (1 page)
- Miyu SP (2 pages)
- Miyu SPCF (2 pages)
- Sora SP (2 pages)
- Sora SPCF (2 pages)
- Julep S (2 pages)
- Julep SCF (2 pages)
- Pavia (2 pages)
- Rhythm PCF (2 pages)
- Rhythm P (2 pages)
- Juniper SF (4 pages)
- Juniper SFCF (4 pages)
- Alaya SP (4 pages)
- Icicle II SP (2 pages)