Replacing the lamp, 3a 3b 3c – LBL Lighting Mini-Springview User Manual
Page 3
3
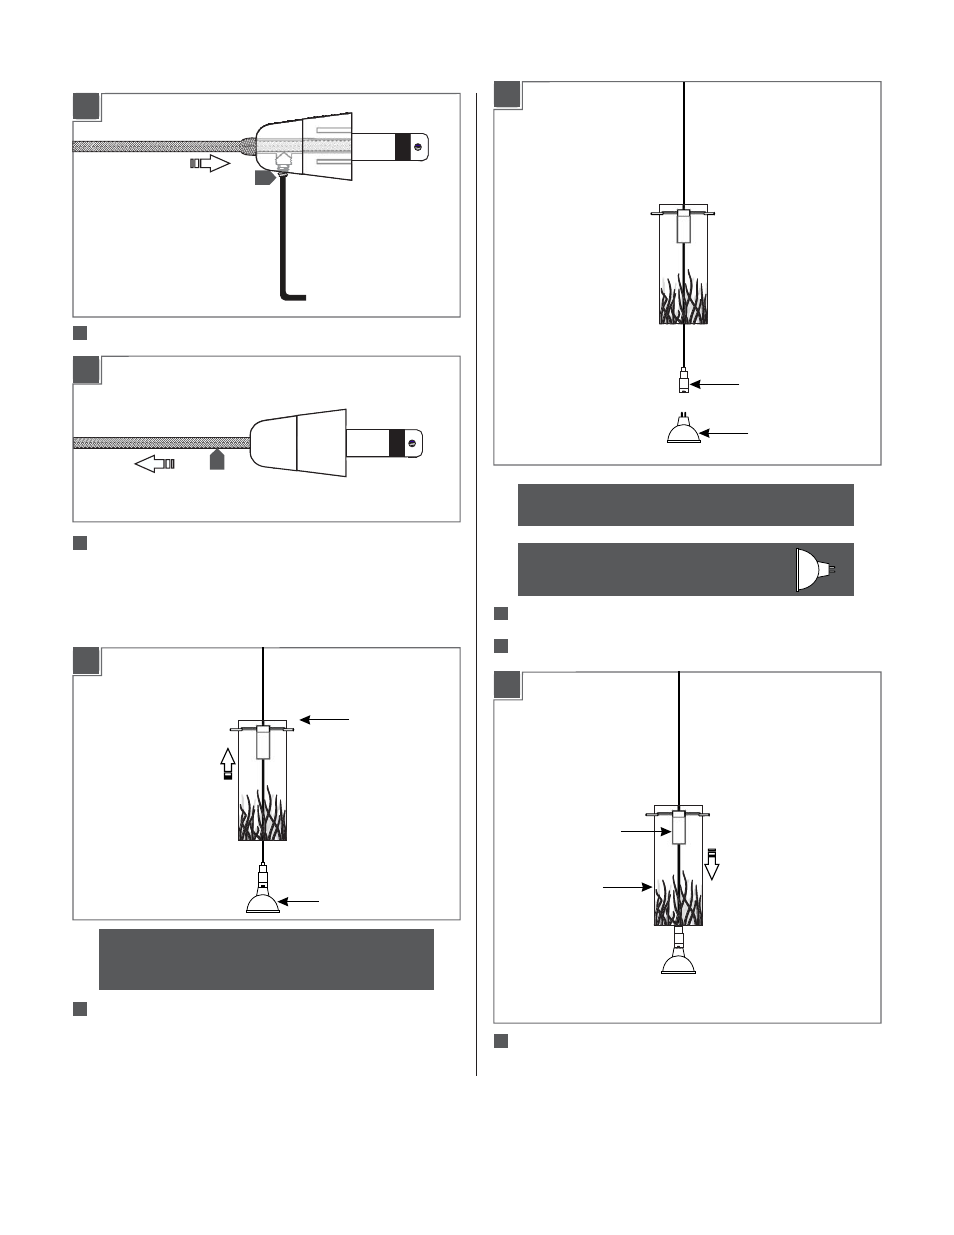
Replacing the Lamp
GLASS SHADE
NOTE:
To reduce the risk of a burn or electric shock
during relamping, disconnect the power to the fixture.
Lift the glass shade up to expose the socket assembly.
SOCKET
NOTE:
Use only your fingers to replace the lamp.
LAMP
GLASS SHADE
Use
MR16 Front Cover
MAX 50 Watt
Halogen Lamp.
SOCKET
3A
3B
3C
1
4
Remove the old lamp.
Push the new lamp pins completely into the socket holes.
2
3
Lower the glass shade until the socket is properly inside the
socket assembly.
SOCKET ASSEMBLY
2H
Firmly tighten the set screw on the conical connector.
10
10
Pull the coaxial cable toward the fixture to smooth the
wrinkles.
2I
11
11
See also other documents in the category LBL Lighting Lighting:
- KENDALL (2 pages)
- LINNET PENDANT (1 page)
- MEZZO GP (4 pages)
- MEZZO GPCF (4 pages)
- MEZZO P (4 pages)
- MEZZO PCF (4 pages)
- MILO S (4 pages)
- MILO SCH (4 pages)
- RHUTHM S (2 pages)
- SOMEDAY GP (2 pages)
- SOMEDAY GPCF (2 pages)
- SOMEDAY P (2 pages)
- SOMEDAY CF (2 pages)
- Isla SP (1 page)
- Mason Classic (1 page)
- Mason SP (2 pages)
- Mason SPCF (2 pages)
- Aiko SP (1 page)
- Aiko SPCF (1 page)
- Olivia SP (1 page)
- Olivia SPCF (1 page)
- Zuri P (2 pages)
- Vera P (2 pages)
- Vera PCF (2 pages)
- Tindra P (4 pages)
- Akari P (1 page)
- Akari PCF (1 page)
- Isis GP (2 pages)
- Isis GPCF (2 pages)
- Rock Candy Cylinder SP (1 page)
- Rock Candy Cylinder SPCF (1 page)
- Miyu Classic SP (1 page)
- Miyu SP (2 pages)
- Miyu SPCF (2 pages)
- Sora SP (2 pages)
- Sora SPCF (2 pages)
- Julep S (2 pages)
- Julep SCF (2 pages)
- Pavia (2 pages)
- Rhythm PCF (2 pages)
- Rhythm P (2 pages)
- Juniper SF (4 pages)
- Juniper SFCF (4 pages)
- Alaya SP (4 pages)
- Icicle II SP (2 pages)