Adjust the suspension cables – LBL Lighting Interlace S User Manual
Page 3
3
10
2
7
2
8
2
9
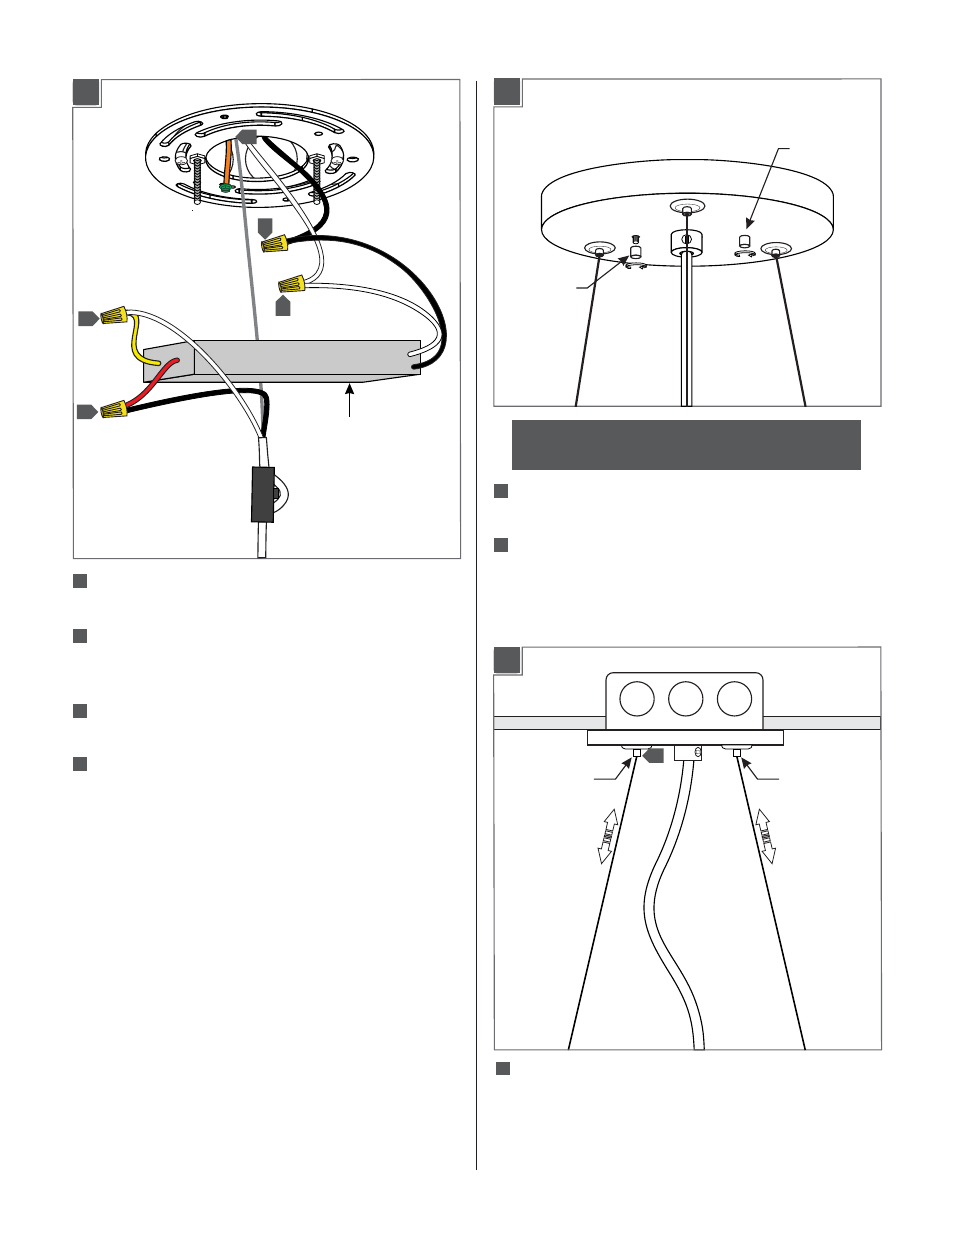
Connect the output driver wires to the appropriate
insulated pendant wires.
Connect the fixture and the crossbar ground wire to a
suitable ground in accordance with local electrical
codes.
Connect the white driver wire to the neutral power line
wire.
Connect the black driver wire to the hot power line
wire.
2
10
3C
9
7
7
9
10
DRIVER
Place all wires, wire nut connections, driver, and the
secondary strain relief properly inside the canopy.
Install the canopy onto to crossbar as secure it tightly
with the two thumb nuts.
NOTE:
It is recommended that one person hold the
fixture while the electrician finishes the installation.
3D
THUMB NUT
THUMB NUT
11
12
1
Adjust the aircraft cables until the fixture is level; feed
the cable into the cable clutch to raise the fixture and
push in on the cable clutch nipple to release the cable
and lower the fixture.
Adjust the Suspension Cables
CABLE
CLUTCH
CABLE
CLUTCH
1
4A
- KENDALL (2 pages)
- LINNET PENDANT (1 page)
- MEZZO GP (4 pages)
- MEZZO GPCF (4 pages)
- MEZZO P (4 pages)
- MEZZO PCF (4 pages)
- MILO S (4 pages)
- MILO SCH (4 pages)
- RHUTHM S (2 pages)
- SOMEDAY GP (2 pages)
- SOMEDAY GPCF (2 pages)
- SOMEDAY P (2 pages)
- SOMEDAY CF (2 pages)
- Isla SP (1 page)
- Mason Classic (1 page)
- Mason SP (2 pages)
- Mason SPCF (2 pages)
- Aiko SP (1 page)
- Aiko SPCF (1 page)
- Olivia SP (1 page)
- Olivia SPCF (1 page)
- Zuri P (2 pages)
- Vera P (2 pages)
- Vera PCF (2 pages)
- Tindra P (4 pages)
- Akari P (1 page)
- Akari PCF (1 page)
- Isis GP (2 pages)
- Isis GPCF (2 pages)
- Rock Candy Cylinder SP (1 page)
- Rock Candy Cylinder SPCF (1 page)
- Miyu Classic SP (1 page)
- Miyu SP (2 pages)
- Miyu SPCF (2 pages)
- Sora SP (2 pages)
- Sora SPCF (2 pages)
- Julep S (2 pages)
- Julep SCF (2 pages)
- Pavia (2 pages)
- Rhythm PCF (2 pages)
- Rhythm P (2 pages)
- Juniper SF (4 pages)
- Juniper SFCF (4 pages)
- Alaya SP (4 pages)
- Icicle II SP (2 pages)